Bernina 1300MDC User Guide - Page 148
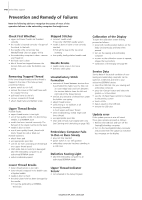
Prevention and Remedy of Failures - threading chart
 |
View all Bernina 1300MDC manuals
Add to My Manuals
Save this manual to your list of manuals |
Page 148 highlights
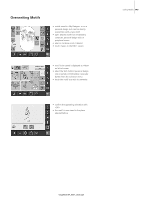
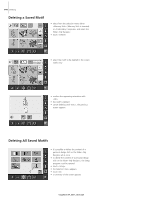
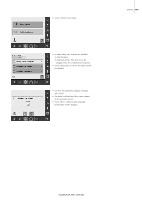
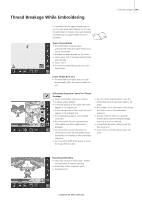
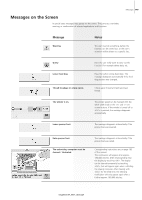
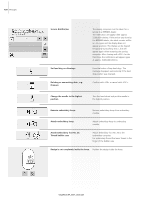
148 Embroidery Support Prevention and Remedy of Failures Note the following advice to recognize the causes of most of the operation failures in the embroidery computer that might occur. Check First Whether: • upper and lower threads are threaded correctly • the needle is inserted correctly - flat part of the shank to the back • the needle is the correct size (see Needle/Thread Chart on pages 16-18) • the embroidery computer is clean - remove any thread lint • the hook race is clean • bits of thread are trapped between the tension disks and under the bobbin case spring Removing Trapped Thread If the lower thread breaks and the thread is trapped in the area of the take-up lever, proceed as follows: • power switch to «0» (off) • remove the screw on the head frame with the angular Torx key • pull head frame to the left • remove remnants of thread • attach head frame and tighten screw Upper Thread Breaks Possible Faults: • upper thread tension is too tight • use of low quality needle. It is best to buy needles in a BERNINA store • needle has been inserted incorrectly. The flat part of the shank must be to the back • needle is blunt or bent • use of poor quality thread, thread with knots, thread too old or dried out Possible Solutions: • attach foam pad • use appropriate spool disc • use net for even unwinding of thread (pull over upper thread spool) • stitch plate hole or hook tip is damaged: take the embroidery computer to an authorized BERNINA dealer • reduce embroidery speed Skipped Stitches • incorrect needle used: • Use only 130/705H needle system • needle is bent or blunt or not correctly inserted: • Push all the way to the top when inserting • low quality, badly polished needle used Needle Breaks • needle clamp screw is too loose • defective stitch plate Unsatisfactory Stitch Formation • remnants of thread between tension discs: • pull folded thin fabric (use the fold, not an outer edge) back and forth between the tension disks to clean the left and right side of the thread tension • remove any remnants of thread from under the bobbin case spring • adjust thread tension • used wrong or no stabilizer at all • incorrectly threaded: • check upper and lower thread • when embroidering, thread finger with lower thread • use appropriate spool disc • clean and oil hook (use original oiler only. See Cleaning and Lubricating on page 103) Embroidery Computer Fails to Run or Runs Slowly • plug not fully inserted • power switch in «0» (off) position • embroidery computer has been standing in a cold room Defective Sewing Light • take the embroidery computer to an authorized BERNINA dealer Calibration of the Display To open the calibration screen directly, proceed as follows:: • press both needle position buttons on the body simultaneously and keep them pressed • turn on the sewing and embroidery computer • as soon as the calibration screen is opened, release the two buttons • Calibration of the Display see page 96 Service Data Service data of the actual condition of your sewing and embroidery computer can be saved on a USB stick and sent to your authorized BERNINA dealer: • insert the USB stick into your sewing and embroidery computer • press the «Setup» button and select the symbol «i» (information) • use the «To Next Page» symbol to change to the previous screen • touch «LOG» • data is saved on the USB stick • remove the USB stick Update error If the update process is at a still stand (hour glass remains) proceed as follows: 1. Remove the USB stick and turn off the Sewing/Embroidery computer 2. Turn on the Sewing/Embroidery computer and proceed with the update as indicated by a message on the display Lower Thread Breaks • lower thread tension is too tight • lower thread is trapped in the bobbin case: • Replace bobbin • needle is blunt or bent • the stitch plate hole has been damaged by the needle: • It must be polished by a BERNINA Technician Upper Thread Indicator Sensor • not activated in the Setup Program 031196.50.04_0507_a630_EN
-
 1
1 -
2
-
3
-
4
-
5
-
6
-
7
-
8
-
9
-
10
-
11
-
12
-
13
-
14
-
15
-
16
-
17
-
18
-
19
-
20
-
21
-
22
-
23
-
24
-
25
-
26
-
27
-
28
-
29
-
30
-
31
-
32
-
33
-
34
-
35
-
36
-
37
-
38
-
39
-
40
-
41
-
42
-
43
-
44
-
45
-
46
-
47
-
48
-
49
-
50
-
51
-
52
-
53
-
54
-
55
-
56
-
57
-
58
-
59
-
60
-
61
-
62
-
63
-
64
-
65
-
66
-
67
-
68
-
69
-
70
-
71
-
72
-
73
-
74
-
75
-
76
-
77
-
78
-
79
-
80
-
81
-
82
-
83
-
84
-
85
-
86
-
87
-
88
-
89
-
90
-
91
-
92
-
93
-
94
-
95
-
96
-
97
-
98
-
99
-
100
-
101
-
102
-
103
-
104
-
105
-
106
-
107
-
108
-
109
-
110
-
111
-
112
-
113
-
114
-
115
-
116
-
117
-
118
-
119
-
120
-
121
-
122
-
123
-
124
-
125
-
126
-
127
-
128
-
129
-
130
-
131
-
132
-
133
-
134
-
135
-
136
-
137
-
138
-
139
-
140
-
141
-
142
-
 143
143 -
 144
144 -
 145
145 -
 146
146 -
 147
147 -
 148
148 -
 149
149 -
 150
150 -
 151
151 -
 152
152 -
 153
153 -
154
-
155
-
156
-
157
-
158
-
159
-
160
-
161
-
162
-
163
-
164
-
165
-
166
-
167
 |
 |