Biostar M7VIP M7VIP user's manual - Page 34
Creating a Security Array With An Existing Data Drive
 |
View all Biostar M7VIP manuals
Add to My Manuals
Save this manual to your list of manuals |
Page 34 highlights
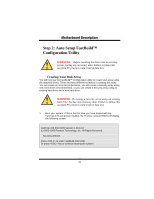
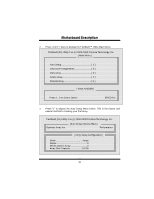
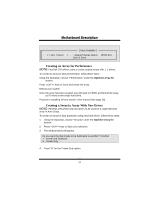
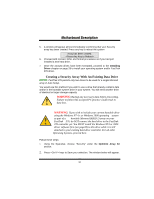
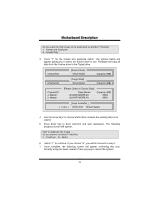
MMootthheerrbbooaarrdd DDeessccrriippttiioonn 5. A window will appear almost immediately confirming that your Security array has been created. Press any key to reboot the system Array has been created. 6. Proceed with normal FDISK and format procedures as if you had just installed a new hard drive. 7. Once the arrayed drives have been formatted, proceed to the Installing Driver chapter on page 28 to install your operating system and/or FastTrak 376 driver. Creating a Security Array With An Existing Data Drive NOTE: FastTrak 376 permits only two drives to be used for a single Mirrored array in Auto Setup. You would use this method if you wish to use a drive that already contains data and/or is the bootable system drive in your system. You will need another drive of identical or larger storage capacity. WARNING: Backup any necessary data before proceeding. Failure to follow this accepted PC practice could result in data loss. WARNING: If you wish to include your current bootable drive using the Windows NT 4.x or Windows 2000 operating system as part of a bootable Mirrored (RAID 1) array on your FastTrak 376, do NOT connect the hard drive to the FastTrak 376 controller yet. You MUST install the Windows NT4 or 2000 driver software first (see page28) to this drive while it is still attached to your existing hard drive controller. For all other Operating Systems, proceed here. Follow these steps: 1. Using the Spacebar, choose "Security" under the Optimize Array for section. 2. Press keys to Save your selection. The window below will appear. 32
-
 1
1 -
2
-
3
-
4
-
5
-
6
-
7
-
8
-
9
-
10
-
11
-
12
-
13
-
14
-
15
-
16
-
17
-
18
-
19
-
20
-
21
-
22
-
23
-
24
-
25
-
26
-
27
-
28
-
 29
29 -
 30
30 -
 31
31 -
 32
32 -
 33
33 -
 34
34 -
 35
35 -
 36
36 -
 37
37 -
 38
38 -
 39
39 -
40
-
41
-
42
-
43
-
44
-
45
-
46
-
47
-
48
-
49
-
50
-
51
-
52
-
53
-
54
-
55
-
56
-
57
-
58
-
59
-
60
-
61
-
62
-
63
-
64
-
65
-
66
-
67
-
68
-
69
-
70
-
71
-
72
 |
 |