Bissell Garage Pro® Wet/Dry Vacuum Cleaner User's Guide - Page 10
aintenance and care
 |
View all Bissell Garage Pro® Wet/Dry Vacuum Cleaner manuals
Add to My Manuals
Save this manual to your list of manuals |
Page 10 highlights
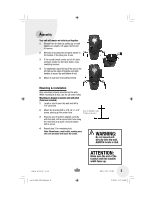
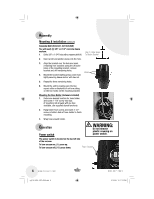
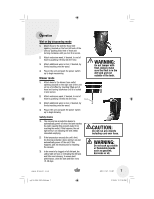
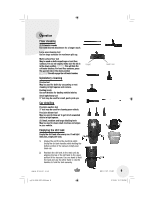
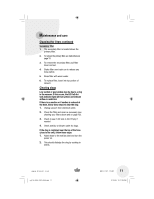
Maintenance and care Cleaning the dirt tank 1. Unplug the unit from electrical outlet. 2. Remove the dirt tank by pulling up on both handles to unlatch. 3. Ensure the dirt tank has been emptied. 4. The dirt tank may be washed in warm water. Make sure it is completely dry before reassembling. 5. Reattach the dirt tank to the main unit by aligning the top of the dirt tank to the upper portion of the vacuum. Use one hand to hold the tank and use the other hand to clip the handles to hold the tank securely. Cleaning the filters The filter should be checked every 15-30 days and washed as needed to maintain performance. Frequency of cleaning will be based on individual use. Primary filter 1. Unplug the unit from electrical outlet. 2. Remove the dirt tank by pulling up on both handles to unlatch. 3. The filter is located inside the top portion of the vacuum. Pull either black tab towards the middle of the unit and remove. 4. Shake filter over trash can to release any loose debris. 5. Use a damp cloth to wipe the inside and outside of the filter if desired. Air dry thoroughly before replacing. 6. To replace, hold one edge of the filter, collapse and snap in. 7. Reattach the dirt tank to the main unit by aligning the top of the dirt tank to the upper portion of the vacuum. Use one hand to hold the tank and use the other hand to clip the handles to hold the tank securely. 10 w w w . b i s s e l l . c o m ug110-4025_18P0_208.indd 10 800.237.7691 2/12/08 12:17:26 PM
-
 1
1 -
2
-
3
-
4
-
 5
5 -
 6
6 -
 7
7 -
 8
8 -
 9
9 -
 10
10 -
 11
11 -
 12
12 -
 13
13 -
 14
14 -
 15
15 -
16
 |
 |