Bissell Garage Pro® Wet/Dry Vacuum Cleaner User's Guide - Page 5
Warning, Attention
 |
View all Bissell Garage Pro® Wet/Dry Vacuum Cleaner manuals
Add to My Manuals
Save this manual to your list of manuals |
Page 5 highlights
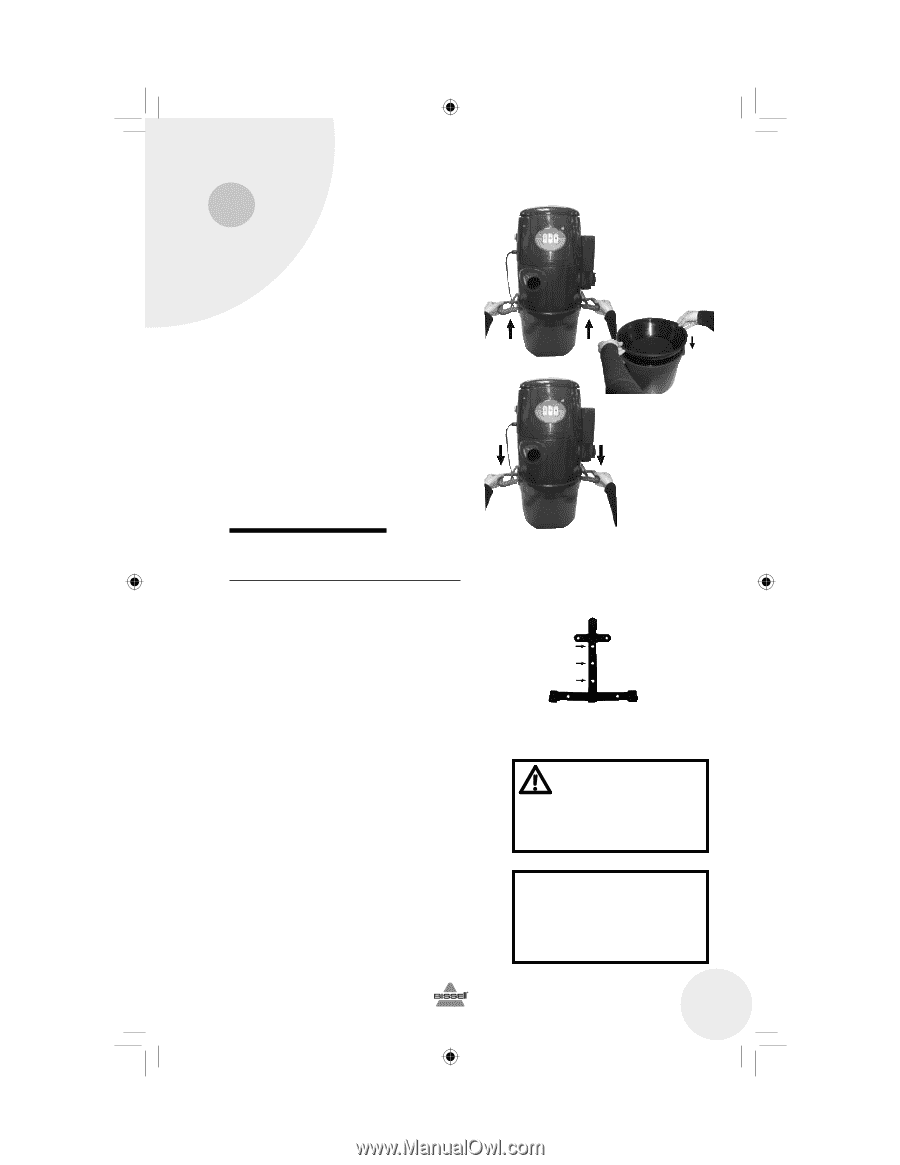
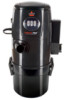
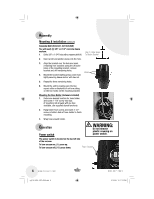
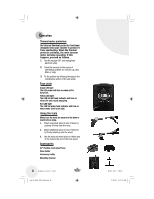
Assembly Your unit will require no tools to put together. 1. Remove the dirt tank by pulling up on both handles to unlatch. Lift upper half of unit to remove. 2. Remove all accessories and parts stored in the bottom of the tank prior to use. 3. If the round funnel comes out of dirt tank, set back inside the dirt tank before reassembling vacuum. 4. To reassemble, place the top of the unit on the dirt tank so the edges fit together and latch handles to secure top and bottom of unit. 5. Mount to wall (see instructions below). Mounting & installation Only use when properly mounted on the wall. When mounting to a stud, use the (3) center holes. Mounting on drywall or plaster wall with stud (fasteners included) 1. Locate a stud in your dry wall and drill a 1/8" pilot hole. 2. Mount the bracket with a #10-16 x 1-3/4" Use (3) Middle Holes screw, starting at the center hole. To Mount Bracket 3. Ensuring your bracket is aligned correctly with the stud; drill a second pilot hole using the next hole as a guide. Securely fasten with a screw. 4. Repeat step 3 for remaining hole. Note: Mount near a wall outlet, making sure the cord provided will reach the outlet. WARNING: Do not mount unit directly into dry wall. ALWAYS locate a stud. www.bissell.com ug110-4025_18P0_208.indd 5 ATTENTION: Make sure the end of the bracket with the smaller width faces up. 800.237.7691 5 2/12/08 12:17:18 PM
-
 1
1 -
 2
2 -
 3
3 -
 4
4 -
 5
5 -
 6
6 -
 7
7 -
 8
8 -
 9
9 -
 10
10 -
 11
11 -
12
-
13
-
14
-
15
-
16
 |
 |