Black & Decker GSP401 Instruction Manual - Page 10
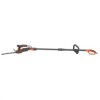
Pole Use
 |
View all Black & Decker GSP401 manuals
Add to My Manuals
Save this manual to your list of manuals |
Page 10 highlights
L 2 1 Hints for optimal hand held use Trimming grass WARNING: Blades coast after turn off. • In order to achieve optimum cutting results, only cut dry grass. WARNING: Hold the tool with one hand as shown in figure M. Keep your other hand well away from the blade. Maintain a stable working position so that you do not slip. Do not overreach. • When cutting long grass, work in stages from the top. Take small cuts. • Keep the tool away from hard objects and delicate plants. • If the tool starts running slowly, reduce the load. • To make a closer cut, slightly tilt the tool. • Spray the blade with a light coating of general purpose oil before first use and whenever the blades begin to look dry. M with the growth as shown in figure O. Younger stems move outwards when the blade cuts downwards, causing shallow patches in the shrub. • Take care to avoid any foreign objects. Especially avoid hard objects such as metal wire and railings, as these could damage the blades. • Spray the blades with a light coating of general purpose oil before first use and whenever the blades begin to look dry. N O Pole Use WARNING: Let the tool work at its own pace. Do not overload. Switching on and off WARNING: Blades coast after turn off. Trimming shrubs WARNING: Blades coast after turn off. • Slightly tilt the tool (up to 15° relative to the line of cut) so that the blade tips point slightly towards the shrub as shown in figure N. This will cause the blades to cut more effectively. • Start by trimming the top of the shrub. Hold the tool at the desired angle and move it steadily along the line of cut. The double-sided blade allows you to cut in either direction. • In order to obtain a very straight cut, stretch a piece of string along the length of the shrub at the desired height. Use the string as a guide line, cutting just above it. • In order to obtain flat sides, cut upwards Switching on WARNING: When in pole mode, only the pole switch turns the tool on/off. • On the pole handle push and hold the lock-off button (9) to the right or to the left and then squeeze the trigger switch (8) as shown in figure P. • Release the lock-off button. Note: Once the tool is on, the lock-off button can be released. P 8 9 10
-
 1
1 -
2
-
3
-
4
-
 5
5 -
 6
6 -
 7
7 -
 8
8 -
 9
9 -
 10
10 -
 11
11 -
 12
12 -
 13
13 -
 14
14 -
 15
15 -
16
-
17
-
18
-
19
-
20
-
21
-
22
-
23
-
24
-
25
-
26
-
27
-
28
-
29
-
30
-
31
-
32
-
33
-
34
-
35
-
36
-
37
-
38
-
39
-
40
-
41
-
42
-
43
-
44
-
45
-
46
 |
 |
