Black & Decker LST136B Instruction Manual - Page 9
Caution, Warning
 |
View all Black & Decker LST136B manuals
Add to My Manuals
Save this manual to your list of manuals |
Page 9 highlights
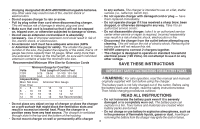
edging mode to trim overhanging grass along lawn edges and flower I I1 beds as shown in figure K. Trimming mode For trimming, the trimmer head should be in the position shown in figure I. If it is not: • Remove the battery from the tool. • Press and hold the head release button (I1). • While holding the auxillary handle, rotate the head clockwise. J • Release the head release button. • Lift the edge guide (J1) into the closed position. Note: The head will only rotate in one dCirAecUtioTnI.ON: Wire edge guide should only be used when in the J1 edging mode. Keep wire edge guide in the retracted position when in the trimming mode. Edging mode (figure K) WARNING: When being used as an Edger, stones, pieces of metal and other objects can be thrown out at high speed by the line. The trimmer and guard are designed to reduce the danger. However, MAKE SURE that other persons and pets are at least 100 feet (30m) away. For edging, the trimmer head should be in the position shown in figure K. If it is not: • Remove the battery from the tool. K • Press and hold the head release K1 button (K1). • While holding the auxillary handle, rotate the head counterclockwise. • Release the head release button. • Drop the edge guide (K2) in to K2 the open position. Ensure that the edging guide is all the way down, an audible click will be heard. Note: The head will only rotate in one direction. Note: The Auto Feed System may not operate correctly if edge guide is not used. Switching on and off • To switch the tool on, press L in and hold the lock off button (L1) then squeeze the trigger lever (L2). Once the tool is running you may release the L1 lock off button (L1). • To switch the tool off, release the trigger lever. WARNING: Never attempt to lock the trigger lever in the L2 on position. POWER COMMAND - Max Power / Max Runtime The max power / max runtime feature (M1) is located on the M tool handle. It allows you to M1 optimize the tools performance and boost the power as needed. • To choose max power to tackle thick weeds, rotate dial to setting 6. • To choose max runtime to increase battery life rotate dial to setting 1. • For a combination of both, rotate dial to setting from 2 to 5. 9
-
 1
1 -
2
-
3
-
 4
4 -
 5
5 -
 6
6 -
 7
7 -
 8
8 -
 9
9 -
 10
10 -
 11
11 -
 12
12 -
 13
13 -
 14
14 -
15
-
16
-
17
-
18
-
19
-
20
-
21
-
22
-
23
-
24
-
25
-
26
-
27
-
28
-
29
-
30
-
31
-
32
-
33
-
34
-
35
-
36
-
37
-
38
-
39
-
40
-
41
-
42
-
43
-
44
 |
 |
