Bosch 1640VS Operating Instructions - Page 13
Caution - 46
 |
UPC - 000346309652
View all Bosch 1640VS manuals
Add to My Manuals
Save this manual to your list of manuals |
Page 13 highlights
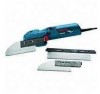
BM 2610006360 03-09:BM 2610006360 03-09 3/18/09 1:42 PM Page 13 SETTING THE MITER ANGLE Loosen the locking screw (Fig. 20). Press and hold the preset angle release button, and the turntable can be rotated to desired angle. Angles from -46º to +46º can be set. Preset stops facilitate quick setting of common angles (15º, 22.5º, 30º, and 45º). The desired angle can be read on the angle scale. Always tighten the locking screw to secure setting. FIG. 20 CLAMPING THE WORKPIECE Securely clamp the workpiece against the fence with the special workclamp (not included) (Fig. 22). FENCE FIG. 22 PRESET ANGLE RELEASE BUTTON WORK CLAMP (not included) LOCKING SCREW Place the workpiece flat on the miter table attachment against the fence. When cutting moldings that have recesses on the back that clear the top of the fence, place the front of the workpiece against the fence to assure the best cut. FIG. 21 RECESS The height of the clamping point can be adjusted to the size of the workpiece by pivoting the workclamp. The workclamp can be mounted on either side of the miter table attachment. ! CAUTION To prevent damage to the workpiece, a piece of scrap wood should be clamped between the work- clamp and the workpiece. SAWING ON THE MITER TABLE ATTACHMENT Remove the saw teeth protector from the blade and turn the tool on. Hold the tool in the area of the on/off switch during the complete sawing process. Lower the blade into the workpiece and slowly saw through the workpiece with uniform pressure. To prevent splintering, at the end of the cut avoid pressure on the saw blade. Turn the tool off after each cut. TIPS The following tips influence the cutting results, and the quality of the cut. - The angle at which the workpiece is positioned. Make sure the miter table attachment is clean and free of sawdust. - Make sure that any large molding that has a recess in its backside is positioned so that the front of the molding is against the fence. - Properly clamp the workpiece. - The type of material being cut. FACTORS AFFECTING THE CUT - The sharpness of the saw blade. - The cutting speed. - The accurate adjustment of the angle indicator. - The accurate setting of the miter angle. - The correct alignment of the saw on the pivoting holder. - The tooth-per-inch of the saw blade. - The rate of feed of the saw blade. -13-
-
 1
1 -
2
-
3
-
4
-
5
-
6
-
7
-
 8
8 -
 9
9 -
 10
10 -
 11
11 -
 12
12 -
 13
13 -
 14
14 -
 15
15 -
 16
16 -
 17
17 -
 18
18 -
19
-
20
-
21
-
22
-
23
-
24
-
25
-
26
-
27
-
28
-
29
-
30
-
31
-
32
-
33
-
34
-
35
-
36
-
37
-
38
-
39
-
40
-
41
-
42
-
43
-
44
 |
 |
