Bosch B20CS51SNI Installation and Use & Care - Page 20
Installation, instructions
 |
View all Bosch B20CS51SNI manuals
Add to My Manuals
Save this manual to your list of manuals |
Page 20 highlights
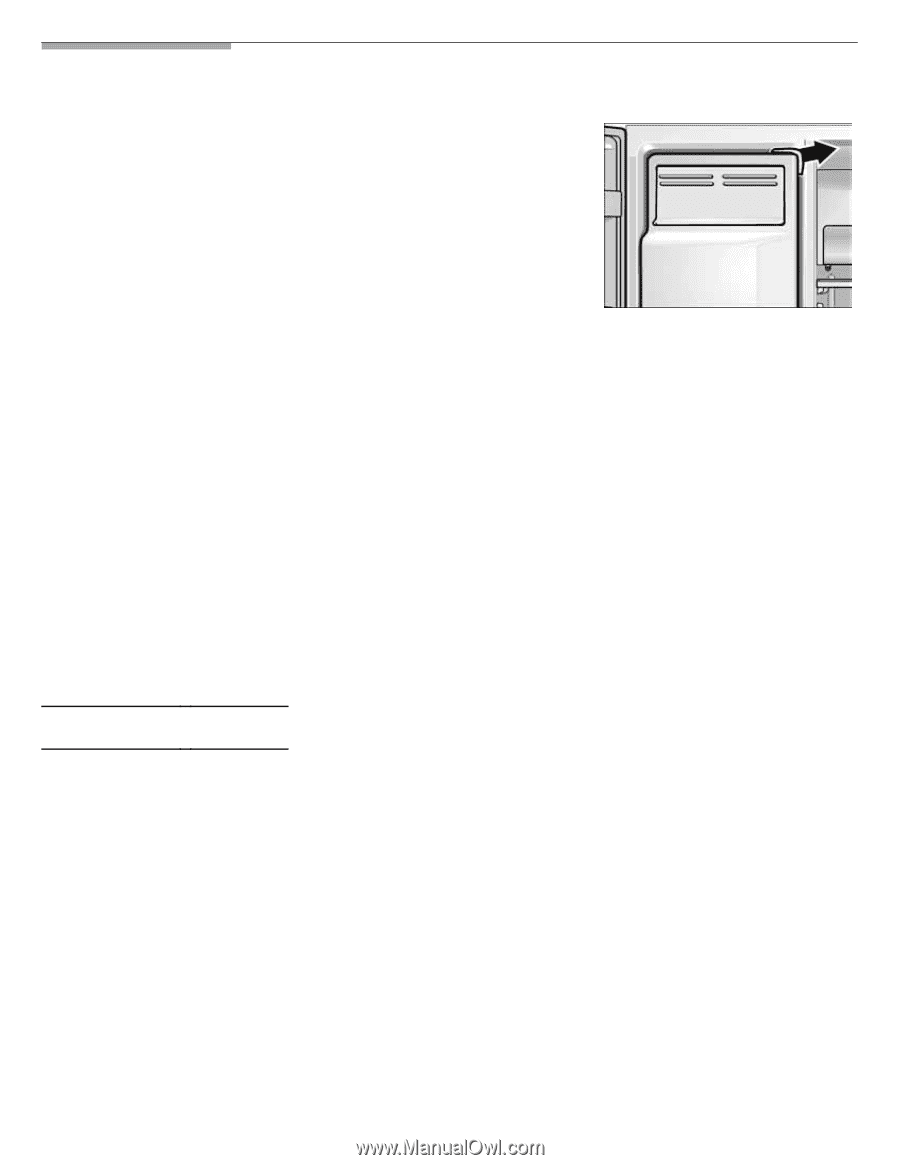
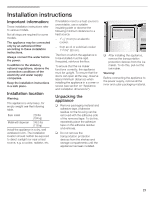
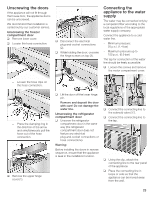
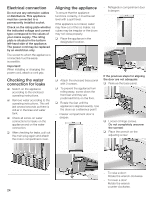
Installation instructions Important information: These installation instructions refer to various models. Not all steps are required for some models. The appliance may be connected only by an authorized fitter according to these installation instructions. Always connect the water before the power. In addition to the statutory national regulations, observe the connection conditions of the electricity and water supply companies. Keep the installation instructions in a safe place. Installation location Warning: The appliance is very heavy, for empty weight see the following table. Basic model 229 lbs (104 kg) Model with dispenser 248.5 lbs (113 kg) Install the appliance in a dry, well ventilated room. The installation location should neither be exposed to direct sunlight nor near a heat source, e.g. a cooker, radiator, etc. If installation next to a heat source is unavoidable, use a suitable insulating plate or observe the following minimum distances to a heat source: - 11/4" (3 cm) to an electric cooker. - from an oil or solidĆfuel cooker 113/16" (30 cm). The floor on which the appliance is to be installed must be rigid. If required, reinforce the floor. To ensure that the ice maker functions correctly, the appliance must be upright. To ensure that the doors can open all the way, observe lateral minimum distances when installing the appliance in a corner or recess (see section on Appliance and installation dimensions"). Unpacking the appliance q Remove packaging material and adhesive tape. (Adhesive residue on the housing can be removed with the adhesive side of the removed tape. To do this, repeatedly place the adhesive tape on the adhesive residue and remove). q Do not remove the transportation protection devices from the shelves and storage compartments until the appliance has been installed. q After installing the appliance, remove the transportation protection devices from the ice maker. To do this, pull out the ice maker. Warning: Before connecting the appliance to the power supply, remove all the inner and outer packaging material. 21
-
 1
1 -
2
-
3
-
4
-
5
-
6
-
7
-
8
-
9
-
10
-
11
-
12
-
13
-
14
-
 15
15 -
 16
16 -
 17
17 -
 18
18 -
 19
19 -
 20
20 -
 21
21 -
 22
22 -
 23
23 -
 24
24 -
 25
25 -
26
-
27
-
28
-
29
-
30
-
31
-
32
-
33
-
34
-
35
-
36
-
37
-
38
-
39
-
40
-
41
-
42
-
43
-
44
-
45
-
46
-
47
-
48
-
49
-
50
-
51
-
52
-
53
-
54
-
55
-
56
-
57
-
58
-
59
-
60
-
61
-
62
-
63
-
64
-
65
-
66
-
67
-
68
-
69
-
70
-
71
-
72
-
73
-
74
-
75
-
76
-
77
 |
 |