Bosch B36IB70NSP Installation Instructions - Page 25
Loading the, appliance, Attaching, adjusting, refrigerator, compartment
 |
View all Bosch B36IB70NSP manuals
Add to My Manuals
Save this manual to your list of manuals |
Page 25 highlights
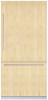
Function of different parts: 1. Double threaded bolt on the adjusting rail: for vertical adjustment of the furniture door. 2. Side brackets: for adjusting the depth of the furniture front. 3. Nuts on the double threaded bolt: for securing the furniture front to prevent lateral movement. 4. Lower brackets: for securing the furniture front to prevent lateral movement. 2 adjacent furniture doors can be attached instead of one large door. These furniture doors must be connected to a metal strip on the rear. This metal strip can be purchased from customer service as an optional accessory, see the section on Optional accessories" on page 12. 19. Loading the appliance door When attaching the furniture doors, it is recommended to load the door storage compartments in the appliance with weights in order to ensure that the gap width is as precise as possible. Recommendations: Refrigerator compartment 55 lbs / 25 kg Freezer compartment 22 lbs / 10 kg 20. Attaching the adjusting rail to the furniture door (refrigerator compartment) i The adjusting rail is the most important means of adjusting the furniture front. When attaching the metal strip to the furniture doors, observe the maximum possible length of the screws and the position of the drill holes. Always screw into the best loadĆbearing material of the furniture door. Never screw into fillers, decorative strips or similar. q Unscrew the installation support part from the appliance doors. i Store the positioning aids, there will be used in an installation step later. q Remove the cover plate from the freezer compartment door. i Check the double threaded bolts on the adjusting rail. Both of them must project out of the door by 3/16" (5 mm). 25
-
 1
1 -
2
-
3
-
4
-
5
-
6
-
7
-
8
-
9
-
10
-
11
-
12
-
13
-
14
-
15
-
16
-
17
-
18
-
19
-
 20
20 -
 21
21 -
 22
22 -
 23
23 -
 24
24 -
 25
25 -
 26
26 -
 27
27 -
 28
28 -
 29
29 -
 30
30 -
31
-
32
-
33
-
34
-
35
-
36
-
37
-
38
-
39
-
40
-
41
-
42
-
43
-
44
-
45
-
46
-
47
-
48
-
49
-
50
-
51
-
52
-
53
-
54
-
55
-
56
-
57
-
58
-
59
-
60
-
61
-
62
-
63
-
64
-
65
-
66
-
67
-
68
-
69
-
70
-
71
-
72
-
73
-
74
-
75
-
76
-
77
-
78
-
79
-
80
-
81
-
82
-
83
-
84
-
85
-
86
-
87
-
88
-
89
-
90
-
91
-
92
-
93
-
94
-
95
-
96
-
97
-
98
-
99
-
100
-
101
-
102
-
103
-
104
 |
 |
