Bosch GRL145HV Operating Instructions - Page 5
Intended Use, Preparation - laser level
 |
UPC - 000346387285
View all Bosch GRL145HV manuals
Add to My Manuals
Save this manual to your list of manuals |
Page 5 highlights
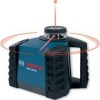
Intended Use This tool projects rotating, dithering and stationary laser points and is intended for accurate transfer and alignment of plumb, level, graded and 90-degree points and lines. • Plumbing (Making vertical) - Use the tool in the vertical orientation for indoor and outdoor plumb applications, such as plumbing up framing, aligning cabinetry, etc. • Leveling - Use the tool in the horizontal orientation for indoor and outdoor level applications, such as leveling cabinetry, setting concrete forms, leveling electrical outlets, etc. • Grading - Use the tool at a sloped angle for indoor and outdoor level applications, such as grading driveways or swimming pools. • Squaring- The laser beam emitting from the top of the tool is perpendicular to the rotating beam, which provides the ability to use the tool for 90 degree layout functions. Preparation Inserting/Replacing the Battery Low Battery Indicator ALWAYS turn off the laser and the main power switch before removing and replacing the batteries. Alkaline batteries are recommended for the tool. The battery compartment is located on the bottom of the unit. Open the compartment and replace the batteries. Note that the two pairs of batteries are stacked. When inserting, pay attention to the correct polarity according to the representation on the inside of the battery compartment. To unlock the battery lid, turn the locking screw 2 in a counter-clockwise direction.To lock the battery lid, turn the locking screw 2 in clockwise direction. Always replace all batteries at the same time. Only use batteries from one brand and with the identical capacity. • Remove the batteries from the tool when not using it for extended periods. When storing for extended periods, the batteries can corrode and discharge themselves. 2 The LED flashes yellow when 25 percent of battery life remains (approximately five hours). The LED flashes, and continues to flash in a pattern of three seconds on/one second off, until the batteries are replaced or fail. -5-
-
 1
1 -
 2
2 -
 3
3 -
 4
4 -
 5
5 -
 6
6 -
 7
7 -
 8
8 -
 9
9 -
 10
10 -
 11
11 -
12
-
13
-
14
-
15
-
16
-
17
-
18
-
19
-
20
-
21
-
22
-
23
-
24
-
25
-
26
-
27
-
28
-
29
-
30
-
31
-
32
-
33
-
34
-
35
-
36
-
37
-
38
-
39
-
40
-
41
-
42
-
43
-
44
 |
 |
