Bosch GRL145HV Operating Instructions - Page 8
Operating Modes- Rotation and Dot/Dithering, Leveling Accuracy - rotary laser
 |
UPC - 000346387285
View all Bosch GRL145HV manuals
Add to My Manuals
Save this manual to your list of manuals |
Page 8 highlights
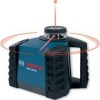
Operating Modes- Rotation and Dot/Dithering The GRL145HV rotary laser tool has two basic operating modes, the Rotation Mode and the Dithering/Dot Mode. Rotation Mode The laser beam is dispersed throughout the level or plumb plane. Rotation mode is used under conditions where laser beam visibility is poor or nonexistent (for example, outdoors in daylight). It is not always possible to easily see a rotating laser beam. A laser receiverdetector makes it possible to detect and correctly position the rotation mode indoors or outdoors. The Rotation Mode is the default mode when the tool is turned on. When the laser is first turned on, it is rotating at 120 rpms. Press the keypad rotation mode button to cycle through the medium and fast speeds, then back to slow speed. Decrease speed to improve laser beam visibility, especially for indoor applications. Note: To enter rotation mode from dithering/dot mode, press the keypad rotation mode button. Dithering/Dot Mode The dithering line is a laser beam that moves rapidly back and forth (dithers), producing a shorter, beam that is brighter than beams in the rotation mode. Because of the brighter laser beam in the dithering mode, a laser receiver-detector may not be required. The dithering line length can easily be changed according to application requirements in either the level or plumb applications. The dithering/dot mode is normally used for indoor applications. A choice of a laser dot or four dithering line lengths are available. The laser beam is less visible at the longer line length. In some situations, it may be necessary to use a laser receiver-detector to accurately locate the beam. When the laser is first turned on, it is rotating at 120 rpms. To enter dithering/dot mode, press the keypad dithering/dot button. A laser dot appears. Continue pressing the dithering/dot button to cycle through dot mode and four different line lengths, and then back from the longer line to the laser dot. The laser dot or line dither can be positioned through a 360° range in the level or plumb plane by pressing one of the two dot/line position control buttons. In dot mode, a single press of either buttons will move the dot in small increments in the corresponding direction. Pressing and holding either button moves the dot in continuous slow motion for the first five seconds, and pressing and holding beyond five seconds moves the dot in faster speed. Working Advice • Always use the center of the laser point for marking. The size of the laser point changes with the distance. Leveling Accuracy Out of Level Indication Out-of-level indicators alert you if the unit is not on a level surface or if it is out of selfleveling range: • The LED flashes red once per second • The laser beam stops rotating (if in rotation mode) or dithering (if in dithering/dot mode) and flashes a laser dot in sync with the LED • The beeper sounds in sync with the laser beam and LED Reposition the tool to ensure that it is within the self-leveling range of ±6°. Once the unit is within self-leveling range, it stops beeping, the LED turns green, and the laser beam stops flashing. The tool resumes the mode of the last command issued. Note: The out-of-level indicator overrides all other indicators. If the laser tool is in low battery or power standby mode and becomes out of level, the out-of-level indicator overrides the low battery or power standby mode indicator. Influences on Accuracy The ambient temperature has the greatest influence. Especially temperature differences occurring from the ground upward can divert the laser beam. As thermal fluctuation is largest close to the ground, the tool, if possible, should be mounted on a commercially available tripod and placed in the center of the working area. Apart from exterior influences, device specific influences (such as heavy impact or drop) can -8-
-
 1
1 -
2
-
 3
3 -
 4
4 -
 5
5 -
 6
6 -
 7
7 -
 8
8 -
 9
9 -
 10
10 -
 11
11 -
 12
12 -
 13
13 -
14
-
15
-
16
-
17
-
18
-
19
-
20
-
21
-
22
-
23
-
24
-
25
-
26
-
27
-
28
-
29
-
30
-
31
-
32
-
33
-
34
-
35
-
36
-
37
-
38
-
39
-
40
-
41
-
42
-
43
-
44
 |
 |
