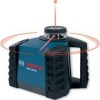
Bosch GRL145HV Operating Instructions - Page 9
Leveling, Manual Sloping, Calibration, To Calibrate the GRL 145HV
 |
UPC - 000346387285
View all Bosch GRL145HV manuals
Add to My Manuals
Save this manual to your list of manuals |
Page 9 highlights
lead to deviations. Therefore, check the accuracy of the tool each time before starting your work. Should the tool exceed the maximum deviation during one of the tests, see recalibration procedure or have it recalibrated by a Bosch after-sales service center. Leveling In the level position, the tool automatically self-levels within ±6°. When the laser beam is turned on, the LED flashes red, the laser dot flashes, and the beeper sounds while the tool self-levels. Once the tool is level, the LED turns to a steady green, the beeping stops, and the laser begins rotating at the slow speed Manual Sloping The tool can be put into the manual slope mode by pressing the rotation and dithering/dot buttons simultaneously and holding for 3 seconds. The unit will beep twice to indicate the unit is in manual slope mode. Note that the unit will not self-level when in the manual slope mode. Use the slope control buttons located on the side portion of the keypad to move the beam up or down to the desired slope angle. While in the manual slope function, the tool can be operated in the point, dither or rotation modes. When the beam reaches its minimum or maximum allowable slope, a continuous beep sound is heard on further key press. To return the tool back to the self-leveling mode, press the rotation and dithering/dot buttons simultaneously for 3 seconds. The unit will beep once to indicate that it is back in self-leveling mode. Calibration Although the GRL 145HV laser tools are calibrated to specification before leaving the factory, they contain many precision-machined parts that may be affected if subject to abuse. Therefore, if a unit is dropped or sustains significant impact, check its calibration. It is also recommended that the tool be periodically calibrated, as a normal maintenance procedure. To Calibrate the GRL 145HV: 1. Select a site for calibration that allows the unit to be placed about 50 ft. (15m) away from a smooth vertical surface, such as a wall. 2. Set the unit on a level surface at one end of the range. Place the unit with the side marked I toward the wall. 3. Turn on the unit with its power switch, then press the keypad laser on/off button 4. Simultaneously press the keypad calibration axis I and II buttons. Hold for five seconds, then release. Three beeps indicate that the unit has entered calibration mode. When in calibration mode, the laser beam is in rotation mode (rotational). Position the unit such that Line I and the laser beam point toward the vertical surface. Line I must be square (90°) to the wall. 5. Mark the laser beam height (center) on the vertical surface of the wall, as A. 6. Rotate the tool 180°, taking care not to change its height. Line I should be positioned exactly 180° from its original position and the opposite side facing the same wall as in step 4. Mark the laser beam height on the same vertical surface, as B. Line I Side I Line II Side II Compare the height of A and B. If the heights match, proceed to step 13. If the heights do not match, proceed to step 7. The goal of the next few steps is to position the level laser beam dot at a height halfway between A and B. -9-
-
 1
1 -
2
-
3
-
 4
4 -
 5
5 -
 6
6 -
 7
7 -
 8
8 -
 9
9 -
 10
10 -
 11
11 -
 12
12 -
 13
13 -
 14
14 -
15
-
16
-
17
-
18
-
19
-
20
-
21
-
22
-
23
-
24
-
25
-
26
-
27
-
28
-
29
-
30
-
31
-
32
-
33
-
34
-
35
-
36
-
37
-
38
-
39
-
40
-
41
-
42
-
43
-
44
 |
 |
