Bose Lifestyle 50 Owner's guide - Page 13
Connecting the Acoustimass, module power mains cord, Connecting the multi-room interface power pack - power cord
 |
View all Bose Lifestyle 50 manuals
Add to My Manuals
Save this manual to your list of manuals |
Page 13 highlights
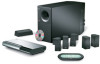
Setting Up Connecting the Acoustimass® module power (mains) cord CAUTION: If you have a dual-voltage system, make sure the voltage selector switch on the Acoustimass module is set correctly. 1. On a dual voltage system, the voltage selector switch is preset at the factory to be correct for your area. Check to be sure it is set for the proper voltage (Figure 9). Use 115V for North America; 230V for Europe and Australia. In Europe, use the adapter plug provided. If you are in doubt, contact your local electric utility for the appropriate voltage setting. Note: Do not plug the AC power cord into a power outlet until all component connections are complete. 2. Plug the small end of the power (mains) cord into the Acoustimass module AC power jack. Figure 9 Dual voltage Acoustimass module: voltage selector switch settings 230 V 115 V Connecting the multi-room interface power pack The multi-room interface comes with either a 100V, 120V, 230V, or 240V power pack. See Figures 1 and 10. Dual voltage models include both the PS71 and PS72 power packs. CAUTION: Be sure to use the correct Bose® power pack for your area. Using the wrong one may damage your power pack or your system. • Model PS71, 120V in North America • Model PS73, 100V in Japan • Model PS77, 240V in Australia • Model PS72, 230V in Europe • Model PS74, 230V in UK or Singapore Figure 10 The AC power pack (model PS71 shown) Note: Do not plug the power pack into a power outlet until you complete all component connections. 1. Firmly insert the small connector on the end of the power pack cable into the AC power jack on the back of the multi-room interface. 2. Make sure that the power pack reaches an AC (mains) outlet. AM189854_05_V.PDF October 17, 2001 11
-
 1
1 -
2
-
3
-
4
-
5
-
6
-
7
-
 8
8 -
 9
9 -
 10
10 -
 11
11 -
 12
12 -
 13
13 -
 14
14 -
 15
15 -
 16
16 -
 17
17 -
 18
18 -
19
-
20
-
21
-
22
-
23
-
24
-
25
-
26
-
27
-
28
-
29
-
30
-
31
-
32
-
33
-
34
-
35
-
36
-
37
-
38
-
39
-
40
-
41
-
42
-
43
-
44
-
45
-
46
-
47
-
48
-
49
-
50
-
51
-
52
-
53
-
54
-
55
 |
 |
