Brother International CS-6000/6000b/6000t/6000i Operation Manual - Page 12
For models equipped with the fast bobbin, winding system
 |
View all Brother International CS-6000/6000b/6000t/6000i manuals
Add to My Manuals
Save this manual to your list of manuals |
Page 12 highlights
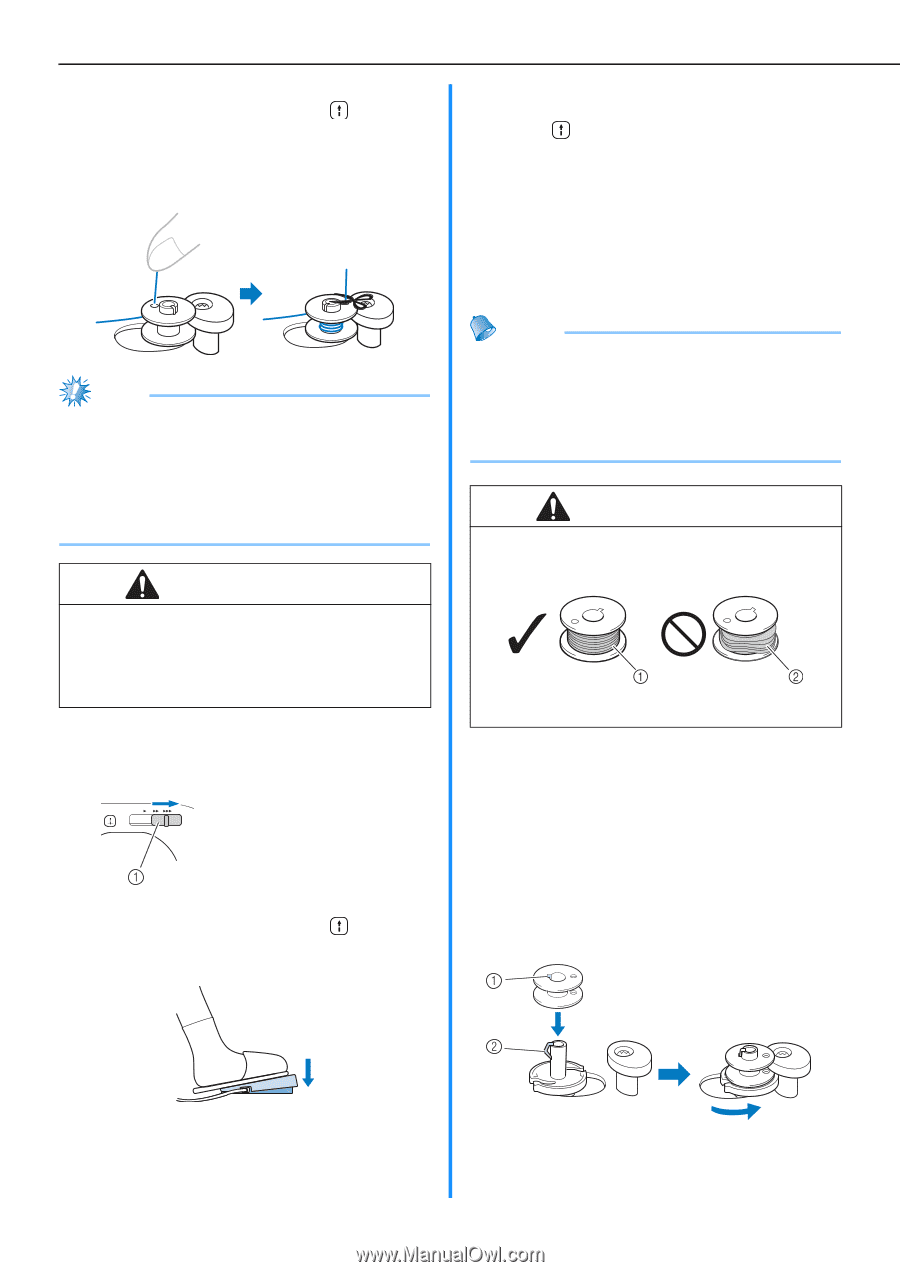
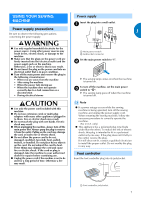
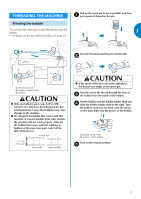
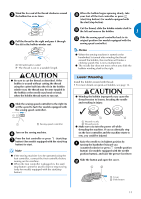
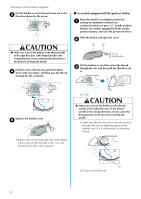
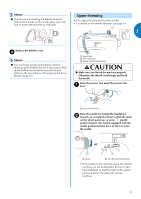
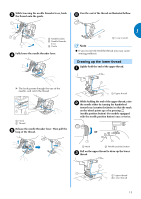
KNOWING YOUR SEWING MACHINE While holding the end of the thread, gently f press the foot controller or press (start/stop button) (for models equipped with the start/stop button) to wind the thread around the bobbin a few times. Then stop the machine. Then stop the machine and trim the excess thread. Note ● If the sewing machine is to be operated using the foot controller, connect the foot controller before turning on the machine. ● When the foot controller is plugged in, the start/ stop button cannot be used to start or stop sewing (only for models equipped with the start/stop button). CAUTION ● Make sure you follow the instructions carefully. If you do not cut the thread completely, and the bobbin is wound, when the thread runs low it may tangle around the bobbin and cause the needle to break. Slide the sewing speed controller to the right (to g set the speed to fast). (For models equipped with the sewing speed controller.) 1 Sewing speed controller Press the foot controller or press (start/stop h button) (for models equipped with the start/stop button) to start. When the bobbin seems full and begins spinning i slowly, take your foot off the foot controller or press (start/stop button) (for models equipped with the start/stop button). Cut the thread, slide the bobbin winder shaft to j the left and remove the bobbin. Slide the sewing speed controller back to its k original position (for models equipped with the sewing speed controller). Memo ● When the sewing machine is started or the handwheel is turned after winding the thread around the bobbin, the machine will make a clicking sound; this is not a malfunction. ● The needle bar does not move when you slide the bobbin winding shaft to the right. CAUTION ● Not winding the bobbin properly may cause the thread tension to loosen, and may break the needle. a Wound evenly b Wound poorly ■ For models equipped with the fast bobbin winding system Follow steps 1 through 2 of the procedure in a "Winding the bobbin" to pass the thread around the pre-tension disk (page 9). Place the bobbin on the bobbin winder shaft so b that the spring on the shaft fits into the notch in the bobbin. Then slide the bobbin winder shaft to the right. a Notch b Spring 10
-
 1
1 -
2
-
3
-
4
-
5
-
6
-
 7
7 -
 8
8 -
 9
9 -
 10
10 -
 11
11 -
 12
12 -
 13
13 -
 14
14 -
 15
15 -
 16
16 -
 17
17 -
18
-
19
-
20
-
21
-
22
-
23
-
24
-
25
-
26
-
27
-
28
-
29
-
30
-
31
-
32
-
33
-
34
-
35
-
36
-
37
-
38
-
39
-
40
-
41
-
42
-
43
-
44
-
45
-
46
-
47
-
48
-
49
-
50
-
51
-
52
-
53
-
54
-
55
-
56
-
57
-
58
-
59
-
60
 |
 |