Brother International CT-1500 Owners Manual - English - Page 11
Maintenance Instructions
 |
View all Brother International CT-1500 manuals
Add to My Manuals
Save this manual to your list of manuals |
Page 11 highlights
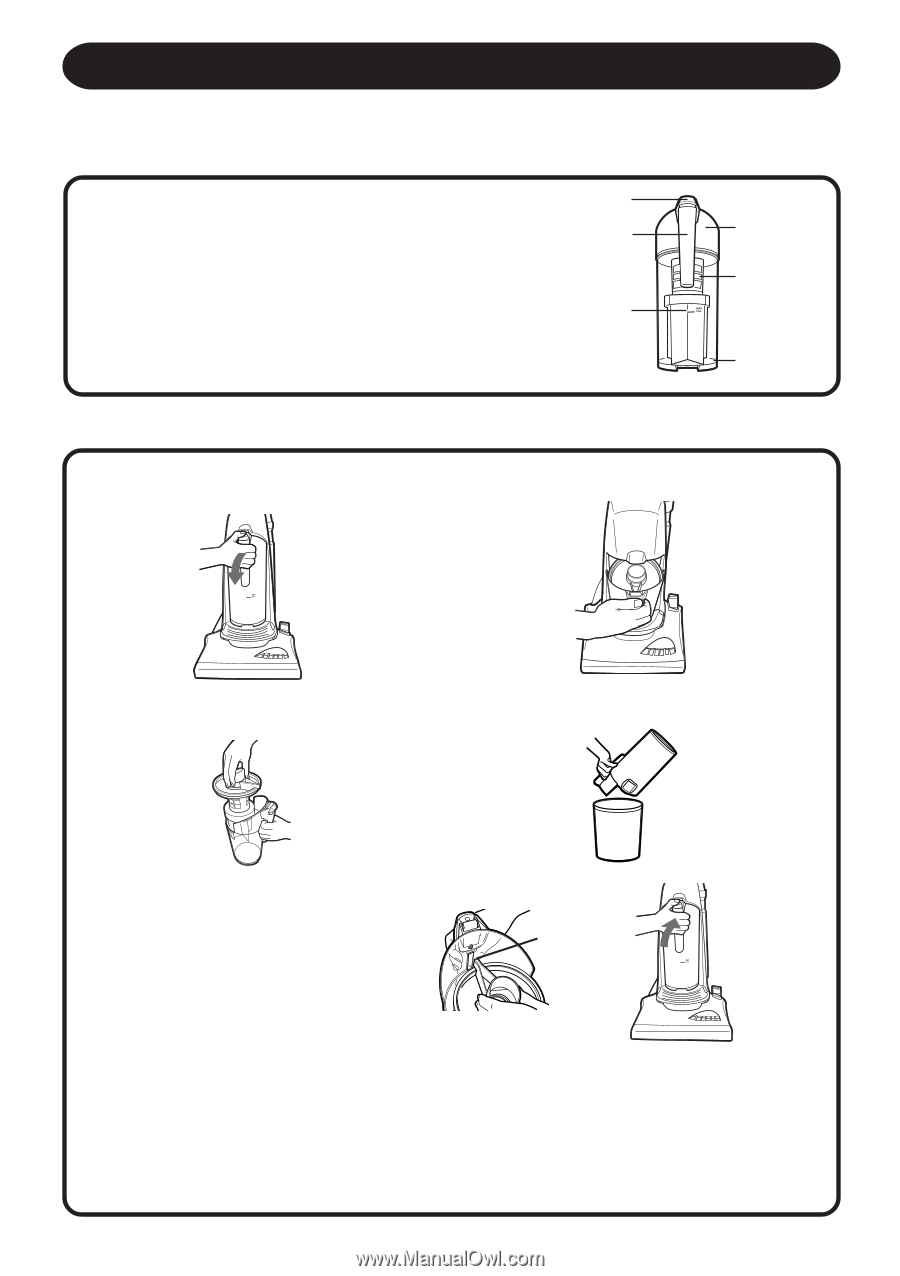
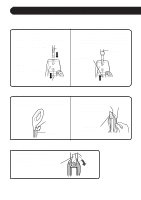
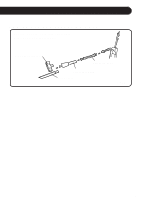
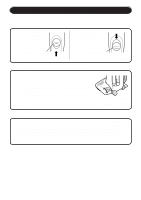
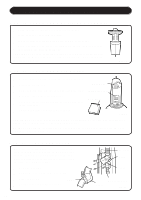
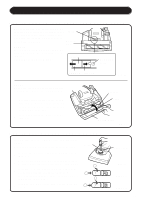
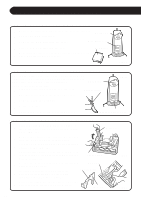
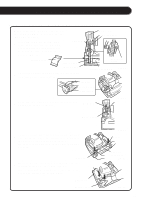
MAINTENANCE INSTRUCTIONS Unplug this vacuum cleaner from the electrical outlet before servicing. HOW TO REMOVE AND REPLACE DIRT COMPARTMENT DIRT COMPARTMENT (A) The dirt compartment assembly consists of the following (B) parts: Dirt Compartment Knob (A) Handle (B) Max Fill Line (C) (C) Dirt Compartment (D) Net Filter Assembly (E) Rectangular Slot (F) (D) (E) (F) Fig.21 1 Press down dirt compartment knob to remove dirt compartment. (Fig.22) 2 Pull dirt compartment out to empty. (Fig.23) Fig.22 3 Remove net filter assembly from the dirt compartment. (Fig. 24) Fig.23 4 Empty dirt compartment. (Fig. 25) Fig.24 5 Replace the net filter assembly into the dirt compartment. Be sure that the lid edge on the top of the net filter fits in the slot placed behind the dirt compartment handle (Fig.26). Align the rectangular slot placed on the bottom of the dirt compartment into the tab on the vacuum cleaner, then push to snap into place (Fig.26-1). Lid Edge Fig.26 Fig.25 Fig.26-1 CAUTION: Do not use chemicals, bleach or hot water to clean the dirt compartment. Wash with soap and water using a soft brush. Do not dry with hair dryer or heater. NOTE: Very fine materials, such as face powder, plaster or fine powder may seal the filters and cause loss of suction. When vacuuming this type of material, be sure to empty the dirt compartment and clean the filters more frequently (before reaching the "Max Fill Line"). 11
-
 1
1 -
2
-
3
-
4
-
5
-
 6
6 -
 7
7 -
 8
8 -
 9
9 -
 10
10 -
 11
11 -
 12
12 -
 13
13 -
 14
14 -
 15
15 -
 16
16 -
17
-
18
-
19
-
20
-
21
-
22
-
23
-
24
 |
 |