Brother International CT-1500 Owners Manual - English - Page 15
How To Replace The Belt
 |
View all Brother International CT-1500 manuals
Add to My Manuals
Save this manual to your list of manuals |
Page 15 highlights
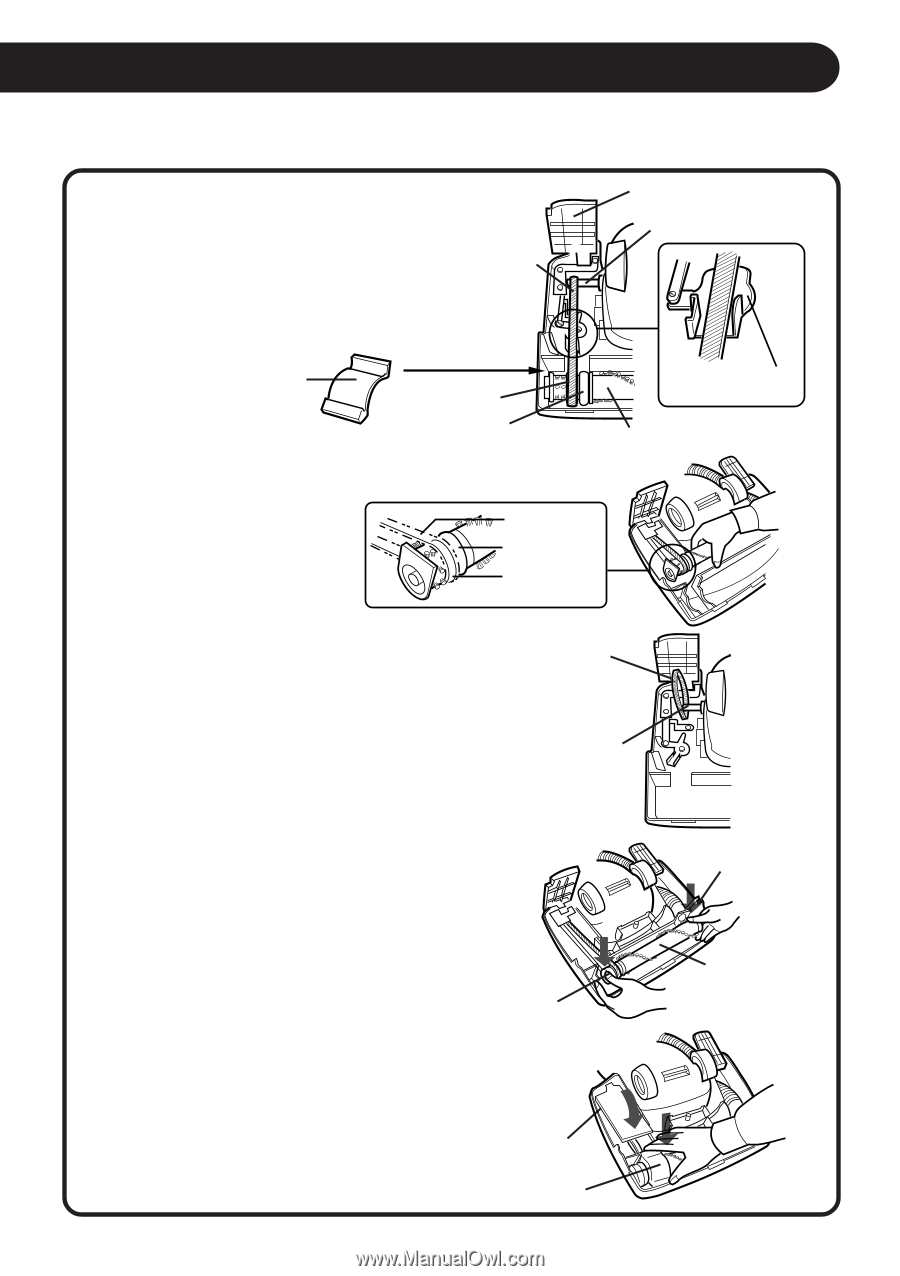
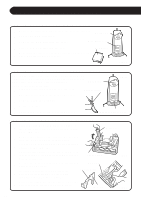
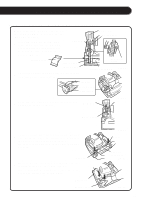
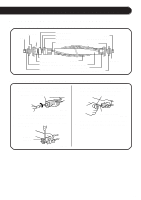
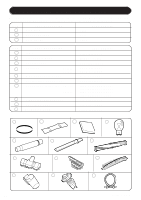
REPLACEMENT INSTRUCTIONS HOW TO REPLACE THE BELT (CT1500 type) When replacing the belt, always set the RUG/FLOOR Selector to the "FLOOR" position. 1 After removing the bottom plate (see page 13), lift up the belt cover and remove the pulley cover to determine if the belt is worn or broken. (Fig. 38) Flat belt Pulley cover Idler pulley Main pulley 2 Pull out the agitator and then remove the flat belt from the motor shaft. (Fig. 39) Belt cover Motor shaft Belt change guide Agitator assembly Fig.38 Flat belt Main pulley Idling pulley 3 Loop the new belt around the motor shaft and agitator as shown. (Fig. 40) New belt Fig.39 Motor shaft 4 Then re-insert the agitator assembly, making sure that both ends of the agitator assembly fit in the groove of the nozzle head. (Fig. 41) Be sure to install the new flat belt into the guide properly. Groove 5 Be sure that the flat belt is not twisted and all rotating parts move smoothly. (Fig. 42) After reinstalling the pulley cover, close the belt cover and replace the bottom plate. Belt cover Pulley cover Fig.40 Groove Agitator assembly Fig.41 Fig.42 15
-
 1
1 -
2
-
3
-
4
-
5
-
6
-
7
-
8
-
9
-
 10
10 -
 11
11 -
 12
12 -
 13
13 -
 14
14 -
 15
15 -
 16
16 -
 17
17 -
 18
18 -
 19
19 -
 20
20 -
21
-
22
-
23
-
24
 |
 |