Brother International ELS Lettering Users Manual - English - Page 50
Brother International ELS Lettering Manual
 |
View all Brother International ELS Lettering manuals
Add to My Manuals
Save this manual to your list of manuals |
Page 50 highlights
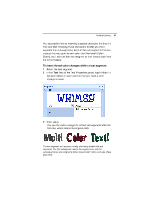
48 Pacesetter Embroidery Lettering Software Instruction Manual Note that, depending on the embroidery font you choose, there are different minimum and maximum height recommendations. For more information, see "Displaying font properties." To change a font type: 1 2 Select the text segment you want to alter. From the Font list, select the font you want to use. You can preview the fonts available by clicking the arrow to the right of the font name. This will display a drop-down list of the available fonts; scroll through the list by dragging the track button. You can click on each font name to display a preview of the font in the Text area. 3 Click Apply to save your changes. You see your text's font type altered accordingly. Displaying a Font's Available Characters In Properties Panel, there is a tool which displays all the characters (keystrokes) that can be entered for available embroidery fonts. For example, some fonts only allow you to enter uppercase characters, while other fonts allow you to enter both uppercase and lowercase characters. The available characters box also tells you the minimum and maximum recommended heights for sewing out the font. To display an embroidery font's available keystrokes: 1 2 Display the Properties Panel, if it is not already visible. In the Text area, select the font you want to use in the Font field.
-
 1
1 -
2
-
3
-
4
-
5
-
6
-
7
-
8
-
9
-
10
-
11
-
12
-
13
-
14
-
15
-
16
-
17
-
18
-
19
-
20
-
21
-
22
-
23
-
24
-
25
-
26
-
27
-
28
-
29
-
30
-
31
-
32
-
33
-
34
-
35
-
36
-
37
-
38
-
39
-
40
-
41
-
42
-
43
-
44
-
 45
45 -
 46
46 -
 47
47 -
 48
48 -
 49
49 -
 50
50 -
 51
51 -
 52
52 -
 53
53 -
 54
54 -
 55
55 -
56
-
57
-
58
-
59
-
60
-
61
-
62
-
63
-
64
-
65
-
66
-
67
-
68
-
69
-
70
-
71
-
72
-
73
-
74
-
75
-
76
-
77
-
78
-
79
-
80
-
81
-
82
-
83
-
84
-
85
-
86
-
87
-
88
-
89
-
90
-
91
-
92
-
93
-
94
-
95
 |
 |
