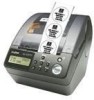
Brother International QL 650TD Users Manual - English and Spanish - Page 25
Connecting the power supply - driver
 |
UPC - 012502613466
View all Brother International QL 650TD manuals
Add to My Manuals
Save this manual to your list of manuals |
Page 25 highlights
Before using the printer 25 5 Connecting the power supply Introduction 1 Insert the power cord into the power cord slot on the rear side of the printer. Power cord Slot Power cord STEP 1 2 Insert the power plug into the outlet. • Before inserting the plug, check the outlet is for 120 VAC. • Locate the printer near the outlet where the power plug can be pulled out easily. • When inserting or pulling out the power cord, be sure to hold the power plug. STEP 2 When using the printer on Windows®, do not connect the printer to the PC before installing software. Do not connect the printer to the PC until the message that prompts the connection when installing the printer driver. When connecting the printer to the PC before installing the printer driver, the dialog box shown right is displayed. At that time, click [Cancel] and disconnect the USB cable. Then, install the printer driver. For details, refer to Î"3. Installing the software" in page 43. STEP 3 Using only this printer (No PC) Connecting to your PC For Macintosh For Windows STEP 4 Maintenance and Troubleshooting
-
 1
1 -
2
-
3
-
4
-
5
-
6
-
7
-
8
-
9
-
10
-
11
-
12
-
13
-
14
-
15
-
16
-
17
-
18
-
19
-
 20
20 -
 21
21 -
 22
22 -
 23
23 -
 24
24 -
 25
25 -
 26
26 -
 27
27 -
 28
28 -
 29
29 -
 30
30 -
31
-
32
-
33
-
34
-
35
-
36
-
37
-
38
-
39
-
40
-
41
-
42
-
43
-
44
-
45
-
46
-
47
-
48
-
49
-
50
-
51
-
52
-
53
-
54
-
55
-
56
-
57
-
58
-
59
-
60
-
61
-
62
-
63
-
64
-
65
-
66
-
67
-
68
-
69
-
70
-
71
-
72
-
73
-
74
-
75
-
76
-
77
-
78
-
79
-
80
-
81
-
82
-
83
-
84
-
85
-
86
-
87
-
88
-
89
-
90
-
91
-
92
-
93
-
94
-
95
-
96
-
97
-
98
-
99
-
100
-
101
-
102
-
103
-
104
-
105
-
106
-
107
-
108
-
109
-
110
-
111
-
112
-
113
-
114
-
115
-
116
-
117
-
118
-
119
-
120
-
121
-
122
-
123
-
124
-
125
-
126
-
127
-
128
 |
 |
