Brother International QL 650TD Users Manual - English and Spanish - Page 51
Input Name and Password of, Continue Installation]. - windows 7 driver
 |
UPC - 012502613466
View all Brother International QL 650TD manuals
Add to My Manuals
Save this manual to your list of manuals |
Page 51 highlights
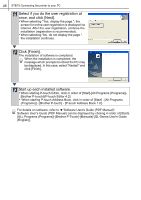
Introduction 51 16 Select the drive where you install the driver, and click [Install]. The screen in which the name and password of administrator is displayed. STEP 1 17 Input "Name" and "Password" of administrator and click [OK]. The screen to check the installation is displayed. Before using the printer Using only this printer (No PC) Connecting to your PC For Macintosh For Windows 18 When continuing the installation, click [Continue Installation]. STEP 2 The installation starts. 19 When the installation is completed and the message "The software was successfully installed" is displayed, click [Restart]. Macintosh® is rebooted. The installation of printer driver is completed. STEP 3 20 After rebooting, connect the USB cable and power cord to the printer. As the caution label is put on the USB port of the printer, remove it and then connect the USB cable. USB port USB cable Power cord slot Power cord STEP 4 21 Connect the USB cable to the USB port of Macintosh®. Press ON/OFF button ( ) of the printer to turn on the power. When connecting the printer to Macintosh® via USB hub, it may not be connected correctly. At that time, connect the printer directly to the USB port of Macintosh®. Maintenance and Troubleshooting
-
 1
1 -
2
-
3
-
4
-
5
-
6
-
7
-
8
-
9
-
10
-
11
-
12
-
13
-
14
-
15
-
16
-
17
-
18
-
19
-
20
-
21
-
22
-
23
-
24
-
25
-
26
-
27
-
28
-
29
-
30
-
31
-
32
-
33
-
34
-
35
-
36
-
37
-
38
-
39
-
40
-
41
-
42
-
43
-
44
-
45
-
 46
46 -
 47
47 -
 48
48 -
 49
49 -
 50
50 -
 51
51 -
 52
52 -
 53
53 -
 54
54 -
 55
55 -
 56
56 -
57
-
58
-
59
-
60
-
61
-
62
-
63
-
64
-
65
-
66
-
67
-
68
-
69
-
70
-
71
-
72
-
73
-
74
-
75
-
76
-
77
-
78
-
79
-
80
-
81
-
82
-
83
-
84
-
85
-
86
-
87
-
88
-
89
-
90
-
91
-
92
-
93
-
94
-
95
-
96
-
97
-
98
-
99
-
100
-
101
-
102
-
103
-
104
-
105
-
106
-
107
-
108
-
109
-
110
-
111
-
112
-
113
-
114
-
115
-
116
-
117
-
118
-
119
-
120
-
121
-
122
-
123
-
124
-
125
-
126
-
127
-
128
 |
 |
