Brother International TD-4100N Users Manual - English and Spanish - Page 15
Flow for Creating Labels - drivers
 |
View all Brother International TD-4100N manuals
Add to My Manuals
Save this manual to your list of manuals |
Page 15 highlights
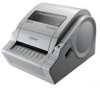
9 Introduction 4 Flow for Creating Labels Labels can be created by using P-touch Editor. For details, see Î the Software User's Guide in the CD-ROM. Follow the procedure described below to prepare for making labels. The following is the example for Windows Vista®. 1 Connect the Power Supply. For details, see "Connecting the Power Supply" on page 11. STEP 1 Getting started 2 Install the software. Install the printer driver to use the TD-4000/4100N as a printer with the PC and install the label design software. For TD-4000, see "Installing the Software for TD-4000" on page 15. For TD-4100N, see "Installing the Software for TD-4100N" on page 17. 3 Connect the TD-4000/4100N to the PC. 4 Specify the paper or label size. From [Control Panel], click [Hardware and Sound] or [Printers and Other Hardware], [Printers], right click on [Brother XX-XXXX], select [Printing Preferences], under [Paper] tab to specify the paper and label settings (width, length, label spacing, and paper width). The list of paper sizes can be imported from other PC or exported to other PC, and the print location and the print density can be adjusted. For details, see the Software User's Guide in the CD-ROM. STEP 2 Installing the software 5 Print labels. • Printing from the P-touch Editor Start the P-touch Editor to create labels. • Printing from other applications Choose [File] - [Print]. (The printing procedure may differ depending on the application being used.) For details, see the Software User's Guide in the CD-ROM. STEP 3 Reference
-
 1
1 -
2
-
3
-
4
-
5
-
6
-
7
-
8
-
9
-
 10
10 -
 11
11 -
 12
12 -
 13
13 -
 14
14 -
 15
15 -
 16
16 -
 17
17 -
 18
18 -
 19
19 -
 20
20 -
21
-
22
-
23
-
24
-
25
-
26
-
27
-
28
-
29
-
30
-
31
-
32
-
33
-
34
-
35
-
36
-
37
-
38
-
39
-
40
-
41
-
42
-
43
-
44
-
45
-
46
-
47
-
48
-
49
-
50
-
51
-
52
-
53
-
54
-
55
-
56
-
57
-
58
-
59
-
60
-
61
-
62
-
63
-
64
-
65
-
66
-
67
-
68
-
69
-
70
-
71
-
72
-
73
-
74
-
75
-
76
-
77
-
78
-
79
-
80
 |
 |
