Brother International VX-940 Users Manual - English - Page 32
Buttonholes, Button, Sewing
 |
View all Brother International VX-940 manuals
Add to My Manuals
Save this manual to your list of manuals |
Page 32 highlights
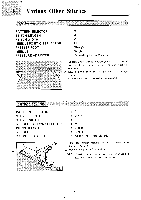
6 Buttonholes and Button Sewing tki Buttonholes PATTERN SELECTOR STITCH LENGTH STITCH WIDTH PRESSER FOOT NEEDLE PRESSURE ADJUSTER : 1 : F (Fine) - 2 (Coarse) : 3-5 : Buttonhole Foot Single : According to the Material One-step automatic Buttonholing is a simple process that provides reliable results. Ca)t Set the marks on the foot and fabric in line. Marks on fabric Marks on the foot Button plate , MAKING BUTTONHOLE 1. Use buttonhole foot with sliding portion. 2. Choose the best stitch width (width of bar tack) between 3 to 5 to suit your work. 3. Using tailor chalk, mark the position of button to be attached. 4. Attach the buttonhole foot. 5. Draw up lower thread. 6. Lower presser foot in accordance with the marked line as per illustration OA 7. Draw button plate out and insert the button as per illustration 8. Pull out buttonhole lever and push this lever back slightly as per illustration © • 9. Holding the upper thread slightly, start the machine. 10. Buttonhole stitching is made in order 4 of 1-4 as per illustration OD Stop the machine when bar tack is reached. Note: 1 2 The maximum capability is 3 cm (1-1/6 inch) which is the diameter of button plus thickness of fabrics. You can make several buttonholes of the exact same size. - 30 -
-
 1
1 -
2
-
3
-
4
-
5
-
6
-
7
-
8
-
9
-
10
-
11
-
12
-
13
-
14
-
15
-
16
-
17
-
18
-
19
-
20
-
21
-
22
-
23
-
24
-
25
-
26
-
 27
27 -
 28
28 -
 29
29 -
 30
30 -
 31
31 -
 32
32 -
 33
33 -
 34
34 -
 35
35 -
 36
36 -
 37
37 -
38
-
39
-
40
-
41
-
42
-
43
-
44
-
45
-
46
-
47
 |
 |
