Brother International XL-2600 Users Manual - English - Page 30
Zigzag Stitching
 |
View all Brother International XL-2600 manuals
Add to My Manuals
Save this manual to your list of manuals |
Page 30 highlights
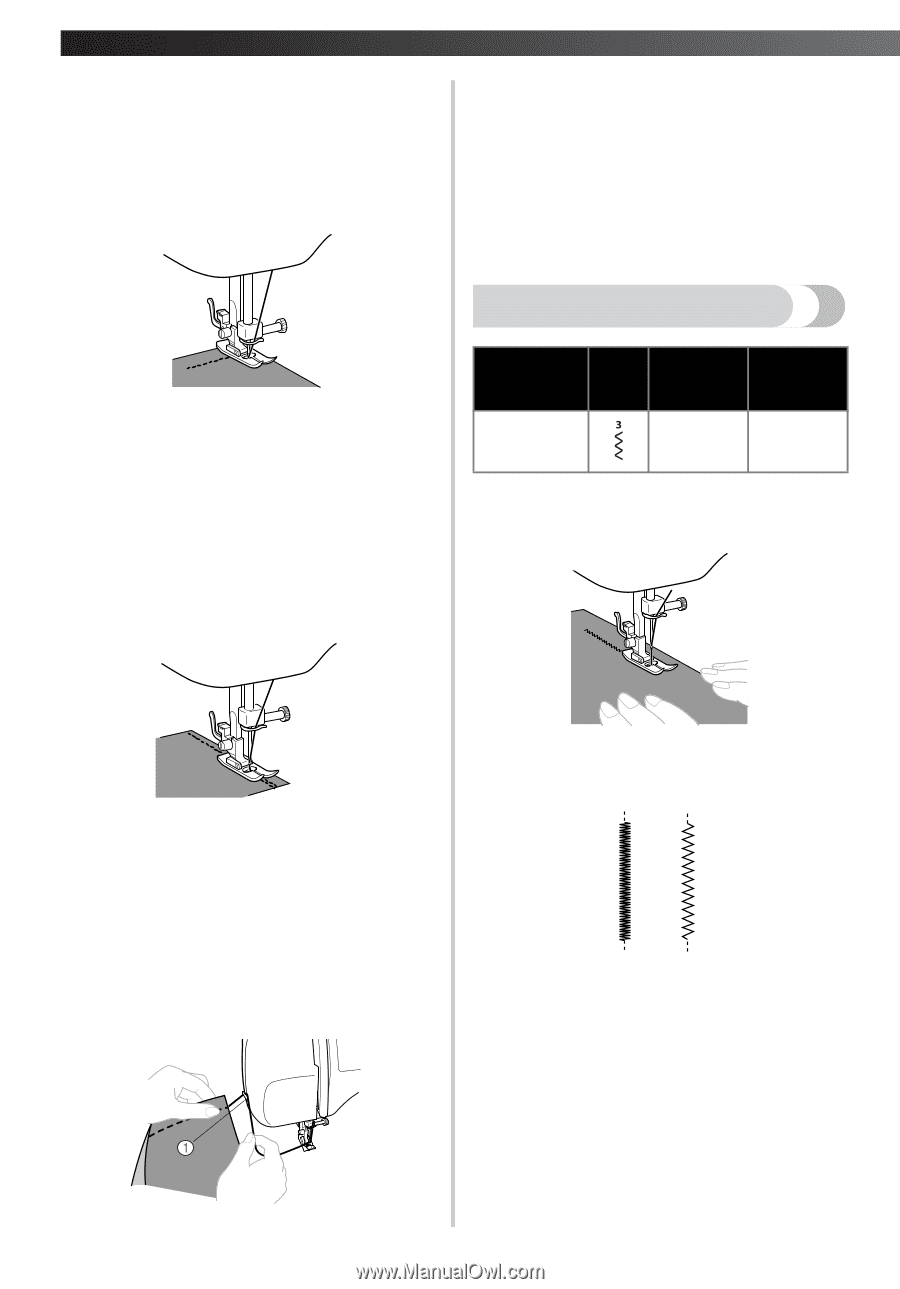
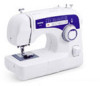
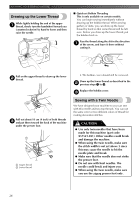
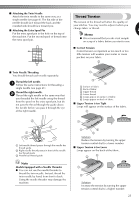
STRAIGHT AND ZIGZAG STITCHING ■ Changing Sewing Direction Stop the machine at the point where you want 1 to change direction with the needle still in the fabric. Raise the presser foot and turn the fabric to its 2 new direction using the needle as a pivot. To prepare the machine for the next seam, 4 pull about 10 cm (4 inch) of thread through the toes of the presser foot toward the back of the machine. ■ Top Stitching and Stretch Materials You can use a straight stitch for top stitching and sewing lightweight fabrics. You can use a triple stretch stitch for sewing stretch fabrics. Zigzag Stitching Lower the presser foot and start sewing in the 3 new direction. ■ Finishing Sewing You can use stitching to lock the threads at the end of the seam or to strengthen a stitch. Stitch to the end of the seam and stop. 1 Push the reverse sewing lever and stitch 2 backwards for 1 cm (3/8 inch) from the end of the fabric. Stitch Stitch Stitch Name Pattern Length Width [mm (inch)] [mm (inch)] Zigzag Stitch F-4 0-5 (1/64-3/16) (0-3/16) ■ Zigzag Stitch Turn the pattern selection dial to the Zigzag Stitch, and then start sewing. ■ Removing the Material from the Machine Stop the machine. 1 Raise the needle to its highest position and make sure that the thread take-up lever is also in its highest position. Lift the presser foot and pull the fabric out 2 gently to the left hand side. Cut both threads with the thread cutter on the 3 left hand side of the machine . We recommend that you sew using the Straight Stitch at the beginning and end of zigzag stitches. (This acts as a reinforcement stitch.) ■ Satin Stitch Setting the Zigzag Stitch length in the "F" range produces a satin stitch (close zigzag stitch). The Satin Stitch can be used for making buttonholes and decorative stitches. Set the pattern selection dial to the Zigzag Stitch, set the stitch length in the "F" range, and set the stitch width dial between 0 and 5. 1 Thread cutter 28
-
 1
1 -
2
-
3
-
4
-
5
-
6
-
7
-
8
-
9
-
10
-
11
-
12
-
13
-
14
-
15
-
16
-
17
-
18
-
19
-
20
-
21
-
22
-
23
-
24
-
 25
25 -
 26
26 -
 27
27 -
 28
28 -
 29
29 -
 30
30 -
 31
31 -
 32
32 -
 33
33 -
 34
34 -
 35
35 -
36
-
37
-
38
-
39
-
40
-
41
-
42
-
43
-
44
-
45
-
46
-
47
-
48
-
49
-
50
-
51
-
52
 |
 |