Bushnell 11 8200 User Guide - Page 5
Delete One, SETUP Menu, File Size, Quality, USB Mode, Power Frequency, CHANGING OPERATIONAL MODES, - software download
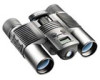 |
View all Bushnell 11 8200 manuals
Add to My Manuals
Save this manual to your list of manuals |
Page 5 highlights
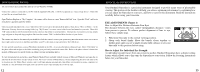
CHANGING OPERATIONAL MODES Pressing the MODE button briefly will cycle through several special camera modes and settings. A corresponding icon or symbol (indicated in parentheses below) will be displayed on the LCD for each mode or setting as you cycle through them by tapping the MODE button. When the icon for a mode or setting is displayed, pressing SNAP will select that mode or change that setting. If no button is pressed for more than 5 seconds, the camera will return to normal operation. The modes/settings are shown as you cycle through them in the following order: • Timer ( ) : selects the self-timer, which will take a photo after a 10 second delay when you press the SNAP button. This can be used to avoid moving or shaking the camera by pressing the SNAP button when the camera is placed on a table or other level surface. After a photo is taken via the timer, the camera automatically returns to normal operation (timer is canceled). • Video Mode: ( ) : This mode sets the camera to take short video clips (.avi files) rather than still photos. With the movie camera icon displayed, press SNAP to begin shooting the video. The counter will show elapsed seconds . Press SNAP again to stop shooting the video. The counter will advance by one number, as a new file (video) has been stored in the internal memory. After shooting the video clip, the camera reverts back to normal still photo operation (assuming unused memory remains). Repeat the steps to set AVI mode again if you wish to shoot more video clips. • Continuous Shot ( CS ) : Takes rapid series of 3 consecutive photos, approx. 1 second apart, when you press and hold the SNAP button. You will hear a short beep when each photo is taken. As with the timer, the camera will return to normal operation after the shots are taken, cancelling the CS mode. • Delete All ( ) : With this mode is selected, press SNAP once, and the number of total photos in memory will blink in the display. Press the SNAP button a second time to erase the entire memory contents. If SNAP is not pressed a second time while the photo counter is blinking, the camera will return to normal operation in a few seconds (all your photos will not be deleted). When the process is 8 CHANGING OPERATIONAL MODES continued complete, the photo number display will reset to zero. If no button is pressed for 5 seconds, the camera returns to stand-by. "Delete All" is a quick way to clear the memory following a download of your photos to a computer, so that the camera is ready to hold as many new photos as possible. • Delete One ( ) : Pressing SNAP when the "Delete One" icon is displayed will delete (erase) only the last photo you took from the camera's memory. • SETUP Menu (SET): Pressing SNAP when "SET" is displayed will enter the Setup Menu display, which has four different settings, each with two options available. Use the MODE button to cycle through the four settings. Pressing the SNAP button will switch ("toggle") between the two options per setting. The four settings (plus "ESC" to exit the setup menu) are displayed in the following order: • File Size (S2 or S1): Select "S2" for High Resolution photos (640x480 pixels), or select "S1" for Low Resolution (320x240 pixels). High resolution is recommended, but low resolution can be used if you need to shoot a greater quantity of photos before downloading, and quality is not a high priority. • Quality (Hq or Lq) : Select "Hq" for High Quality photos (recommended setting, least amount of jpg file compression). Select "Lq" to store more photos in memory but with a slight loss in quality due to greater file compression. • USB Mode (Sto or PCC): Select "Sto" for normal use, allowing you to download and view the photos in the camera's memory when it is connected to your PC with a USB cable (included). Selecting "PCC" will allow the camera to be used as a live "PC camera" with appropriate software. This may be of limited use, as the camera has a fixed focus preset for distances of 30 feet or greater. • Power Frequency (60 or 50 Hz): This sets the correct electrical line frequency to avoid any visible "flickering" in the images, especially when shooting video clips where fluorescent lighting is present. The "60" setting should be used for operation in the United States. If you are using the camera in a country with 50 Hz (cycle) AC power frequency, press SNAP to select "50" instead. 9
-
 1
1 -
 2
2 -
 3
3 -
 4
4 -
 5
5 -
 6
6 -
 7
7 -
 8
8 -
 9
9 -
 10
10 -
 11
11 -
12
-
13
-
14
-
15
-
16
-
17
-
18
-
19
-
20
-
21
-
22
-
23
-
24
-
25
-
26
-
27
-
28
-
29
-
30
-
31
-
32
-
33
-
34
-
35
-
36
-
37
-
38
-
39
-
40
-
41
-
42
-
43
-
44
-
45
 |
 |