Canon 2080B001 XL H1S / XL H1A Instruction Manual - Page 39
Reviewing the Recording, Selecting the On-Screen Displays
 |
UPC - 013803079685
View all Canon 2080B001 manuals
Add to My Manuals
Save this manual to your list of manuals |
Page 39 highlights
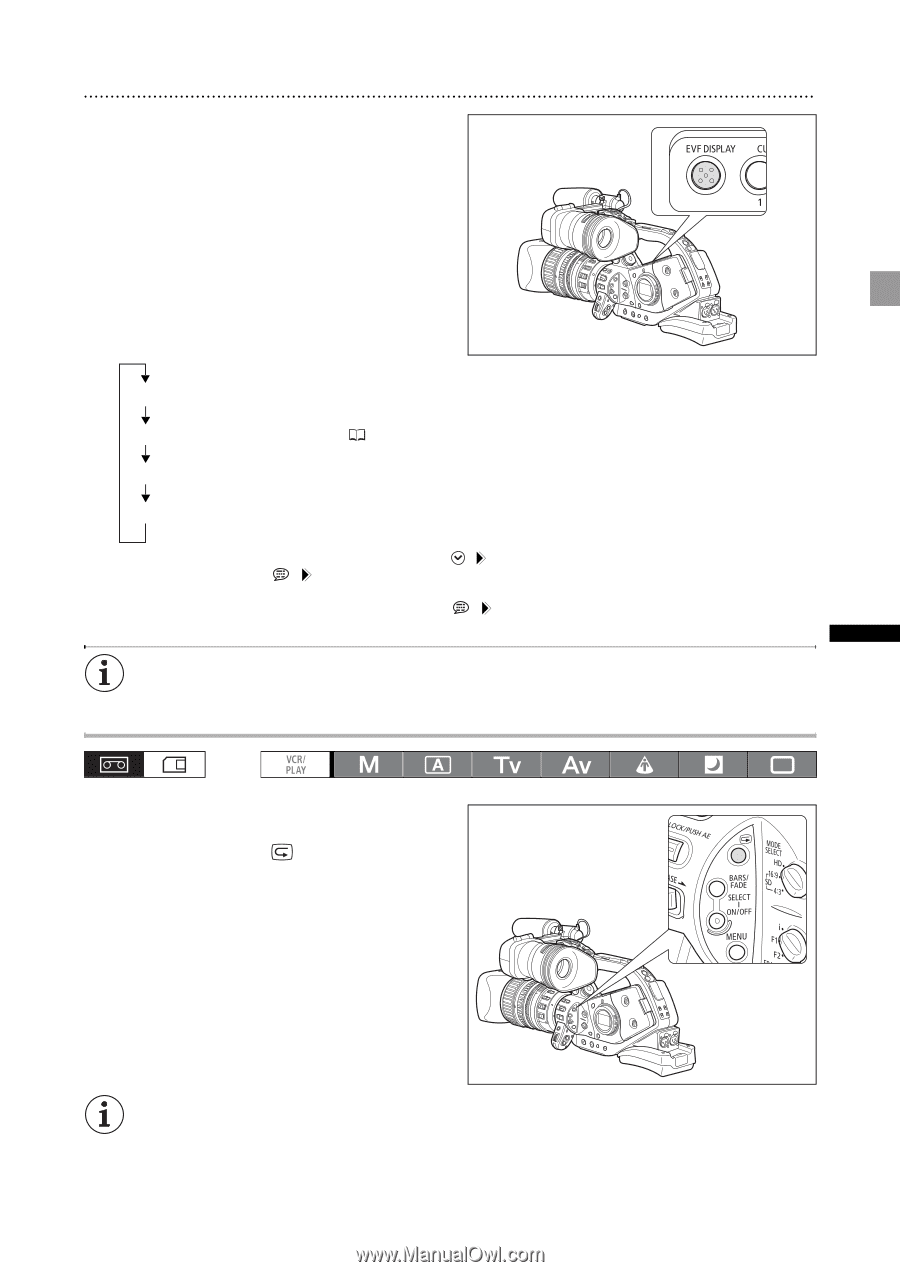
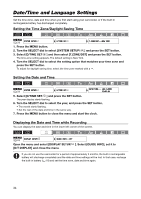
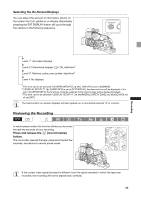
Selecting the On-Screen Displays You can select the amount of information shown on the screen from full, partial or no display. Repeatedly pressing the EVF DISPLAY button will cycle through the options in the following sequence. Level 11: All screen displays Level 2: Customized displays ( 110), date/time2 Level 33: Markers, safety zone guides, date/time2 Level 4: No displays 1 This level cannot be selected if [SYSTEM SETUP/ ] [ALL DISPLAY] is set to [DISABLE]. 2 If [DISPLAY SETUP/ ] [GUIDE INFO] is set to [D/T DISPLAY], the date and time will be displayed; if it is set to [CUSTOM KEYS], the functions currently assigned to the custom keys will be displayed instead. 3 This level cannot be selected if [DISPLAY SETUP/ ] [MARKERS], [SAFETY ZONE] and [GUIDE INFO] are all set [OFF]. The camcorder's on-screen displays will also appear on a connected external TV or monitor. Reviewing the Recording In record pause mode, this function allows you to review the last few seconds of your recording. Press and release the (record review) button. The camcorder rewinds the tape, plays back the last few seconds, and returns to record pause mode. If the current video signal standard is different from the signal standard in which the tape was recorded, the recording will not be played back correctly. 39 Recording
-
 1
1 -
2
-
3
-
4
-
5
-
6
-
7
-
8
-
9
-
10
-
11
-
12
-
13
-
14
-
15
-
16
-
17
-
18
-
19
-
20
-
21
-
22
-
23
-
24
-
25
-
26
-
27
-
28
-
29
-
30
-
31
-
32
-
33
-
 34
34 -
 35
35 -
 36
36 -
 37
37 -
 38
38 -
 39
39 -
 40
40 -
 41
41 -
 42
42 -
 43
43 -
 44
44 -
45
-
46
-
47
-
48
-
49
-
50
-
51
-
52
-
53
-
54
-
55
-
56
-
57
-
58
-
59
-
60
-
61
-
62
-
63
-
64
-
65
-
66
-
67
-
68
-
69
-
70
-
71
-
72
-
73
-
74
-
75
-
76
-
77
-
78
-
79
-
80
-
81
-
82
-
83
-
84
-
85
-
86
-
87
-
88
-
89
-
90
-
91
-
92
-
93
-
94
-
95
-
96
-
97
-
98
-
99
-
100
-
101
-
102
-
103
-
104
-
105
-
106
-
107
-
108
-
109
-
110
-
111
-
112
-
113
-
114
-
115
-
116
-
117
-
118
-
119
-
120
-
121
-
122
-
123
-
124
-
125
-
126
-
127
-
128
-
129
-
130
-
131
-
132
-
133
-
134
-
135
-
136
-
137
-
138
-
139
-
140
-
141
-
142
-
143
-
144
-
145
-
146
-
147
-
148
-
149
-
150
-
151
-
152
-
153
-
154
-
155
-
156
-
157
-
158
-
159
-
160
-
161
-
162
-
163
 |
 |