Canon Color imageCLASS MF8050Cn imageCLASS MF8050Cn Starter Guide - Page 11
Performing Color Correction
 |
View all Canon Color imageCLASS MF8050Cn manuals
Add to My Manuals
Save this manual to your list of manuals |
Page 11 highlights
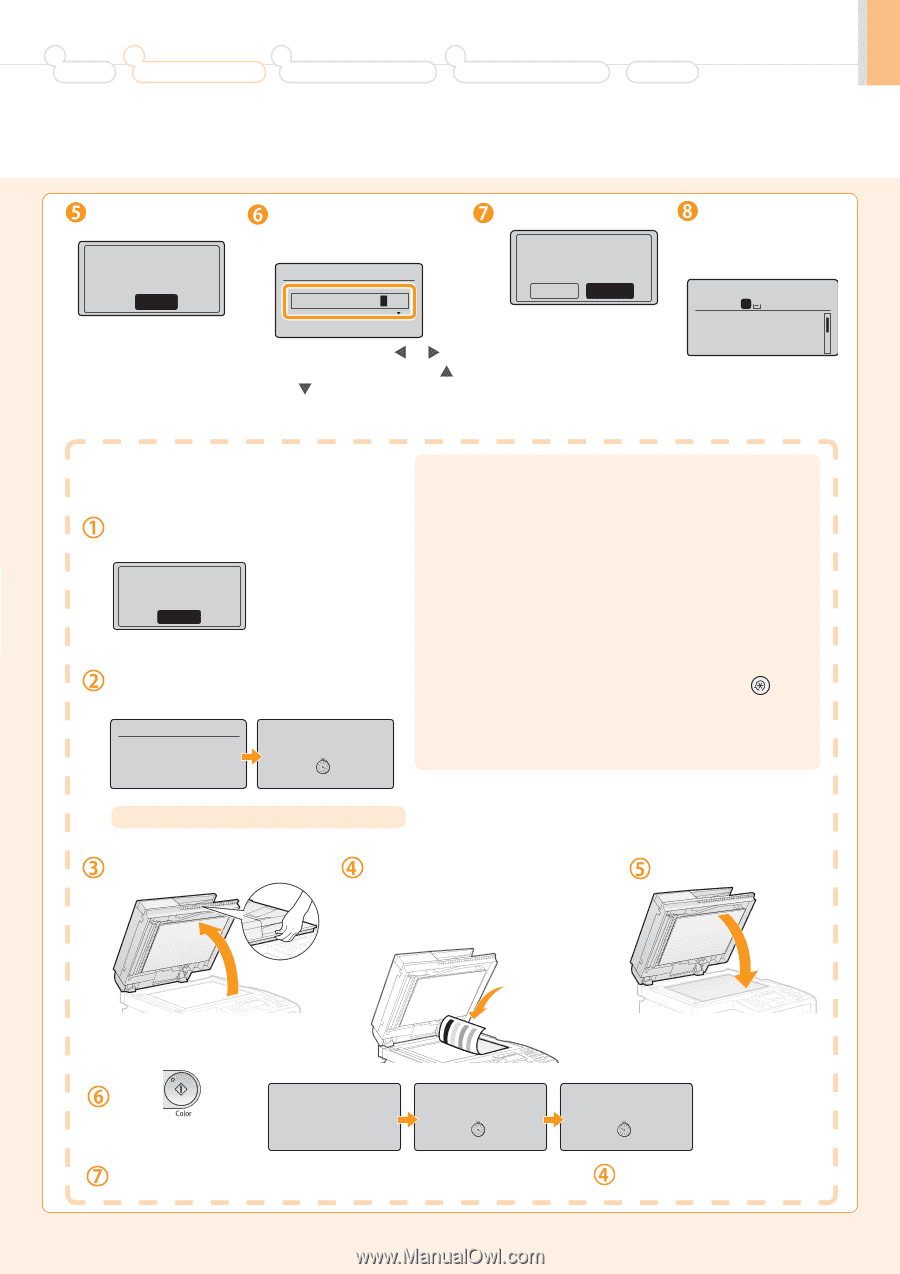
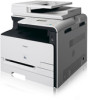
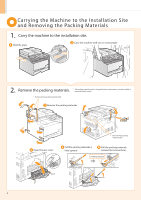
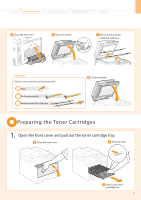
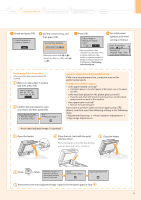
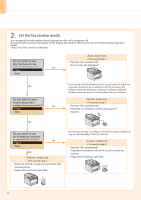
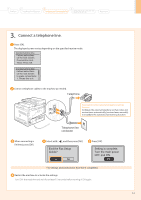
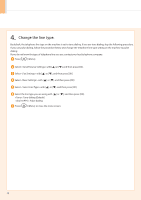
1 Preface 2 Installing the Machine 3 Configuring and Connecting the Fax 4 Connecting to a Computer and Installing the Drivers Appendix Check and press [OK]. Check that paper is loaded in Drawer 1. Next Use the numeric keys, and then press [OK]. Current Time Settings 2010 01/01 12:52 AM • Move the cursor with [ ] or [ ]. • Switch to or with [ ] or [ ]. Press [OK]. Adjust image to reproduce original color? Yes No • You can perform color correction by selecting to obtain optimum copy results or printout results. For details on the procedure, see the following "Performing Color Correction." An initial screen appears, and initial setting is finished. 1 Copy: Press Start 100% 1 LTR Density: +- 0 Original Type: Text... Copy Ratio: 100% Di... Performing Color Correction Color correction takes approximately 255 seconds. Make sure that paper is loaded, and then press [OK]. Supported paper: Size: A4, LTR, 16K Type: Plain 1/2, Rec OK Confirm the procedure for color correction, and then press [OK]. Steps (Start:Press OK) 1. Print Adj. Image 1 2. Scan Adj. Image 1 Step 1 Printing adj. image 1. Check the temperature of the installation site. If the room temperature is low, correction may not be performed properly. If appears • Is the paper loaded correctly? → Load plain paper or recycled paper of A4/Letter size in the paper cassette. • Is the test chart placed on the platen glass correctly? → Place the test chart with the print side face down and the black stripe toward the back of the machine. • Has a paper jam occurred? → Remove the jammed paper. If you want to perform color correction again, press [ ] (Menu), and then select the following settings in the following order. → → A test chart (adjusted image 1) is printed. Open the feeder. Place the test chart with the print side face down. Place the paper so that the black stripe is at the back side of the machine. Close the feeder. Press [ ] (Start). Place adj. image 1 on the glass with black side toward the back. Press [Color] start. Step 2 Scanning adj. image 1. Copy Image Adjustment Remove the test chart (adjusted image 1) placed on the platen glass in Step . 9
-
 1
1 -
2
-
3
-
4
-
5
-
 6
6 -
 7
7 -
 8
8 -
 9
9 -
 10
10 -
 11
11 -
 12
12 -
 13
13 -
 14
14 -
 15
15 -
 16
16 -
17
-
18
-
19
-
20
-
21
-
22
-
23
-
24
-
25
-
26
-
27
-
28
-
29
-
30
-
31
-
32
 |
 |