Canon EOS 1D Mark III User Guide - Page 24
Remote Live View Mode, Focusing, Metering and Exposure
 |
UPC - 013803078220
View all Canon EOS 1D Mark III manuals
Add to My Manuals
Save this manual to your list of manuals |
Page 24 highlights
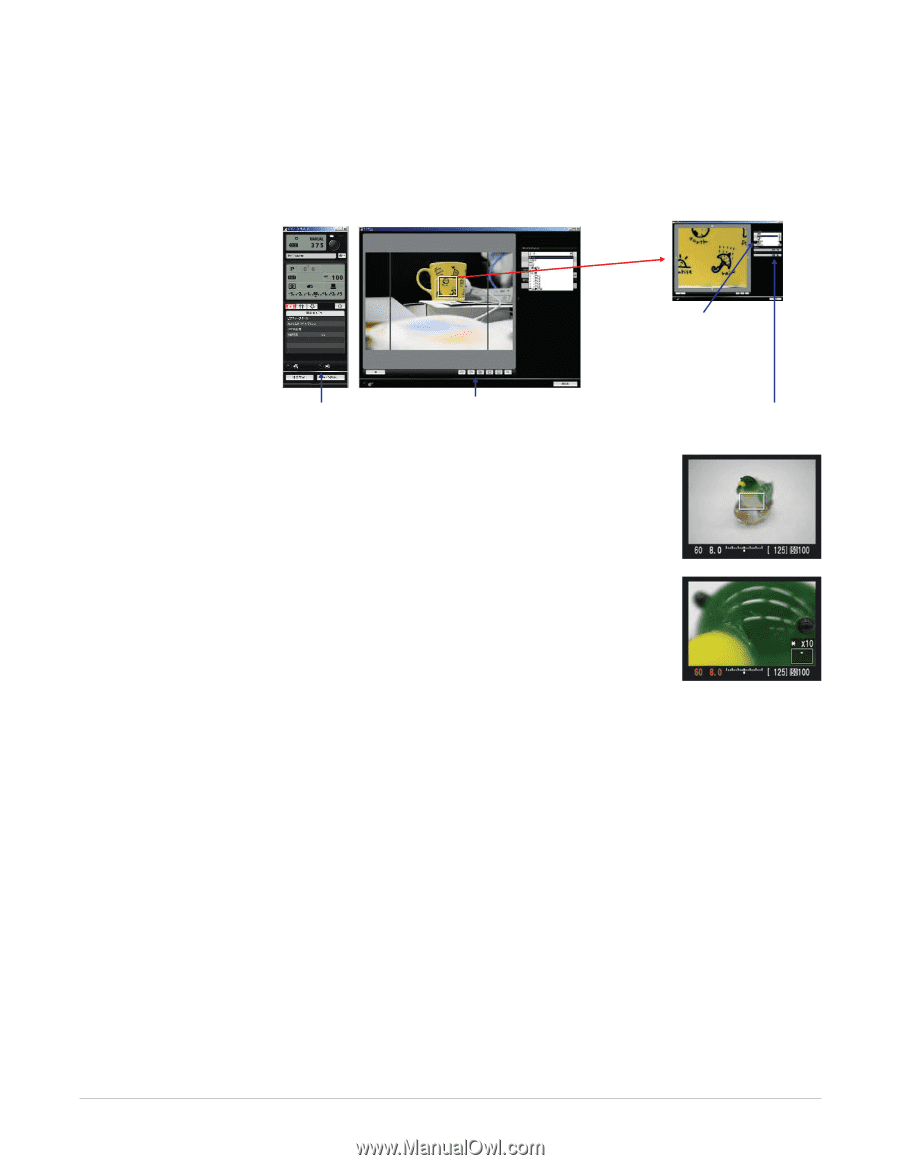
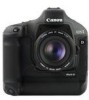
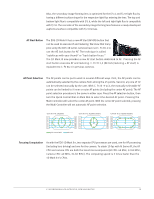
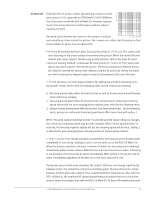
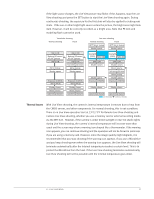
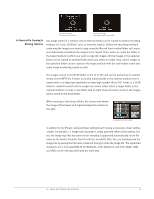
Remote Live View Mode Remote Live View Mode is controlled through EOS Utility 2.0 (a major upgrade from version 1.1), included on the EOS Digital Solution Disk Ver.14. The camera can be connected either wired with the provided USB 2.0 Hi-Speed cable, or wirelessly with the WFT-E2A. To get started, the camera must be set to Live View. Then, click the [Starting Live View] button on the Remote Live View screen. Magnified view (Displayed in a separate window centering on the AF point.) • White balance select button Select the WB from a list. Click on "Apply to camera" to apply the setting to the camera. • Focus the setting to the camera. • Depth-of-field preview button Live View Start Button Rotate image left or right, grid display, aspect ratio, histogram, and magnify buttons Display mode button Focusing Focusing is manual only with Live View. Use the Multi-Controller to select the AF point aimed over the area you want to focus, then press the Magnify button to enlarge the image by 5x or 10x at the AF point's position. Press the button again to return to normal view. At 5x or 10x magnification, you can focus manually while looking at the LCD monitor. To make it easier to focus Live View enabled during the magnified view, image sharpness is applied at a higher setting than it really is. Pressing the depth-of-field preview button stops down to the aperture which will be used to take the picture. It will simulate the shooting exposure and you can check both the exposure with 10x Magnification level and depth of field. If you use depth-of-field preview during regular viewfinder shooting, the viewfinder will look dark and it may be difficult to see the depth of field. However, with Live View shooting, a clever simulation is displayed so checking the depth of field is easier as long as the exposure setting is near the metering's correct exposure. Metering and Exposure Evaluative metering with the imaging element is used. The metering mode cannot be changed. The metering range is EV 0 to EV 20 (at 23°C/73°F, with EF 50mm f/1.4 USM lens). Any shooting mode and drive mode can be used. Also, AE lock, exposure compensation, AEB, and depth-of-field preview are possible. During magnified view, AE lock is automatically applied to the meter reading for the entire image. If C. Fn IV -16 [Live View exposure simulation] is set to [1: Enable (simulates exposure)] and the shooting mode is P, Tv, Av, or M, then the LCD monitor's brightness will change in response to the exposure setting so you can see how the exposure will look before you take the picture. When you press the shutter button completely, the opened shutter will close; the shutter will be cocked and released, and the picture will be taken. VI. LIVE VIEW MODE 24
-
 1
1 -
2
-
3
-
4
-
5
-
6
-
7
-
8
-
9
-
10
-
11
-
12
-
13
-
14
-
15
-
16
-
17
-
18
-
 19
19 -
 20
20 -
 21
21 -
 22
22 -
 23
23 -
 24
24 -
 25
25 -
 26
26 -
 27
27 -
 28
28 -
 29
29 -
30
-
31
-
32
-
33
-
34
-
35
-
36
-
37
-
38
-
39
-
40
-
41
-
42
-
43
-
44
-
45
-
46
-
47
-
48
-
49
-
50
-
51
-
52
-
53
-
54
-
55
-
56
-
57
-
58
-
59
-
60
-
61
-
62
-
63
 |
 |