Canon EOS 70D Instruction Manual - Page 27
Connect to the camera., Perform further settings., Save the settings.
 |
View all Canon EOS 70D manuals
Add to My Manuals
Save this manual to your list of manuals |
Page 27 highlights
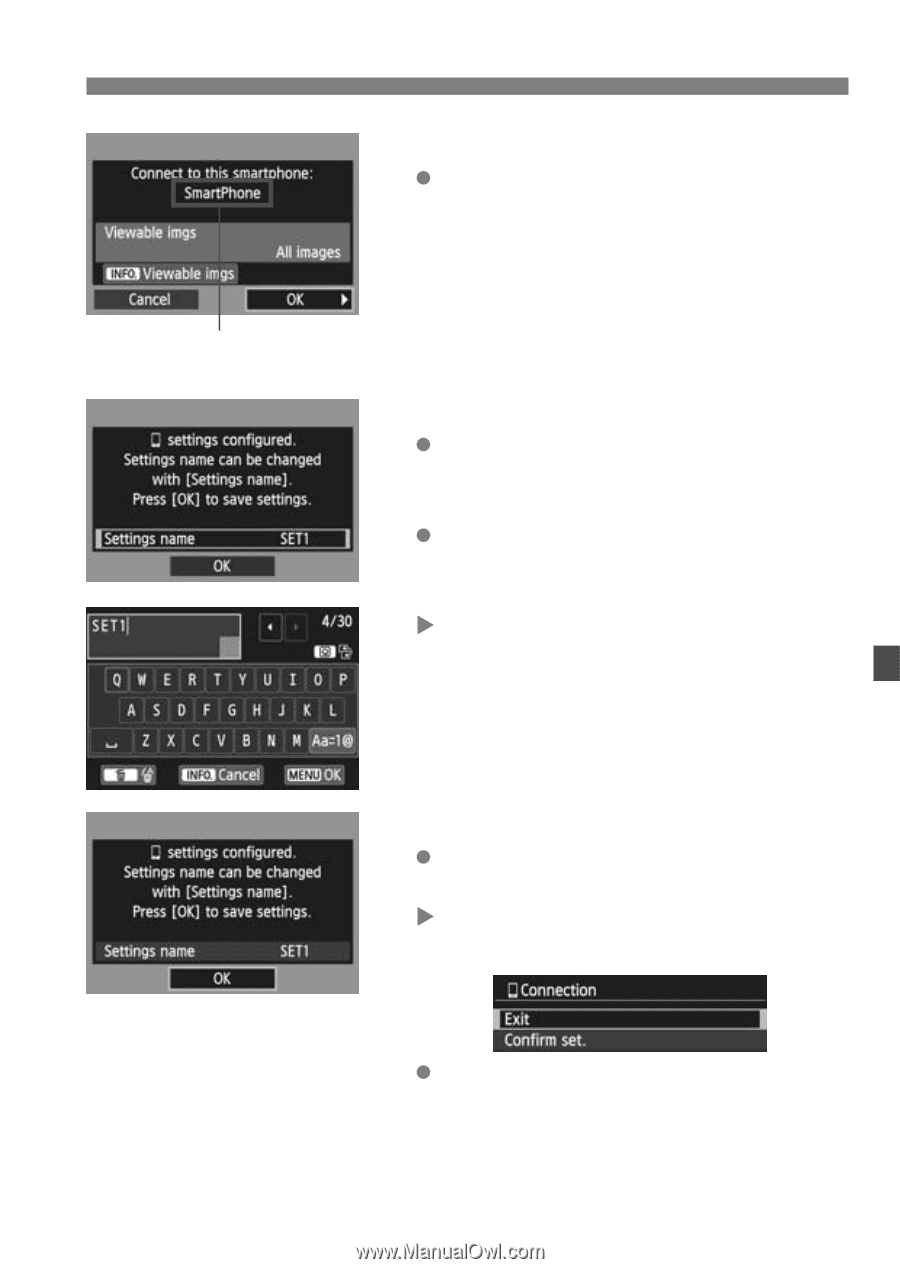
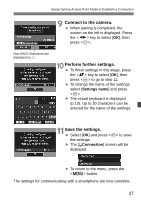
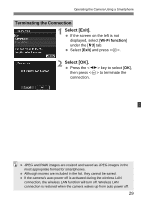
Using Camera Access Point Mode to Establish a Connection 9 Connect to the camera. When pairing is completed, the screen on the left is displayed. Press the key to select [OK], then press . Non-ASCII characters are displayed as 8. 10 Perform further settings. To finish settings in this stage, press the key to select [OK], then press to go to step 11. To change the name of the settings, select [Settings name] and press . X The virtual keyboard is displayed (p.10). Up to 30 characters can be entered for the name of the settings. 11Save the settings. Select [OK] and press to save the settings. X The [qConnection] screen will be displayed. To return to the menu, press the button. The settings for communicating with a smartphone are now complete. 27
-
 1
1 -
2
-
3
-
4
-
5
-
6
-
7
-
8
-
9
-
10
-
11
-
12
-
13
-
14
-
15
-
16
-
17
-
18
-
19
-
20
-
21
-
 22
22 -
 23
23 -
 24
24 -
 25
25 -
 26
26 -
 27
27 -
 28
28 -
 29
29 -
 30
30 -
 31
31 -
 32
32 -
33
-
34
-
35
-
36
 |
 |