Canon MultiPASS F80 MultiPASS F80 Basic Guide - Page 52
Press [Set] twice.
 |
View all Canon MultiPASS F80 manuals
Add to My Manuals
Save this manual to your list of manuals |
Page 52 highlights
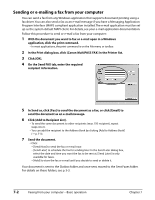
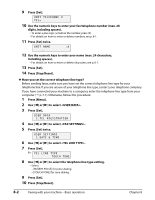
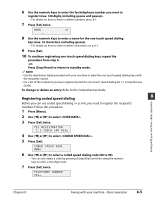
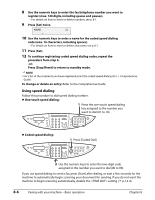
9 Press [Set]. UNIT TELEPHONE # TEL= 10 Use the numeric keys to enter your fax/telephone number (max. 20 digits, including spaces). • To enter a plus sign (+) before the number, press [#]. • For details on how to enter or delete numbers, see p. 8-1. 11 Press [Set] twice. UNIT NAME :A _ 12 Use the numeric keys to enter your name (max. 24 characters, including spaces). • For details on how to enter or delete characters, see p. 8-1. 13 Press [Set]. 14 Press [Stop/Reset]. Have you set the correct telephone line type? Before sending faxes, make sure you have set the correct telephone line type for your telephone line. If you are unsure of your telephone line type, contact your telephone company. If you have connected your machine to a computer, enter the telephone line type from your computer ( p. 7-1). Otherwise, follow this procedure: 1 Press [Menu]. 2 Use [2] or [3] to select . 3 Press [Set]. USER DATA 1.TEL REGISTRATION 4 Use [2] or [3] to select . 5 Press [Set] twice. USER SETTINGS 1.DATE & TIME 6 Use [2] or [3] to select . 7 Press [Set]. Ex: T E L L I N E T Y P E TOUCH TONE 8 Use [2] or [3] to select the telephone line type setting. • Select: - [ROTARY PULSE] for pulse dialing. - [TOUCH TONE] for tone dialing. 9 Press [Set]. 10 Press [Stop/Reset]. 8-2 Faxing with your machine-Basic operation Chapter 8
-
 1
1 -
2
-
3
-
4
-
5
-
6
-
7
-
8
-
9
-
10
-
11
-
12
-
13
-
14
-
15
-
16
-
17
-
18
-
19
-
20
-
21
-
22
-
23
-
24
-
25
-
26
-
27
-
28
-
29
-
30
-
31
-
32
-
33
-
34
-
35
-
36
-
37
-
38
-
39
-
40
-
41
-
42
-
43
-
44
-
45
-
46
-
 47
47 -
 48
48 -
 49
49 -
 50
50 -
 51
51 -
 52
52 -
 53
53 -
 54
54 -
 55
55 -
 56
56 -
 57
57 -
58
-
59
-
60
-
61
-
62
-
63
-
64
-
65
-
66
-
67
-
68
-
69
-
70
-
71
-
72
-
73
-
74
-
75
-
76
-
77
-
78
-
79
-
80
-
81
-
82
-
83
-
84
-
85
-
86
-
87
-
88
-
89
-
90
-
91
-
92
-
93
-
94
-
95
-
96
-
97
-
98
-
99
-
100
-
101
-
102
-
103
-
104
-
105
-
106
-
107
-
108
-
109
-
110
-
111
-
112
-
113
-
114
-
115
 |
 |