Canon MultiPASS F80 MultiPASS F80 Basic Guide - Page 53
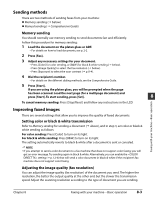
Sending methods, Improving faxed images
 |
View all Canon MultiPASS F80 manuals
Add to My Manuals
Save this manual to your list of manuals |
Page 53 highlights
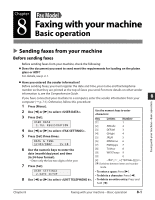
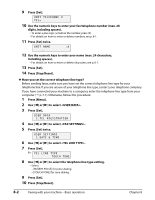
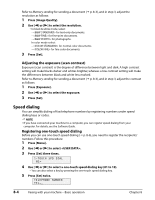
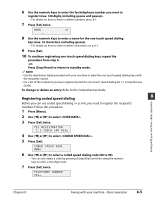
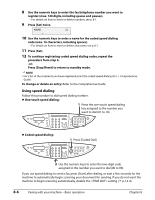
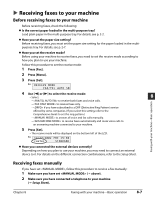
Sending methods There are two methods of sending faxes from your machine: Memory sending ( below) Manual sending ( Comprehensive Guide) Memory sending You should normally use memory sending to send documents fast and efficiently. Follow this procedure for memory sending: 1 Load the document on the platen glass or ADF. • For details on how to load documents, see p. 2-2. 2 Press [Fax]. 3 Adjust any necessary settings for your document. • Press [Color] for color sending, or [B&W] for black & white sending ( below). • Press [Image Quality] to select the fax resolution ( below). • Press [Exposure] to select the scan contrast ( p. 8-4). 4 Dial the recipient's number. • For details on the different dialing methods, see the Comprehensive Guide. 5 Press [Start]. If you are using the platen glass, you will be prompted when the page has been scanned. Load the next page (for a multipage document) and press [Start]. To start sending, press [Set]. 8 To cancel memory sending: Press [Stop/Reset] and follow any instructions in the LCD. Faxing with your machine-Basic operation Improving faxed images There are several settings that allow you to improve the quality of faxed documents. Setting color or black & white transmission Refer to Memory sending for sending a document ( above), and in step 3, set color or black & white sending as follows: For color sending: Press [Color] to turn on its light. For black & white sending: Press [B&W] to turn on its light. The setting automatically reverts to black & white after a document is sent or canceled. NOTE • If you attempt to send a color document to a fax machine that does not support color faxing, you will get an error message. Try sending again in black & white. Alternatively, you can enable the setting ( p. 12-4) that will send a color document in black & white if the recipient's fax machine does not support color faxing. Adjusting the image quality (fax resolution) You can adjust the image quality (fax resolution) of the document you send. The higher the resolution, the better the output quality at the other end, but the slower the transmission speed. Adjust the scanning resolution according to the type of document you are sending. Chapter 8 Faxing with your machine-Basic operation 8-3
-
 1
1 -
2
-
3
-
4
-
5
-
6
-
7
-
8
-
9
-
10
-
11
-
12
-
13
-
14
-
15
-
16
-
17
-
18
-
19
-
20
-
21
-
22
-
23
-
24
-
25
-
26
-
27
-
28
-
29
-
30
-
31
-
32
-
33
-
34
-
35
-
36
-
37
-
38
-
39
-
40
-
41
-
42
-
43
-
44
-
45
-
46
-
47
-
 48
48 -
 49
49 -
 50
50 -
 51
51 -
 52
52 -
 53
53 -
 54
54 -
 55
55 -
 56
56 -
 57
57 -
 58
58 -
59
-
60
-
61
-
62
-
63
-
64
-
65
-
66
-
67
-
68
-
69
-
70
-
71
-
72
-
73
-
74
-
75
-
76
-
77
-
78
-
79
-
80
-
81
-
82
-
83
-
84
-
85
-
86
-
87
-
88
-
89
-
90
-
91
-
92
-
93
-
94
-
95
-
96
-
97
-
98
-
99
-
100
-
101
-
102
-
103
-
104
-
105
-
106
-
107
-
108
-
109
-
110
-
111
-
112
-
113
-
114
-
115
 |
 |
