Canon MultiPASS MP390 MultiPASS MP390 Set-Up Sheet - Page 1
Canon MultiPASS MP390 Manual
 |
View all Canon MultiPASS MP390 manuals
Add to My Manuals
Save this manual to your list of manuals |
Page 1 highlights
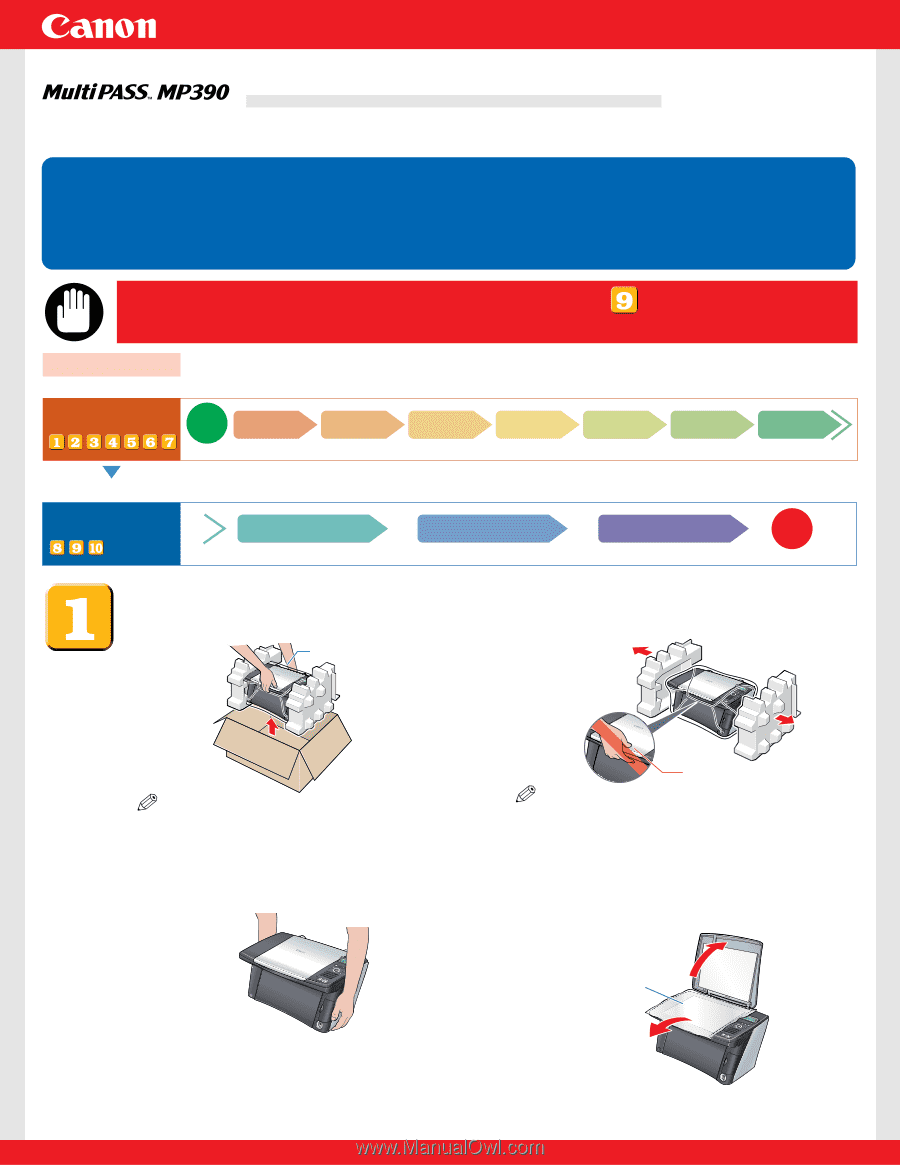
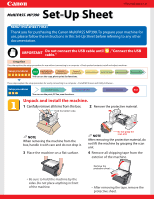
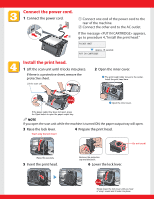
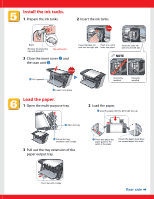
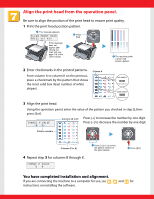
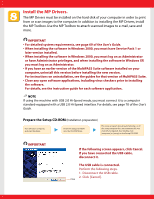
Set-Up Sheet HT3-2145-000-V.1.0 READ THIS SHEET FIRST Thank you for purchasing the Canon MultiPASS MP390. To prepare your machine for use, please follow the instructions in this Set-Up Sheet before referring to any other documentation. IMPORTANT Do not connect the USB cable until cable." , "Connect the USB Setup flow This side explains the setup procedure for use without connecting to a computer. Setup procedures Start Unpack and install Connect the machine telephone line Connect power cord You can use the copy, photo print, fax functions. Install print head Install ink tanks Load print media Align print head These steps explain the setup procedure for use by connecting to a computer. Setup procedures Install MP Drivers Connect USB cable You can use the print, PC fax, scan functions. Install Utility Software End Unpack and install the machine. 1 Carefully remove all items from the box. 2 Remove the protective material. Hold the bottom side. NOTE When removing the machine from the box, handle it with care and do not drop it. 3 Place the machine on a flat surface. NOTE Do not grasp the scan unit. After removing the protective material, do not lift the machine by grasping the scan unit. 4 Remove all shipping tape from the exterior of the machine. Remove the protective sheet. • Be sure to hold the machine by the sides. Do not place anything in front of the machine. • After removing the tape, remove the protective sheet.
-
 1
1 -
 2
2 -
 3
3 -
 4
4 -
 5
5 -
 6
6 -
 7
7 -
8
 |
 |