Canon MultiPASS MP390 MultiPASS MP390 Set-Up Sheet - Page 4
Install the ink tanks., Load the paper.
 |
View all Canon MultiPASS MP390 manuals
Add to My Manuals
Save this manual to your list of manuals |
Page 4 highlights
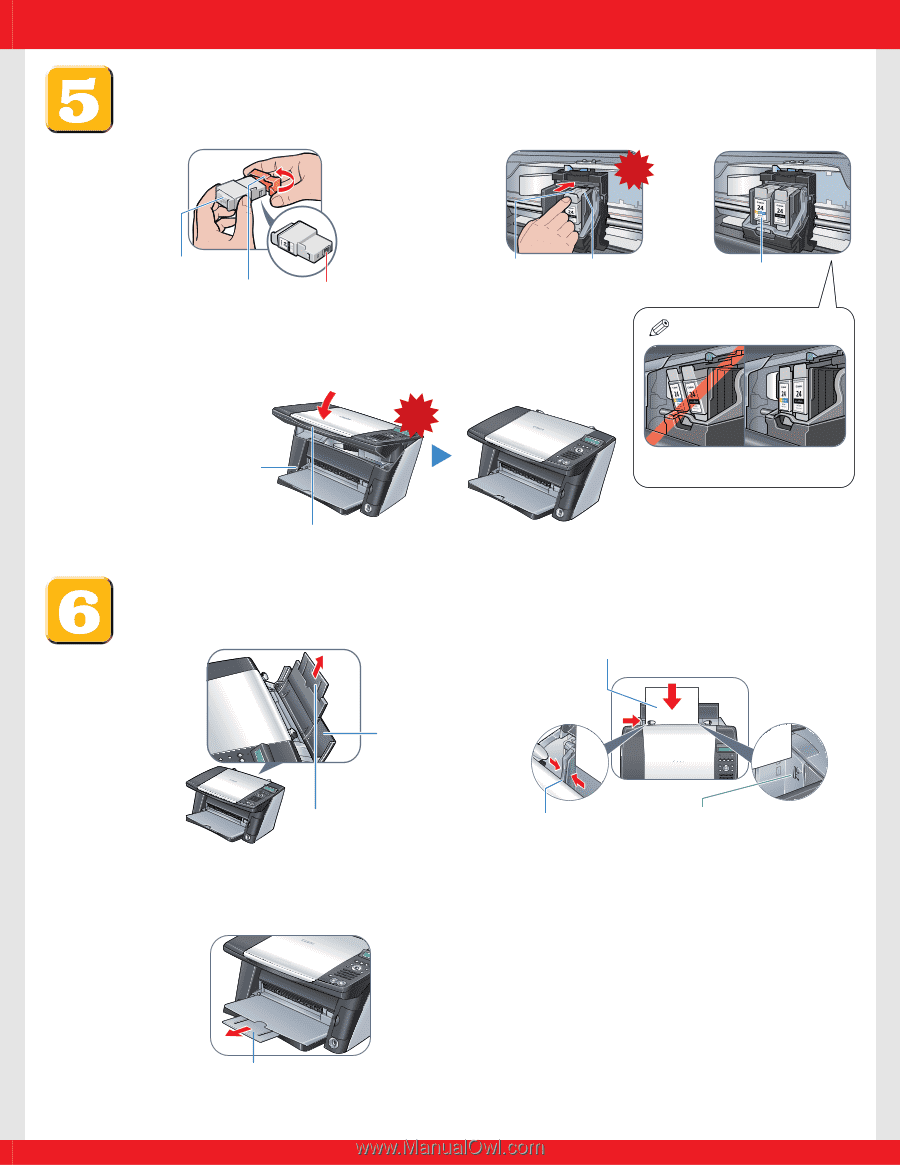
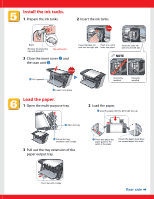
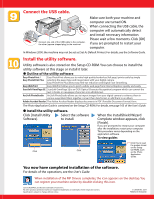
Install the ink tanks. 1 Prepare the ink tanks. 2 Insert the ink tanks. Click Black Remove the protective cap and discard it. Do not touch! 3 Close the inner cover q and the scan unit w. Insert the black ink Push it in until it tank into the right slot. locks into place. Insert the color ink tank into the left slot. NOTE Click q Lift it upward. Incorrectly installed Correctly installed w Lower it into place. Load the paper. 1 Open the multi-purpose tray. 2 Load the paper. q Load the paper with the print side face up. q Open the tray. w Pull up the tray extension until it stops. 3 Pull out the tray extension of the paper output tray. w Pinch and adjust the paper guide to the width of the stack. Ensure the paper stack does not exceed paper limit mark. Pull it out until it stops. Rear side a
-
 1
1 -
 2
2 -
 3
3 -
 4
4 -
 5
5 -
 6
6 -
 7
7 -
 8
8
 |
 |