Canon PowerShot A2500 Black User Guide - Page 35
Configure the setting. - friday ads
 |
View all Canon PowerShot A2500 Black manuals
Add to My Manuals
Save this manual to your list of manuals |
Page 35 highlights
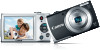
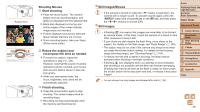
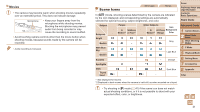
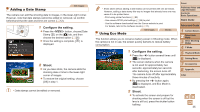
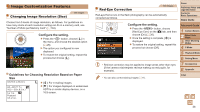
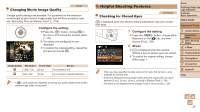
Adding a Date Stamp Still Images The camera can add the shooting date to images, in the lower-right corner. However, note that date stamps cannot be edited or removed, so confirm beforehand that the date and time are correct (=12). 1 Configure the setting. zzPress the button, choose [Date Stamp ] on the [4] tab, and then choose the desired option (=26). XXOnce the setting is complete, [ ] is displayed. 2 Shoot. XXAs you take shots, the camera adds the shooting date or time to the lower-right corner of images. zzTo restore the original setting, choose [Off] in step 1. • Date stamps cannot be edited or removed. • Shots taken without adding a date stamp can be printed with one as follows. However, adding a date stamp this way to images that already have one may cause it to be printed twice. - Print using printer functions (=83) - Use camera DPOF print settings (=86) to print - Use the software downloaded from the Canon website to print For details, refer to the Software Guide (=17). Using Eco Mode Still Images Movies This function allows you to conserve battery power in Shooting mode. When the camera is not in use, the screen quickly darkens to reduce battery consumption. 1 Configure the setting. zzPress the button several times until [ ] is displayed. XXThe screen darkens when the camera is not used for approximately two seconds; approximately ten seconds after darkening, the screen turns off. The camera turns off after approximately three minutes of inactivity. zzBy pressing the button again, [ ] is displayed, and Eco Mode is deactivated. 2 Shoot. zzTo activate the screen and prepare for shooting when the screen is off but the lens is still out, press the shutter button halfway. Cover Preliminary Notes and Legal Information Contents: Basic Operations Basic Guide Advanced Guide 1 Camera Basics 2 Smart Auto Mode 3 Other Shooting Modes 4 P Mode 5 Playback Mode 6 Setting Menu 7 Accessories 8 Appendix Index 35
-
 1
1 -
2
-
3
-
4
-
5
-
6
-
7
-
8
-
9
-
10
-
11
-
12
-
13
-
14
-
15
-
16
-
17
-
18
-
19
-
20
-
21
-
22
-
23
-
24
-
25
-
26
-
27
-
28
-
29
-
 30
30 -
 31
31 -
 32
32 -
 33
33 -
 34
34 -
 35
35 -
 36
36 -
 37
37 -
 38
38 -
 39
39 -
 40
40 -
41
-
42
-
43
-
44
-
45
-
46
-
47
-
48
-
49
-
50
-
51
-
52
-
53
-
54
-
55
-
56
-
57
-
58
-
59
-
60
-
61
-
62
-
63
-
64
-
65
-
66
-
67
-
68
-
69
-
70
-
71
-
72
-
73
-
74
-
75
-
76
-
77
-
78
-
79
-
80
-
81
-
82
-
83
-
84
-
85
-
86
-
87
-
88
-
89
-
90
-
91
-
92
-
93
-
94
-
95
-
96
-
97
-
98
-
99
-
100
-
101
-
102
-
103
-
104
-
105
-
106
-
107
-
108
-
109
 |
 |