Canon PowerShot SX100 IS PowerShot SX 100 IS Camera User Guide - Page 25
Turn on the printer., Press the camera's, Playback button to turn on the, camera., Use the, button
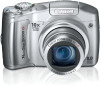 |
View all Canon PowerShot SX100 IS manuals
Add to My Manuals
Save this manual to your list of manuals |
Page 25 highlights
Getting Started 2. Turn on the printer. 3. Press the camera's (Playback) button to turn on the camera. • The button will light blue. • A , or icon will appear in the LCD monitor if the connection is correct (the displayed icons differ according to the connected printer). • will display on movies. Printing 23 4. Use the or button to select an image to print and press the button. • The button will blink blue and printing will start. • You can also select an image by turning the control dial. After you finish printing, turn off the camera and the printer and disconnect the interface cable. Always grasp the sides of the connector when disconnecting the interface cable from the camera's DIGITAL terminal.
-
 1
1 -
2
-
3
-
4
-
5
-
6
-
7
-
8
-
9
-
10
-
11
-
12
-
13
-
14
-
15
-
16
-
17
-
18
-
19
-
 20
20 -
 21
21 -
 22
22 -
 23
23 -
 24
24 -
 25
25 -
 26
26 -
 27
27 -
 28
28 -
 29
29 -
 30
30 -
31
-
32
-
33
-
34
-
35
-
36
-
37
-
38
-
39
-
40
-
41
-
42
-
43
-
44
-
45
-
46
-
47
-
48
-
49
-
50
-
51
-
52
-
53
-
54
-
55
-
56
-
57
-
58
-
59
-
60
-
61
-
62
-
63
-
64
-
65
-
66
-
67
-
68
-
69
-
70
-
71
-
72
-
73
-
74
-
75
-
76
-
77
-
78
-
79
-
80
-
81
-
82
-
83
-
84
-
85
-
86
-
87
-
88
-
89
-
90
-
91
-
92
-
93
-
94
-
95
-
96
-
97
-
98
-
99
-
100
-
101
-
102
-
103
-
104
-
105
-
106
-
107
-
108
-
109
-
110
-
111
-
112
-
113
-
114
-
115
-
116
-
117
-
118
-
119
-
120
-
121
-
122
-
123
-
124
-
125
-
126
-
127
-
128
-
129
-
130
-
131
-
132
-
133
-
134
-
135
-
136
-
137
-
138
-
139
-
140
-
141
-
142
-
143
-
144
-
145
-
146
-
147
-
148
-
149
-
150
-
151
-
152
-
153
-
154
-
155
-
156
-
157
-
158
-
159
-
160
-
161
-
162
-
163
-
164
-
165
-
166
-
167
-
168
-
169
-
170
-
171
-
172
-
173
-
174
-
175
-
176
-
177
-
178
-
179
-
180
-
181
-
182
-
183
-
184
-
185
-
186
-
187
-
188
-
189
-
190
-
191
-
192
-
193
-
194
-
195
-
196
-
197
-
198
-
199
-
200
-
201
-
202
-
203
-
204
-
205
-
206
-
207
-
208
-
209
-
210
-
211
-
212
-
213
-
214
-
215
-
216
-
217
-
218
-
219
-
220
-
221
-
222
-
223
-
224
-
225
-
226
-
227
 |
 |

Printing
23
Getting Started
2.
Turn on the printer.
3.
Press the camera’s
(Playback) button to turn on the
camera.
• The
button will light blue.
• A
,
or
icon will appear in the
LCD monitor if the connection is
correct (the displayed icons differ
according to the connected printer).
•
will display on movies.
4.
Use the
or
button to select an image to print and
press the
button.
• The
button will blink blue and printing will start.
• You can also select an image by turning the control dial.
After you finish printing, turn off the camera and the printer and
disconnect the interface cable.
Always grasp the sides of the connector when disconnecting
the interface cable from the camera’s DIGITAL terminal.