Canon SELPHY CP730 SELPHY CP730/CP720 Printer User Guide Macintosh - Page 21
Trimming Settings (CP730 Only), Press the, button., buttons to adjust the size of the print, area.
 |
View all Canon SELPHY CP730 manuals
Add to My Manuals
Save this manual to your list of manuals |
Page 21 highlights
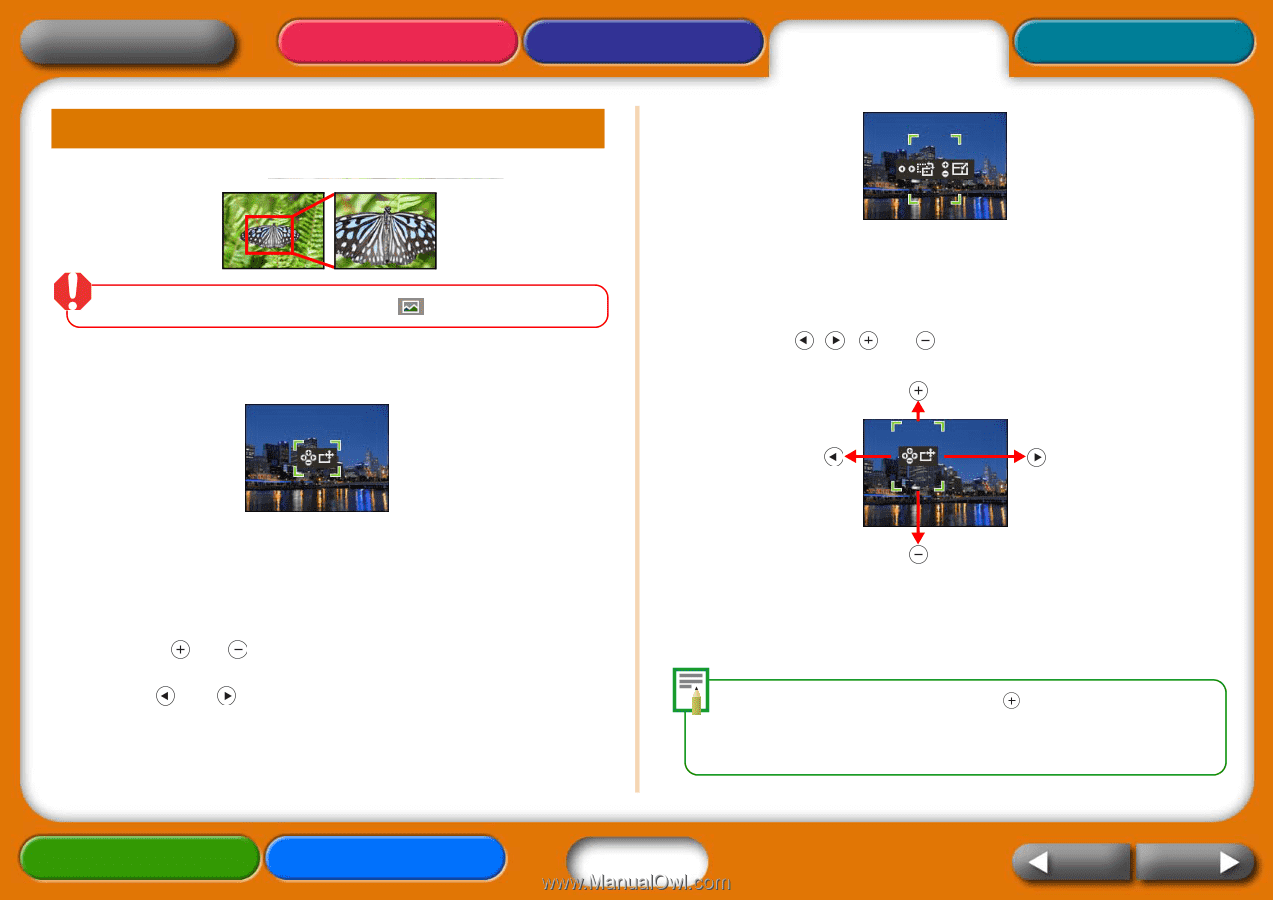
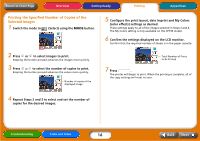
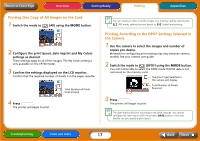
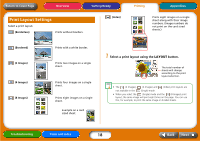
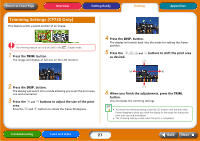
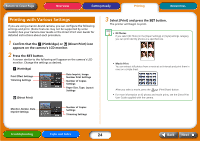
Return to Cover Page Overview Getting Ready Printing Appendices Trimming Settings (CP730 Only) This feature prints a select portion of an image. The trimming feature can only be used in the (Single) mode. 1 Press the TRIM. button. The image will display at full size on the LCD monitor. 4 Press the DISP. button. The display will switch back into the mode for setting the frame position. 5 Press the , , and buttons to shift the print area as desired. 2 Press the DISP. button. The display will switch into a mode allowing you to set the print area size and orientation. 3 Press the and buttons to adjust the size of the print area. Press the and buttons to rotate the frame 90 degrees. 6 When you finish the adjustments, press the TRIM. button. This concludes the trimming settings. • To cancel the trimming setting, press the button until the print area frame disappears when you have the display in the mode for setting the print area size and orientation. • The trimming setting is reset when the print is completed. Troubleshooting Tasks and Index 21 Back Next
-
 1
1 -
2
-
3
-
4
-
5
-
6
-
7
-
8
-
9
-
10
-
11
-
12
-
13
-
14
-
15
-
 16
16 -
 17
17 -
 18
18 -
 19
19 -
 20
20 -
 21
21 -
 22
22 -
 23
23 -
 24
24 -
 25
25 -
 26
26 -
27
-
28
-
29
-
30
-
31
-
32
-
33
-
34
-
35
-
36
-
37
-
38
-
39
-
40
-
41
-
42
-
43
-
44
-
45
-
46
-
47
-
48
-
49
-
50
-
51
 |
 |