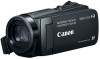
Canon VIXIA HF W10 HF W11 User Manual
Canon VIXIA HF W10 Manual
 |
View all Canon VIXIA HF W10 manuals
Add to My Manuals
Save this manual to your list of manuals |
Canon VIXIA HF W10 manual content summary:
- Canon VIXIA HF W10 | HF W11 User Manual - Page 1
HD Camcorder Detailed User Guide VIXIA_HF_W11_10_US_EN - Canon VIXIA HF W10 | HF W11 User Manual - Page 2
(video/still image 87 USB CONNECTION MENU 88 Names of Parts 89 Indications on the LCD monitor 92 Troubleshooting 95 When the unit is not working properly 95 Charging 95 Power supply 96 Recording 96 SD Card 97 Playback 97 Editing/Copying 98 Computer 98 Screen/Image 99 Other Problems - Canon VIXIA HF W10 | HF W11 User Manual - Page 3
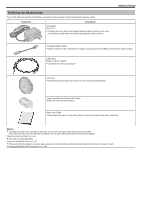
Canon service center. Illustration Description AC Adapter AC-V11U 0 Charges this unit. Attach the charging adapter cable to the tip of the cord. It can also be used when recording or playing back videos Small Core Filter (for AC Adapter) . Basic User Guide 0 Read well and keep in a safe place - Canon VIXIA HF W10 | HF W11 User Manual - Page 4
the opening at the terminals. B Press the entire cover against the camcorder with equal force and firmly attach the cover completely. C Slide the there are damages to the cover, etc. and consult your Canon dealer or the nearest Canon service center. 0 Do not apply excessive force when opening/closing - Canon VIXIA HF W10 | HF W11 User Manual - Page 5
after pressing the Reset button, consult the nearest Canon service center. To USB Connector Charging Adapter Cable (Provided charging time will be longer than usual. The camera does not turn on if the remaining battery 0 You can record or play back videos during charging. (However, the charging - Canon VIXIA HF W10 | HF W11 User Manual - Page 6
into water holding the camcorder. 0 Do not use the camcorder in strong water there are damages to the cover, etc. and consult your Canon dealer or the nearest service center. 0 Use within a water depth of 5 m (16 to enter into the camera or malfunction. 0 Do not subject the camera to high pressure - Canon VIXIA HF W10 | HF W11 User Manual - Page 7
your nearest service center. (Subject to a fee) . 0 After using the camera under the sea or on the beach, immerse the camera in fresh water (50°F). 0 Turning on the camera while it is still cold will deteriorate the performance of the LCD monitor. Problems such as the screen becoming dark - Canon VIXIA HF W10 | HF W11 User Manual - Page 8
unit) can reduce the interference generated when this unit is connected to an external device. 0 Use the small core filter with the power cable, and AV cable. 0 Do not attach the core filter to the provided adapter cable. Release the stopper 3 cm Wind twice (for AC Adapter cable) Wind once (for AV - Canon VIXIA HF W10 | HF W11 User Manual - Page 9
(initialize) the SD card using "FORMAT SD CARD" from the "SETUP" menu. " FORMAT SD CARD " (A p. 86) . 0 This unit supports 256 MB to 2 GB SD cards. 0 Use a Class 4 or higher compatible SD card (2 GB) for video recording. SDHC Card . 0 Use a Class 4 or higher compatible SDHC card (4 GB to 32 GB) for - Canon VIXIA HF W10 | HF W11 User Manual - Page 10
card is inserted in an adapter). It may cause malfunction. 0 To record videos with "VIDEO QUALITY" set to "UXP", use of a Class 6 or higher compliant as standard SDHC/SDXC cards. UHS Speed Class is not supported. 0 SD card used for recording and edited using this DATE/TIME RECORDING" has been set 10 - Canon VIXIA HF W10 | HF W11 User Manual - Page 11
Adjusting the Touch Screen Adjust the response position when the touch screen is touched. 1 Tap "MENU". ˻PLAY REC . 2 Tap "SETUP". TOP MENU RECORD OFF SETTING MENU SETUP CONNECTION SETTINGS . 3 Tap "TOUCH SCREEN ADJUST". SETUP TOUCH SCREEN ADJUST 6 Tap "OK". Getting Started COMPLETED OK - Canon VIXIA HF W10 | HF W11 User Manual - Page 12
(n). 8 Recording Mode Button Switches the recording mode (P Intelligent Auto/H Manual). . 0 When this unit is not operated for a certain period again. 1 A/B (Video/Still Image) Mode Button 0 Switches between A video (60i/60p) and B still image modes. 2 Video Scene Capture Button 0 Displayed - Canon VIXIA HF W10 | HF W11 User Manual - Page 13
p. 62) "Deleting the Currently Displayed File" (A p. 62) 5 Playback Media Button 0 Switches between SD card and built-in memory. 6 Menu Button "Operating the Menu" (A p. 73) 7 Date Button "Operation Buttons for Video Playback" (A p. 51) "Operation Buttons for Still Image Playback" (A p. 57) 13 - Canon VIXIA HF W10 | HF W11 User Manual - Page 14
. 1 SILENT Button "Using the Silent Mode" (A p. 22) 2 INFO. Button (Displayed only after playback) "Checking the Recording Date and Other Information" (A p. 53) 3 PLAYBACK SETTING Menu "PLAYBACK SETTING Menu (video)" (A p. 81) "PLAYBACK SETTING Menu (still image)" (A p. 83) 4 SETUP Menu "SETUP - Canon VIXIA HF W10 | HF W11 User Manual - Page 15
. 0 The unit turns on. 0 When the LCD monitor is closed, the unit turns off. 2 Tap "OK" when "SET DATE/TIME!" is displayed. SET DATE/TIME! OK . 3 Set the date and time. DATE & TIME SETTING 24 DATE TIME 12 2019 AM 10 00 SAVE . 0 When the day, month, year, hour, or minute item is tapped, "3" and - Canon VIXIA HF W10 | HF W11 User Manual - Page 16
Getting Started 7 Select the region where you live and tap "SAVE". DATE & TIME/AREA GMT Changing the Display Language The language on the display can be changed. 1 Tap "MENU". SAVE . 0 Time difference between the selected city and - Canon VIXIA HF W10 | HF W11 User Manual - Page 17
injuries or damages which may result if this unit falls off, read the instruction manual of the tripod (or monopod) to be used and make sure that is recommended to use a tripod or monopod when recording in conditions prone to camera shake (such as in dark places or when zoomed to the telephoto end). - Canon VIXIA HF W10 | HF W11 User Manual - Page 18
outlet. A B BF C O North America United States Canada Mexico Asia Japan India Indonesia Singapore Sri Lanka Thailand South Korea SETUP CONNECTION SETTINGS . 3 Tap "DATE & TIME". SETUP DATE & TIME . 0 Tap 3 or 2 to scroll the screen. 4 Tap "AREA SETTING". DATE & TIME AREA SETTING . 5 - Canon VIXIA HF W10 | HF W11 User Manual - Page 19
˻PLAY REC . 2 Tap "SETUP". TOP MENU RECORD OFF SETTING MENU SETUP CONNECTION SETTINGS . 3 Tap "DATE & TIME". SETUP DATE & TIME . 0 Tap 3 or 2 to scroll the screen. 4 Tap "DST SETTING". DATE & TIME DST SETTING . 5 Tap "ON". DST SETTING DAYLIGHT SAVING TIME (DST) CURRENT SETTING: OFF ON - Canon VIXIA HF W10 | HF W11 User Manual - Page 20
A to switch the mode to video. 2 Check if the recording mode is P Intelligent Auto. ˻PLAY . 0 If the mode is H Manual, tap H on the recording screen image stabilizer setting. "Reducing Camera Shake" (A p. 40) F Recording Media Displays the icon of the media where videos are recorded to. The - Canon VIXIA HF W10 | HF W11 User Manual - Page 21
Camera shake that often occurs when using the zoom lever can be minimized. "Zooming" (A p. 26) C Still Image Recording A Tap this button to record a still image during video recording. "Capturing Still Images During Video between the P Intelligent Auto P/H and H Manual recording mode. 21 - Canon VIXIA HF W10 | HF W11 User Manual - Page 22
DATE/TIME RECORDING" is used, the date and time can be recorded together with the video. "Recording Videos with Date microcomputer-controlled device. Electrostatic discharge, external noise and interference (from a be restored. Please be forewarned. - Canon will not be responsible for any lost - Canon VIXIA HF W10 | HF W11 User Manual - Page 23
RECORDING", "RECORDING EFFECT" or "DATE/TIME RECORDING" is set - recording mode is B. 0 If the mode is A video, tap A on the recording screen to display the . 0 If the mode is H Manual, tap H on the recording screen to release the shutter. Available only when "SHUTTER MODE" is set to "RECORD - Canon VIXIA HF W10 | HF W11 User Manual - Page 24
during use. "Checking the Remaining Recording Time" (A p. 48) G Recording Mode Displays the current recording mode of P (Intelligent Auto) or H (Manual). H Setting Scenes of Intelligent Auto Displays scenes detected automatically in the Intelligent Auto function. Multiple scenes may be detected - Canon VIXIA HF W10 | HF W11 User Manual - Page 25
Video/Still Image Switches between video and still image Mode modes. A/B B WT Zoom Allows the same functions as the zoom lever to be performed. Camera P Intelligent Auto P/H and H Manual recording mode. Recording Using the device. Electrostatic discharge, external noise and interference ( - Canon VIXIA HF W10 | HF W11 User Manual - Page 26
1 Tap "WT". MMEENNUU MMEENNUU . 2 Tap "M". ˻PLAY REC MMEENNUU REC MMEENNUU . 0 Zoom to the point that is stored in advance. Memo : 0 If the setting of DIS, VIDEO QUALITY, SYSTEM SELECT or ZOOM is changed, the zoom position stored will be erased. 26 - Canon VIXIA HF W10 | HF W11 User Manual - Page 27
image, tap A or B on the recording screen to display the mode switching screen. Tap A or B to switch the mode to video or still image respectively. 2 Select the Manual recording mode. ˻PLAY . 0 If the mode is P Intelligent Auto, tap P on the recording screen to display the mode switching screen - Canon VIXIA HF W10 | HF W11 User Manual - Page 28
when you are unable to focus clearly using Intelligent Auto or when you want to lock the focus. 1 Select the Manual recording mode. 5 Tap "MANUAL". FOCUS AUTO MANUAL ˻PLAY . 0 If the mode is P Intelligent Auto, tap P on the recording screen to display the mode switching screen. Tap H to switch - Canon VIXIA HF W10 | HF W11 User Manual - Page 29
switching screen. Tap H to switch the recording mode to Manual. . 6 Adjust the brightness value. Recording intelligent AUTO MANUAL . 2 Tap "MENU". ˻PLAY SET REC . PLAY REC MENU . Memo : 0 Settings can be adjusted separately for videos and still images. . 0 Tap L to exit the menu. 0 Tap - Canon VIXIA HF W10 | HF W11 User Manual - Page 30
P Intelligent Auto, tap P on the recording screen to display the mode switching screen. Tap H to switch the recording mode to Manual. intelligent AUTO MANUAL ON . 0 "ADVANCE" is designed to perform more effective backlight compensation. Choose this when the backlight compensation is not adjusted - Canon VIXIA HF W10 | HF W11 User Manual - Page 31
the recording mode to Manual. intelligent AUTO MANUAL . 2 Tap "MENU Use this when the problem of unnatural colors is not when shooting under illumination such as a video light. q MARINE:BLUE Set this hold the "SET" button. 3 o blinks, release your finger after the setting screen disappears. 0 - Canon VIXIA HF W10 | HF W11 User Manual - Page 32
macro function even when the unit is at the telephoto zoom setting. 4 Tap 1. RECORD SETTING . *The image is only an impression. 1 Select the Manual recording mode. . 5 Tap "TELE MACRO". RECORD SETTING ˻PLAY . 0 If the mode is P Intelligent Auto, tap P on the recording screen to display the mode - Canon VIXIA HF W10 | HF W11 User Manual - Page 33
to record more natural images. Select from the following two settings depending on the color of the water at the shooting location. 1 Select the Manual recording mode. ˻PLAY . 0 If the mode is P Intelligent Auto, tap P on the recording screen to display the mode switching screen. Tap H to switch the - Canon VIXIA HF W10 | HF W11 User Manual - Page 34
when "TIME-LAPSE RECORDING" or "DATE/TIME RECORDING" is set Caution : 0 Before using the camera underwater, read "Before Using Underwater or with Effects (RECORDING EFFECT) You can add and record various effects to videos or still images. Once setting is done, you can easily record images that - Canon VIXIA HF W10 | HF W11 User Manual - Page 35
and still image, tap A or B on the recording screen to display the mode switching screen. Tap A or B to switch the mode to video or still image respectively. 2 Tap "MENU". ˻PLAY REC . 0 The top menu appears. 3 Tap "RECORD SETTING". TOP MENU RECORD OFF SETTING MENU SETUP CONNECTION SETTINGS - Canon VIXIA HF W10 | HF W11 User Manual - Page 36
and still image, tap A or B on the recording screen to display the mode switching screen. Tap A or B to switch the mode to video or still image respectively. 2 Tap "MENU". ˻PLAY REC . 0 The top menu appears. 3 Tap "RECORD SETTING". TOP MENU RECORD OFF SETTING MENU SETUP CONNECTION SETTINGS - Canon VIXIA HF W10 | HF W11 User Manual - Page 37
and still image, tap A or B on the recording screen to display the mode switching screen. Tap A or B to switch the mode to video or still image respectively. 2 Tap "MENU". ˻PLAY REC . 0 The top menu appears. 3 Tap "RECORD SETTING". TOP MENU RECORD OFF SETTING MENU SETUP CONNECTION SETTINGS - Canon VIXIA HF W10 | HF W11 User Manual - Page 38
and still image, tap A or B on the recording screen to display the mode switching screen. Tap A or B to switch the mode to video or still image respectively. 2 Tap "MENU". ˻PLAY REC . 0 The top menu appears. 3 Tap "RECORD SETTING". TOP MENU RECORD OFF SETTING MENU SETUP CONNECTION SETTINGS - Canon VIXIA HF W10 | HF W11 User Manual - Page 39
the selected position (face/color/area) again to cancel the setting. 0 Tap on an unselected position (face/color/area) to reset. 0 If the camera loses track of a subject, tap the subject again. 0 Settings are canceled when zoom operation is performed. ("AREA SELECT" only) 0 When "COLOR TRACKING" is - Canon VIXIA HF W10 | HF W11 User Manual - Page 40
" when shooting a subject of little movement with the unit on a tripod. 0 Complete stabilization may not be possible if camera shake is excessive. 0 This setting is effective for video recording only. 0 Using the image stabilizer will narrow the angle of view. 0 Dynamic zoom is not available in the - Canon VIXIA HF W10 | HF W11 User Manual - Page 41
. Recorded time increases in units of frames. Displays the actual elapsed time after recording starts. Remaining time left to record with the currently selected video quality. . 0 If the icon is not displayed on the screen, tap 1 to scroll the screen. 0 Tap L to exit the menu. 0 Tap J to return to - Canon VIXIA HF W10 | HF W11 User Manual - Page 42
recording. 0 When recording is stopped with the recorded time less than "0:00:00:14", the video will not be saved. 0 Zooming, simultaneous still image recording, and image stabilizer are not available It is also recommended to fix the focus and white balance manually. "Tripod Mounting" (A p. 17) 42 - Canon VIXIA HF W10 | HF W11 User Manual - Page 43
on the recording screen to display the mode switching screen. Tap A to switch the mode to video. 2 Tap "MENU". 0:00:01 [5:56] . 0 Tapping the A button changes the display L to cancel the "PHOTO-INSERT RECORDING" first.) 0 When the camera is turned off, "PHOTO-INSERT RECORDING" will end. 0 When " - Canon VIXIA HF W10 | HF W11 User Manual - Page 44
or still image using the self-timer. This is useful when taking a video or still image that includes the photographer. The 2-second self-timer is useful for preventing camera shake caused by pressing the shutter button when taking a still image. Memo : 0 When shooting a photo using the self-timer - Canon VIXIA HF W10 | HF W11 User Manual - Page 45
Mode 1 Open the LCD monitor. B 5 Tap "2SEC" or "10SEC". SELF-TIMER OFF Recording 10SEC . 0 Check if the recording mode is B. 0 If the mode is A video, tap A on the recording screen to display the mode switching screen. Tap B to switch the mode to still image. 2 Tap "MENU". 2SEC . 6 Take a still - Canon VIXIA HF W10 | HF W11 User Manual - Page 46
the mode is B still image, tap B on the recording screen to display the mode switching screen. Tap A to switch the mode to video. 2 Tap "MENU". . 0 Move the date and time display while touching it with your finger and tracing it on a screen. 7 Press the START/STOP button to start recording. ˻PLAY - Canon VIXIA HF W10 | HF W11 User Manual - Page 47
is A. 0 If the mode is B still image, tap B on the recording screen to display the mode switching screen. Tap A to switch the mode to video. 2 Tap "MENU". ˻PLAY REC . 0 The top menu appears. 3 Tap "RECORD SETTING". TOP MENU RECORD OFF SETTING MENU SETUP . . 0 Press the START/STOP button - Canon VIXIA HF W10 | HF W11 User Manual - Page 48
are estimates. 0 The remaining recording time is displayed only during video mode. 0 The remaining recording time is displayed for the recording Open the LCD monitor. ˻PLAY . 0 Check that the camera is set to the recording mode. If the camera is in the playback mode, click 3 to switch to recording - Canon VIXIA HF W10 | HF W11 User Manual - Page 49
Recording Approximate Video Recording Time Picture quality UXP XP EP 60p 32GB (VIXIA HF W11) 2 h 40 m 3 h 40 m 13 h 30 m 2 h 20 m Built-in memory 8GB (VIXIA HF W10) 35 m 50 m 3 h 30 m Picture quality SDHC/SDXC card 4GB 8GB 16GB (subject to a fee), consult the nearest Canon service center. 49 - Canon VIXIA HF W10 | HF W11 User Manual - Page 50
device. Electrostatic discharge, external noise and interference (from Please be forewarned. - Canon will not be responsible for date. 0 Images recorded in 60p mode and 60i mode are displayed on the index screen separately. 0 To view the videos recorded in 60p mode, set "SYSTEM SELECT" in the video - Canon VIXIA HF W10 | HF W11 User Manual - Page 51
and Time Display) C> D< E3 FR G I/J H MENU I Thumbnail (File) Description Switches between video mode (60i/60p) and still image mode. Moves to the previous/next date Displays the next index screen (thumbnail display) 0 You can perform the same operation with the zoom lever. Displays the previous - Canon VIXIA HF W10 | HF W11 User Manual - Page 52
the menu screen. Memo : 0 Tap or drag on the operation area of the touch screen. 0 The recording date and time can be displayed on the screen during playback. (A p. 81) Adjusting the Volume of Videos You can use the zoom/volume lever to control the volume. Turn up the volume T ʴ VOL. W Turn - Canon VIXIA HF W10 | HF W11 User Manual - Page 53
Tap A or B to select the video or still image mode. 2 Tap M to select the playback mode. Playback 5 Tap C. TOP MENU PLAYBACK OFF SETTING EDIT SETUP CONNECTION SETTINGS . 0 Tap L to exit the menu. You can display the recording date and duration of the selected file. DATE/TIME PB TIME QUALITY - Canon VIXIA HF W10 | HF W11 User Manual - Page 54
is A. 0 If the mode is B still image, tap B on the recording screen to display the mode switching screen. Tap A to switch the mode to video. 2 Tap M to select the playback mode. ˻REC PLAY . 0 An hours:minutes:seconds counter appears. 8 Pause the playback and reset the counter. 0:01:23 0:12 - Canon VIXIA HF W10 | HF W11 User Manual - Page 55
. Tap A to switch the mode to video. 2 Tap M to select the playback mode. ˻PLAY . 3 Tap "MENU". REC MENU . 0 After selecting a date, tap "NEXT". 0 When "ALL" a progress status will be displayed. 0 The Digest Playback time is only a guide. 8 Digest Playback starts. 0:01:23 0:12:34 ˻REC . 4 Tap - Canon VIXIA HF W10 | HF W11 User Manual - Page 56
performed correctly, such as turning off the power in the middle of recording. You can perform the following operations to play back the videos with defective management information. 1 Open the LCD monitor. A 5 Tap "PLAYBACK OTHER FILE". PLAYBACK SETTING PLAYBACK OTHER FILE . 6 Tap on the file to - Canon VIXIA HF W10 | HF W11 User Manual - Page 57
still image) is shown and the group is displayed with a green frame. Display A A/B B (Date and Time Display) C> Description Switches between video and still image modes. Moves to the previous/next date Displays the next index screen (thumbnail display) 0 You can perform the same operation with the - Canon VIXIA HF W10 | HF W11 User Manual - Page 58
to index screen Deletes the currently displayed still image. Enlarges the displayed video. 0 Tap the position of the image you want to enlarge. Caution : 0 This unit is a microcomputer-controlled device. Electrostatic discharge, external noise and interference (from a TV, a radio, etc.) might prevent - Canon VIXIA HF W10 | HF W11 User Manual - Page 59
manual of the TV in use. "Connecting via the HDMI Mini Connector" (A p. 59) "Connecting via the AV Connector" (A p. 61) 0 To display the date and time on TV, set both "DISPLAY DATE/TIME" and "DISPLAY ON TV" to "ON". (A p. 81) " DISPLAY ON TV " (A p. 87) Unnatural Displays on TV Trouble Images - Canon VIXIA HF W10 | HF W11 User Manual - Page 60
file. ˻REC . "Playing Back Videos" (A p. 50) "Playing Back Still HDMI-CEC related setting to "ON". (For details, refer to the instruction manual of the TV.) 0 Set "HDMI CONTROL" in the CONNECTION SETTINGS menu (This is applicable only if this unit supports the language selected for the TV.) To use - Canon VIXIA HF W10 | HF W11 User Manual - Page 61
instruction manual of the TV in use. 1 Connect to a TV. TV 5 Play back a file. Playback Yellow AV Input To AV Connector AV Cable White Red Video Input Audio Input (L) Audio Input (R) STV-250N Stereo Video 4 Press the external input button on the TV to switch to the input from - Canon VIXIA HF W10 | HF W11 User Manual - Page 62
be restored. 0 Files that are protected cannot be deleted. Release protection before deleting the file. "Protecting Files" (A p. 63 remains, the screen returns to the index screen. ˻PLAY REC MENU . 0 While the video mode is shown in the image, the same operations apply for the still image mode. - Canon VIXIA HF W10 | HF W11 User Manual - Page 63
the deletion, tap "QUIT". Editing Protecting Files Prevent important videos/still images from being deleted accidently by protecting them. "Protecting/Releasing Protection of the Currently Displayed File" (A p. 63) "Protecting/Releasing Protection of Selected Files" (A p. 64) Caution : 0 When the - Canon VIXIA HF W10 | HF W11 User Manual - Page 64
files. 1 Open the LCD monitor. A 5 Tap "PROTECT/CANCEL". EDIT PROTECT/CANCEL . 6 Tap on the files to protect or release protection of. PROTECT/CANCEL . 0 Tap A or B to select the video or still image mode. 0 Tap B or A on the recording screen to display the mode switching screen. Tap A to switch - Canon VIXIA HF W10 | HF W11 User Manual - Page 65
Editing 0:12:34 ˻REC MENU . Memo : 0 Still images are captured with a size of 1920×1080. 0 Captured still images are stored in the media where the video is being played back from. . 0 Check if the recording mode is A. 0 If the mode is B still image, tap B on the recording screen to display the - Canon VIXIA HF W10 | HF W11 User Manual - Page 66
mode is A. 0 If the mode is B still image, tap B on the recording screen to display the mode switching screen. Tap A to switch the mode to video. 2 Tap M to select the playback mode. THE ABOVE SCENE IS FOUND COMBINE WITH THIS SCENE? YES NO . 8 Tap the media to store to. SELECT THE - Canon VIXIA HF W10 | HF W11 User Manual - Page 67
mode is A. 0 If the mode is B still image, tap B on the recording screen to display the mode switching screen. Tap A to switch the mode to video. 2 Tap M to select the playback mode. QUIT . 0 When "A" is tapped, the start point is set. 0 After setting the start point, tap d to continue playback - Canon VIXIA HF W10 | HF W11 User Manual - Page 68
videos in the high definition quality by connecting an AVCHDcompliant Blu-ray recorder to this unit via a USB cable. For details on creating the disc, refer to the instruction manual CARD . 0 The following screen is displayed after the camera operation is completed. CONNECT TO OTHER SD CARD USB - Canon VIXIA HF W10 | HF W11 User Manual - Page 69
0 Make sure that there is enough space left in the destination medium. 0 Videos in the SD card cannot be copied to the built-in memory. 1 Open the . 0 Tap "SEL ALL" to select all files. 0 Tap "REL ALL" to release all selections. 7 Tap "SET". QUANTITY:0030 ˻PLAY REC MENU . 0 The mode changes - Canon VIXIA HF W10 | HF W11 User Manual - Page 70
camera and PC are connected by an USB cable, recorded media are read-only. Memo : 0 To edit/view the files, use a software that supports AVCHD (video Click . 1 Click "Safely Remove Hardware and Eject Media". 2 Click all "CANON~". 3 Disconnect the USB cable and close the LCD monitor. . 0 Disconnect - Canon VIXIA HF W10 | HF W11 User Manual - Page 71
the camera and PC are connected by an USB cable, recorded media are read-only. 0 MTS files that are copied to a Mac computer cannot be imported to iMovie. To use MTS files with iMovie, import the files using iMovie. Memo : 0 To edit/view the files, use a software that supports AVCHD (video) files - Canon VIXIA HF W10 | HF W11 User Manual - Page 72
.MTS MOV_0003.MTS (Video files with defective management information) [ PRIVATE ] (Management Information) [ AVCHD ] (SD Card) [ CANON ] [ BDMV ] [ STREAM ] [ BACKUP ] [ CLIPINF ] [ XXXXX.MTS ] [ PLAYLIST ] [ INDEX.BDM ] [ MOVIEOBJ.BDM ] . Caution : 0 When the camera and PC are connected - Canon VIXIA HF W10 | HF W11 User Manual - Page 73
the Menu The following menu is available on this unit. 0 TOP MENU: Menu that contains all the items specific to the video recording, still image recording, video playback, and still image playback modes respectively. Operating the Top Menu You can configure various settings using the menu. 1 Tap - Canon VIXIA HF W10 | HF W11 User Manual - Page 74
Clearly (TOUCH PRIORITY AE/AF)" (A p. 38) LIGHT (VIXIA HF W11) Turns on/off the light. Setting OFF AUTO ON Details Does not light up. Lights up automatically when the surrounding is dark. Lights up at all times. DIS Camera shake during video recording can be effectively reduced. "Reducing - Canon VIXIA HF W10 | HF W11 User Manual - Page 75
and time. Set this when you want to save the file with date and time display. (The date and time cannot be deleted after recording.) "Recording Videos with Date and Time" (A p. 46) TIME COUNTER RECORDING You can take a video with a stopwatch recorded. You can start, stop and reset the stopwatch as - Canon VIXIA HF W10 | HF W11 User Manual - Page 76
on the LCD screen is tapped. Memo : 0 The size of the still image that is captured in the video mode is 1,920 x 1,080. 0 Some SD cards may not support continuous shooting. 0 The continuous shooting speed will drop if this function is used repeatedly. SEAMLESS RECORDING Continues recording on - Canon VIXIA HF W10 | HF W11 User Manual - Page 77
, the image becomes grainy as it is digitally enlarged. 0 The angle of view changes when the image stabilizer is turned on or off. ZOOM MIC Sets the zoom microphone. OFF ON Setting Details Deactivates the zoom microphone. Records audio sounds in the same direction as the zoom operation. Memo - Canon VIXIA HF W10 | HF W11 User Manual - Page 78
Settings Menu LCD CLOSED RECORDING This unit does not turn off even when the LCD monitor is closed during recording. OFF ON Setting Details The unit is turned off when the LCD monitor is closed. Activates LCD CLOSED RECORDING. Memo : 0 If "LCD CLOSED RECORDING" is set to "ON", stop the - Canon VIXIA HF W10 | HF W11 User Manual - Page 79
zoom. "Taking Close-up Shots (TELE MACRO)" (A p. 32) *Displayed only in the manual recording mode. TOUCH PRIORITY AE/AF Automatically adjusts focus and brightness based on the subjects' faces . Memo : 0 Setting can be adjusted separately for videos. "GAIN UP (Video)" (A p. 74) Settings Menu 79 - Canon VIXIA HF W10 | HF W11 User Manual - Page 80
continuously while the START/STOP button is pressed, or while the A button on the LCD screen is tapped. Memo : 0 Some SD cards may not support continuous shooting. 0 The continuous shooting speed will drop if this function is used repeatedly. IMAGE SIZE Sets the image size (number of pixels) for - Canon VIXIA HF W10 | HF W11 User Manual - Page 81
TIME Sets whether to display the recording date and time during video playback. Setting Details OFF Does not display the date and time during playback. ON Displays the date and time during playback. TIME COUNTER PLAYBACK A time counter that can be reset can be displayed during playback. "TIME - Canon VIXIA HF W10 | HF W11 User Manual - Page 82
File" (A p. 63) "Protecting/Releasing Protection of Selected Files" (A p. 64) COPY Copies files from the built-in memory to the SD card. "Copying Files to an SD Card" (A p. 69) TRIMMING Select the required part of a video and save it as a new video file. The original video remains in its existing - Canon VIXIA HF W10 | HF W11 User Manual - Page 83
pattern. RANDOM Switches the screen with a random effect from SLIDE, "BLINDS", and "CHECKERBOARD". Memo : 0 Slideshow effects are not available when playing back still images in external devices (such as USB external hard disk drives). 83 - Canon VIXIA HF W10 | HF W11 User Manual - Page 84
Settings Menu EDIT Menu (still image) . PROTECT/CANCEL Protects files from being deleted accidently. "Protecting/Releasing Protection of the Currently Displayed File" (A p. 63) "Protecting/Releasing Protection of Selected Files" (A p. 64) COPY Copies files from the built-in memory to the SD card. " - Canon VIXIA HF W10 | HF W11 User Manual - Page 85
SETUP (video/still image) Settings Menu . DATE & TIME Resets the current time or sets to the local time when using this unit overseas. "Clock Setting" (A p. 15) "Setting the Clock to Local Time when Traveling" (A p. 18) "Setting Daylight Saving Time" (A p. 19) DATE DISPLAY STYLE Sets the order - Canon VIXIA HF W10 | HF W11 User Manual - Page 86
the built-in memory. Deletes all files on the built-in memory and resets the folder and file numbers to "1". (File number of the AVCHD video file starts from "0".) Caution : 0 All data on the built-in memory will be deleted when it is formatted. Copy all files on the built-in - Canon VIXIA HF W10 | HF W11 User Manual - Page 87
/still image) . DISPLAY ON TV Displays icons and date/time on a TV screen. Setting OFF Does not display icons and date/time on TV. ON Displays icons and date/time on TV. Details VIDEO OUTPUT Sets the aspect ratio (16:9 or 4:3) according to the connecting TV. Setting Details 4:3 Select - Canon VIXIA HF W10 | HF W11 User Manual - Page 88
Settings Menu USB CONNECTION MENU This menu appears when this unit is connected to a computer using an USB cable. PLAYBACK ON PC 0 Saves videos recorded by this unit on your computer. "Copying to Windows PC" (A p. 70) "Copying to Mac Computer" (A p. 71) 88 - Canon VIXIA HF W10 | HF W11 User Manual - Page 89
Right Side 1 2 . A Speaker B Grip Belt 0 Pass your hand through the grip belt to hold this unit firmly. "Grip Adjustment" (A p. 8) Bottom Side . A Cover Lock B Tripod Mounting Hole "Tripod Mounting" (A p. 17) Names of Parts 1 2 89 - Canon VIXIA HF W10 | HF W11 User Manual - Page 90
recording. B Light (VIXIA HF W11) 0 Turn on the light when shooting in dark places. C Stereo Microphone 0 Do not cover the microphone with your fingers during video recording. D LCD Monitor to perform charging. You can also connect to the external device or computer using the USB cable. 90 - Canon VIXIA HF W10 | HF W11 User Manual - Page 91
LCD Monitor . A LCD Monitor 0 Turns the power on/off by opening and closing. 0 Enables self-portraits to be taken by rotating the monitor. . "Using the Touch Screen" (A p. 10) "Names of Buttons and Functions on the LCD Monitor" (A p. 12) Caution : 0 Do not press against the surface with force or - Canon VIXIA HF W10 | HF W11 User Manual - Page 92
"Checking the Remaining Recording Time" (A p. 48) I CONTINUOUS SHOOTING "SHUTTER MODE (Video)" (A p. 76) "SHUTTER MODE (Still Image)" (A p. 80) L Recording Mode "Taking Videos in Auto Mode" (A p. 20) "Manual Recording" (A p. 27) M Setting Scenes of Intelligent Auto 0 Displays scenes detected - Canon VIXIA HF W10 | HF W11 User Manual - Page 93
10:00 00:12:34 7 1SEC 8 9 ˻REC . A Video Mode 0 Switches between video and still image modes. B Video Quality " VIDEO QUALITY " (A p. 76) C Operation Indicator "Operation Buttons for Video Playback" (A p. 51) D Date/Time 0 Displays the recording date and time. E Recording media " REC MEDIA FOR - Canon VIXIA HF W10 | HF W11 User Manual - Page 94
Playback 1 23 4 56 100-0001 10:00 7 8 ˻REC . A Still Image Mode 0 Switches between video and still image modes. B Folder Number C File Number D Date/Time 0 Displays the recording date and time. E Recording media " REC MEDIA FOR IMAGE " (A p. 86) F Battery Indicator "Checking the Remaining - Canon VIXIA HF W10 | HF W11 User Manual - Page 95
Troubleshooting When the unit is not working properly Charging Resetting this Unit This unit is a microcomputer-controlled device. Electrostatic discharge, external noise and interference (from a TV, a radio, the built-in battery (subject to a fee), consult the nearest Canon service center. 95 - Canon VIXIA HF W10 | HF W11 User Manual - Page 96
Troubleshooting Power supply Recording Unable to turn on the power. The camera does not turn on if when recording scenes with fast movements or extreme changes in brightness. Set the "VIDEO QUALITY" to "UXP" or "XP" for recording. " VIDEO QUALITY " (A p. 76) The inside of the lens is foggy. Open - Canon VIXIA HF W10 | HF W11 User Manual - Page 97
Troubleshooting SD Card Playback Cannot insert the SD card. Make sure not to CARD " (A p. 86) When "CHECK CARD'S WRITE PROTECTION SWITCH" appears, release the lock on the SD card. . Sound or video is interrupted. Sometimes playback is interrupted at the connecting section between two scenes. This - Canon VIXIA HF W10 | HF W11 User Manual - Page 98
Troubleshooting Editing/Copying Unable to delete file. Files (videos/still images) that are protected cannot be deleted. Release protection before deleting the file. "Protecting Files" (A p. 63) Unable to copy to SD card. If the SD card is write protected, set it to off. - Canon VIXIA HF W10 | HF W11 User Manual - Page 99
Troubleshooting Screen/Image Other Problems ON" to improve the condition. "Reducing Camera Shake" (A p. 40) A band the recording menu to "MANUAL". Select from "FINE video mode and still image mode, discharge, external noise and problem, contact your Canon dealer or the Canon service center. 99 - Canon VIXIA HF W10 | HF W11 User Manual - Page 100
Troubleshooting Disclaimer - We shall not be held responsible for loss of recorded contents when recording videos/audio or playback cannot be operated due to malfunctions in this unit, provided parts, or SD card. - Once deleted, recorded contents (data), including data loss - Canon VIXIA HF W10 | HF W11 User Manual - Page 101
Troubleshooting UNSUPPORTED SCENE! Use files recorded with this unit. (Files recorded with when the actual recorded time displayed is "0:00:00:17" or less, the video cannot be saved. CAMERA TEMPERATURE IS HIGH PLEASE TURN CAMERA OFF TO ALLOW IT TO COOL DOWN PLEASE WAIT Turn off the power of this - Canon VIXIA HF W10 | HF W11 User Manual - Page 102
detach the AC adapter and power plug before performing any maintenance. Camcorder 0 Wipe this unit with a dry, soft cloth to remove or cleaner, be sure to observe the warning labels and instructions of the product. 0 Do not leave the device in the camera after using underwater or on the beach, read "Before - Canon VIXIA HF W10 | HF W11 User Manual - Page 103
Camera Item Details Power supply Using AC adapter: DC 5.2 V Power consumption 2.6 W (60i mode, "LIGHT": "OFF" (VIXIA HF W11), MONITOR BRIGHTNESS: 3 (standard)) 2.8 W (60i mode, "LIGHT": "OFF" (VIXIA HF W11 f= 2.9 mm to 116.0 mm 35 mm conversion: Video 40.5 mm to 1620 mm (image stabilizer: off) - Canon VIXIA HF W10 | HF W11 User Manual - Page 104
Specifications AC Adapter (AC-V11U) Item Details Power supply AC 110 V to 240 V, 50 Hz/60 Hz Output DC 5.2 V, 1 A Allowable operating 0°C to 40°C (32°F to 104°F) temperature (10°C to 35°C (50°F to 95°F) during charging) Dimensions (mm) 66 x 28 x 47 (2-5/8" x 1-1/8" x 1-7/8") (W x H x D: - Canon VIXIA HF W10 | HF W11 User Manual - Page 105
. 0 Mac, OS X, iMovie and iPhoto are trademarks of Apple Inc., registered in the U.S. and other countries. 0 Other product and company names included in this instruction manual are trademarks and/or registered trademarks of their respective holders. 0 Marks such as ™ and ® have been omitted in this - Canon VIXIA HF W10 | HF W11 User Manual - Page 106
sand, dirt or water damage (except as otherwise contemplated by the instruction manual); C If defects or damages are caused by the use of unauthorized parts or by service other than by Canon USA's factory service centers or authorized service facilities; D If the Equipment is used for commercial or - Canon VIXIA HF W10 | HF W11 User Manual - Page 107
(except as otherwise contemplated by the instruction manual); C If defects or damages are caused by the use of parts or supplies (other than those sold by Canon Canada) that cause damage to the Equipment or that cause abnormally frequent service calls or service problems; D If defects or damages are - Canon VIXIA HF W10 | HF W11 User Manual - Page 108
USA http://pro.usa.canon.com CANON U.S.A., INC. ** (855) CINE-EOS (855-246-3367) (USA only)
-
 1
1 -
 2
2 -
 3
3 -
 4
4 -
 5
5 -
 6
6 -
 7
7 -
8
-
9
-
10
-
11
-
12
-
13
-
14
-
15
-
16
-
17
-
18
-
19
-
20
-
21
-
22
-
23
-
24
-
25
-
26
-
27
-
28
-
29
-
30
-
31
-
32
-
33
-
34
-
35
-
36
-
37
-
38
-
39
-
40
-
41
-
42
-
43
-
44
-
45
-
46
-
47
-
48
-
49
-
50
-
51
-
52
-
53
-
54
-
55
-
56
-
57
-
58
-
59
-
60
-
61
-
62
-
63
-
64
-
65
-
66
-
67
-
68
-
69
-
70
-
71
-
72
-
73
-
74
-
75
-
76
-
77
-
78
-
79
-
80
-
81
-
82
-
83
-
84
-
85
-
86
-
87
-
88
-
89
-
90
-
91
-
92
-
93
-
94
-
95
-
96
-
97
-
98
-
99
-
100
-
101
-
102
-
103
-
104
-
105
-
106
-
107
-
108
 |
 |

HD Camcorder
VIXIA_HF_W11_10_US_EN
Detailed User Guide