Canon imageCLASS 2300N Set-up Sheet for imageCLASS 2300N - Page 3
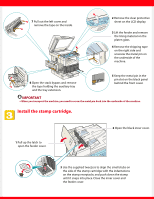
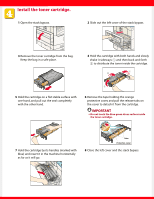
Install the stamp cartridge., IMPORTANT
 |
View all Canon imageCLASS 2300N manuals
Add to My Manuals
Save this manual to your list of manuals |
Page 3 highlights
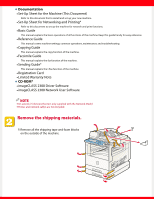
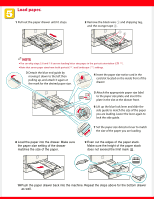
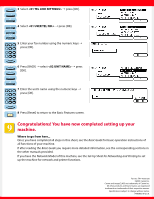
7 Pull out the left cover and remove the tape on the inside. 2 Remove the clear protective sheet on the LCD display. 3 Lift the feeder and remove the lining material on the platen glass. 4 Remove the shipping tape on the right side and unscrew the metal pin on the underside of the machine. 6 Open the stack bypass and remove the tape holding the auxiliary tray and the tray extension. 5 Keep the metal pin in the pin slot on the black panel behind the front cover. IMPORTANT G When you transport the machine, you need to screw the metal pin back into the underside of the machine. Install the stamp cartridge. 1 Pull up the latch to open the feeder cover. 2 Open the black inner cover. 3 Use the supplied tweezers to align the small stubs on the side of the stamp cartridge with the indentations on the stamp receptacle, and push down the stamp until it snaps into place. Close the inner cover and the feeder cover.
-
 1
1 -
 2
2 -
 3
3 -
 4
4 -
 5
5 -
 6
6 -
 7
7 -
 8
8
 |
 |
