Canon imageCLASS 2300N Set-up Sheet for imageCLASS 2300N - Page 5
Load paper
 |
View all Canon imageCLASS 2300N manuals
Add to My Manuals
Save this manual to your list of manuals |
Page 5 highlights
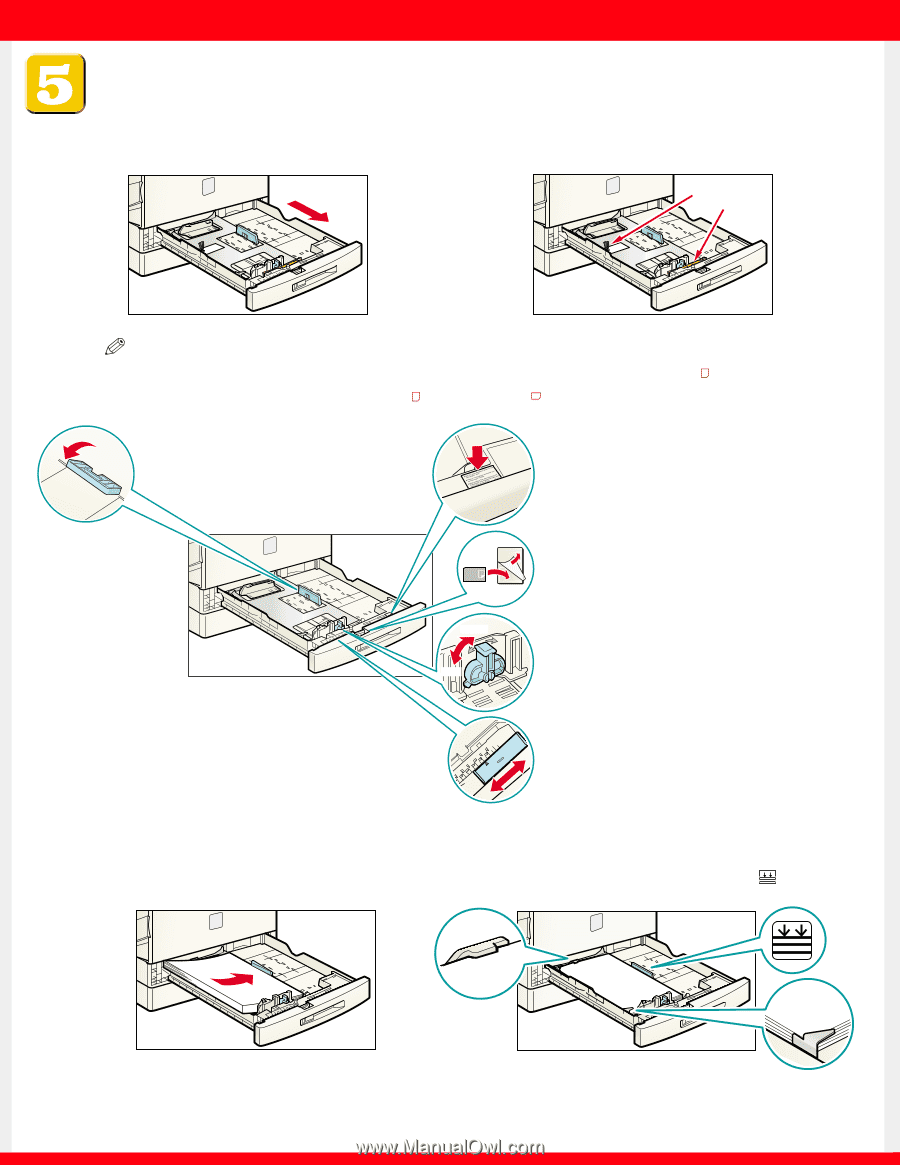
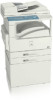
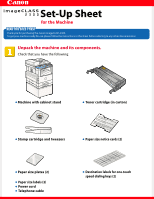
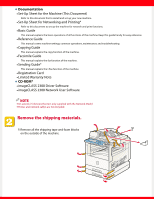
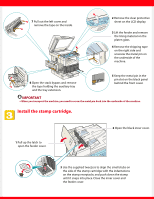
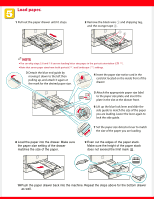
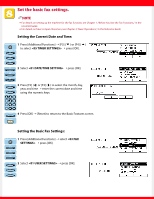
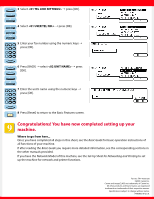
Load paper. 1 Pull out the paper drawer until it stops. 2 Remove the black wire 1 and shipping tag, and the orange tape 2. 12 NOTE G You can skip steps 3, 6 and 7 if you are loading letter size paper in the portrait orientation (LTR ). G Note that some paper sizes have both portrait ( ) and landscape ( ) settings. 3 Detach the blue end guide by moving it down to the left then pulling up, and attach it again at the mark for the desired paper size. 4 Insert the paper size notice card in the card slot located on the inside front of the drawer. LTR Unlock Lock 5 Attach the appropriate paper size label to the paper size plate, and insert the plate in the slot at the drawer front. 6 Lift up the blue lock lever and slide the side guide to match the size of the paper you are loading. Lower the lever again to lock the side guide. U2 U3 STMT U1 LTR LTR LGL 11X17 B5 B5 A5 B4 A4 A4 A3 7 Set the paper size detector lever to match the size of the paper you are loading. 8 Load the paper into the drawer. Make sure the paper size setting of the drawer matches the size of the paper. 9 Even out the edges of the paper stack. Make sure the height of the paper stack does not exceed the limit mark . 10 Push the paper drawer back into the machine. Repeat the steps above for the bottom drawer as well.
-
 1
1 -
 2
2 -
 3
3 -
 4
4 -
 5
5 -
 6
6 -
 7
7 -
 8
8
 |
 |