Canon imageCLASS 2300N Set-up Sheet for imageCLASS 2300N - Page 6
Connect the telephone cable and the power cord., Using the operation panel, LCD display, Reset key
 |
View all Canon imageCLASS 2300N manuals
Add to My Manuals
Save this manual to your list of manuals |
Page 6 highlights
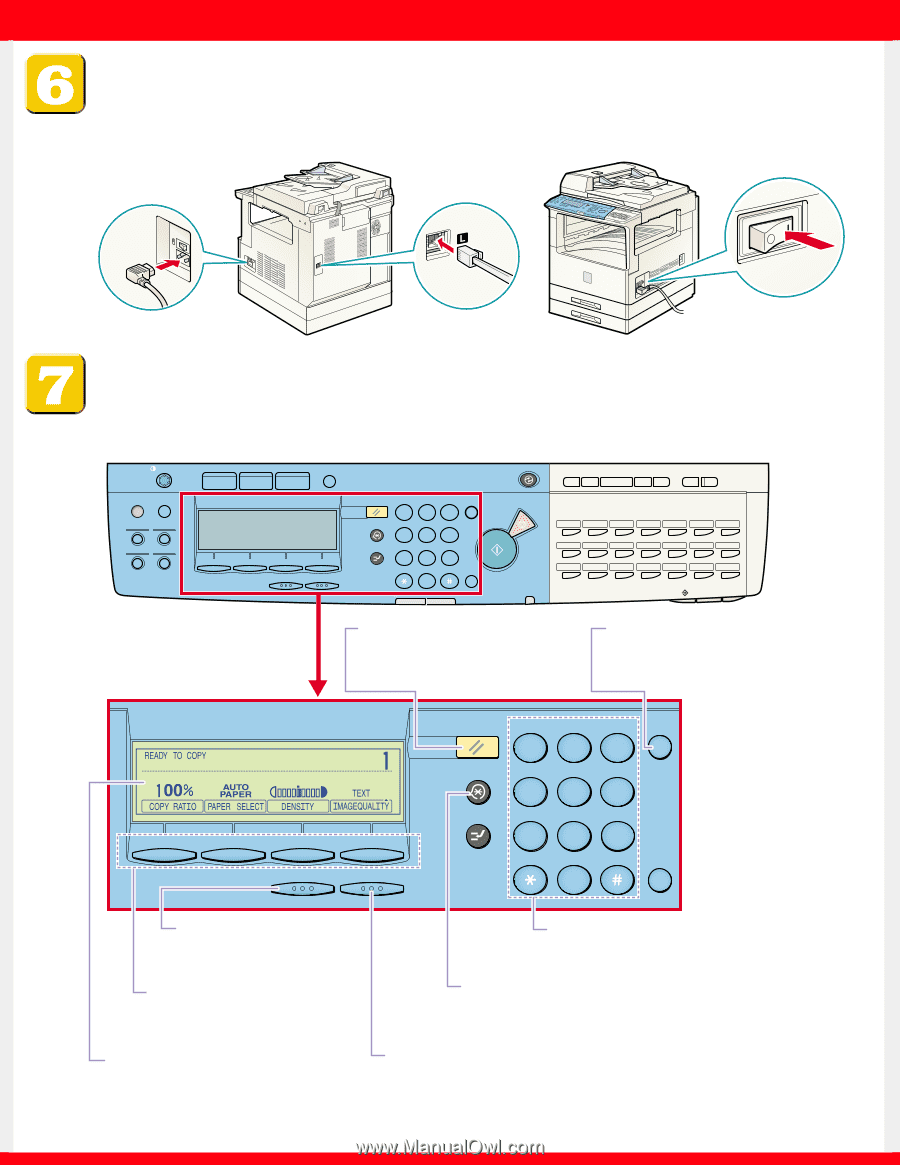
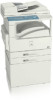
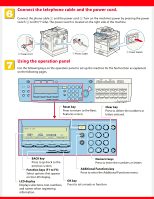
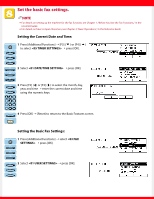
Connect the telephone cable and the power cord. Connect the phone cable 1 and the power cord 2. Turn on the machine's power by pressing the power switch 3 to ON ("I" side). The power switch is located on the right side of the machine. 2 Power Cord 1 Phone Cable 3 Power Switch Using the operation panel Use the following keys on the operation panel to set up the machine for the fax function as explained on the following pages. Display Contrast Collate Special Features Reduce Enlarge 1 2 Two Page Separation Frame Erase 3 4 COPY FAX PRINT Monitor F1 F2 F3 F4 BACK OK Energy Saver Coded Pause/ Directory Dial Hook Redial Tone Line/Mail Direct TX Reset @. 1 Additional Functions GHI 4 ABC DEF Clear 2 3C JKL MNO 56 Start Stop 01 02 03 04 05 06 07 Interrupt PRS 7 TUV WXY 89 08 09 10 11 12 13 14 OPER SYMBOLS 0 ID In Use Memory Alarm 15 16 17 18 19 20 21 Power 43~63 22~42 Reset key Press to return to the Basic Features screen. Clear key Press to delete the numbers or letters entered. F1 F2 F3 F4 BACK OK Reset @. 1 Additional Functions GHI 4 Interrupt PRS 7 ABC DEF Clear 2 3C JKL MNO 56 TUV WXY 89 OPER SYMBOLS 0 ID BACK key Press to go back to the previous screen. Function keys (F1 to F4) Select options that appear on the LCD display. LCD display Displays selections, text, numbers, and names when registering information. Numeric keys Press to enter the numbers or letters. Additional Functions key Press to enter the Additional Functions menu. OK key Press to set a mode or function.
-
 1
1 -
 2
2 -
 3
3 -
 4
4 -
 5
5 -
 6
6 -
 7
7 -
 8
8
 |
 |