Canon imageRUNNER ADVANCE C9280 PRO imageRUNNER ADVANCE C9200 PRO/C7200 Srs Se - Page 19
Enter the IP address in [Primary DNS Server] for, Press [DNS Host/Domain Name Settings].
 |
View all Canon imageRUNNER ADVANCE C9280 PRO manuals
Add to My Manuals
Save this manual to your list of manuals |
Page 19 highlights
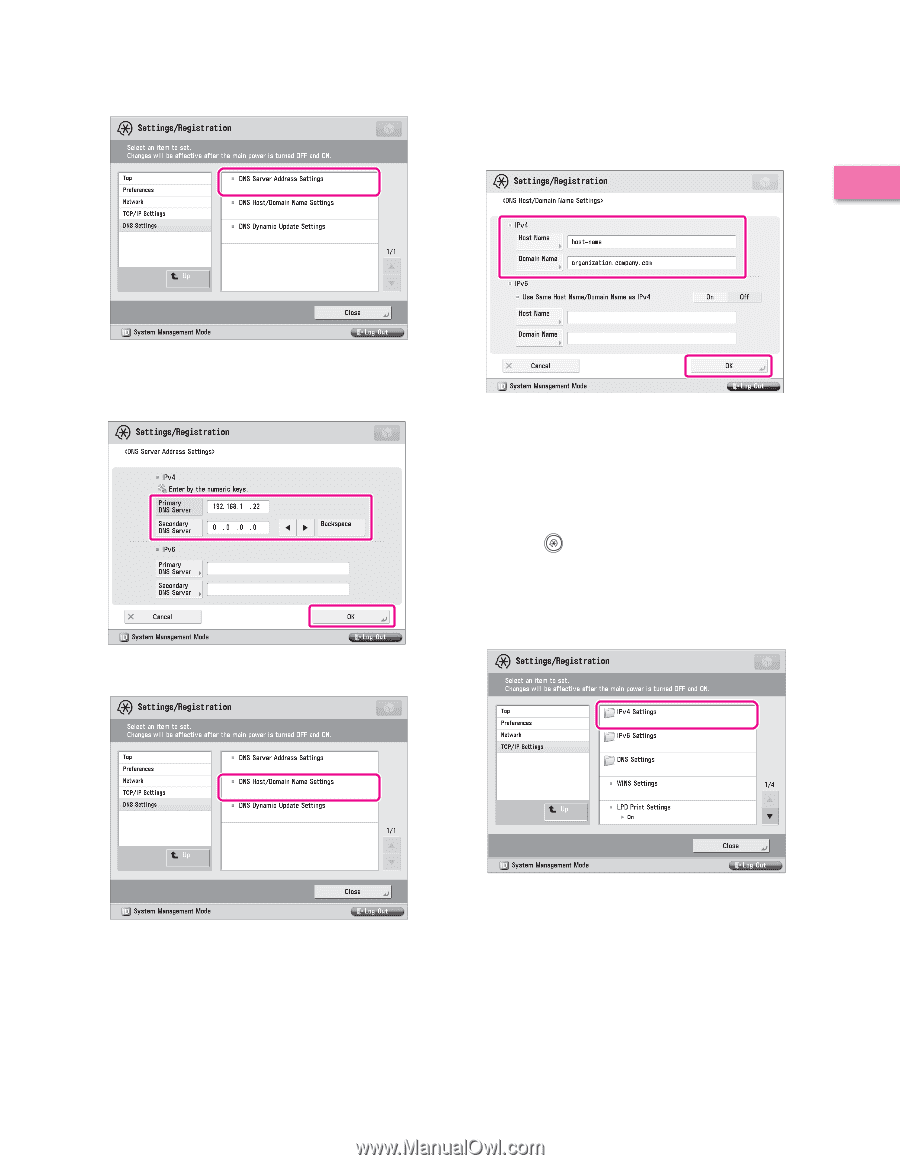
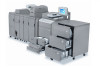
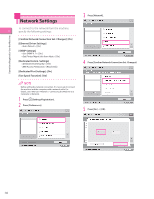
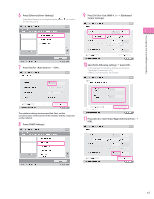
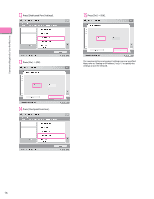
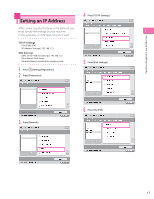
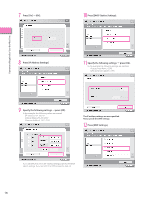
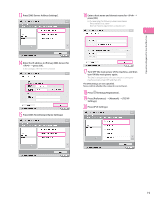
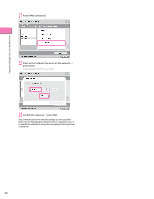
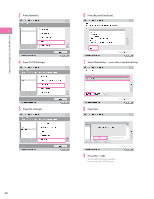
Operations Required to Use the Machine 13 Press [DNS Server Address Settings]. 16 Enter a host name and domain name for ˠ press [OK]. In this example, the following values are entered: [Host Name]: host-name [Domain Name]: organization.company.com 1 14 Enter the IP address in [Primary DNS Server] for ˠ press [OK]. In this example, '192.168.1.22' is entered. 15 Press [DNS Host/Domain Name Settings]. 17 Turn OFF the main power of the machine, and then turn ON the main power again. The DNS setting becomes effective only after turning the machine's main power OFF, and then ON. The DNS settings are now specified. Next, confirm whether the network is correctly set. 18 Press (Settings/Registration). 19 Press [Preferences] ˠ [Network] ˠ [TCP/IP Settings]. 20 Press [IPv4 Settings]. 19
-
 1
1 -
2
-
3
-
4
-
5
-
6
-
7
-
8
-
9
-
10
-
11
-
12
-
13
-
 14
14 -
 15
15 -
 16
16 -
 17
17 -
 18
18 -
 19
19 -
 20
20 -
 21
21 -
 22
22 -
 23
23 -
 24
24 -
25
-
26
-
27
-
28
-
29
-
30
-
31
-
32
-
33
-
34
-
35
-
36
-
37
-
38
-
39
-
40
-
41
-
42
-
43
-
44
-
45
-
46
-
47
-
48
-
49
-
50
-
51
-
52
-
53
-
54
-
55
-
56
-
57
-
58
-
59
-
60
-
61
-
62
-
63
-
64
-
65
-
66
-
67
-
68
-
69
-
70
-
71
-
72
-
73
-
74
-
75
-
76
-
77
-
78
-
79
-
80
-
81
-
82
-
83
-
84
-
85
-
86
-
87
-
88
 |
 |