Canon imageRUNNER ADVANCE C9280 PRO imageRUNNER ADVANCE C9200 PRO/C7200 Srs Se - Page 47
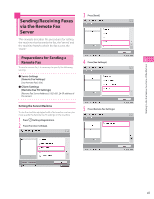
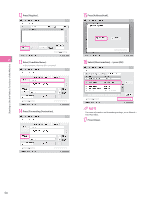
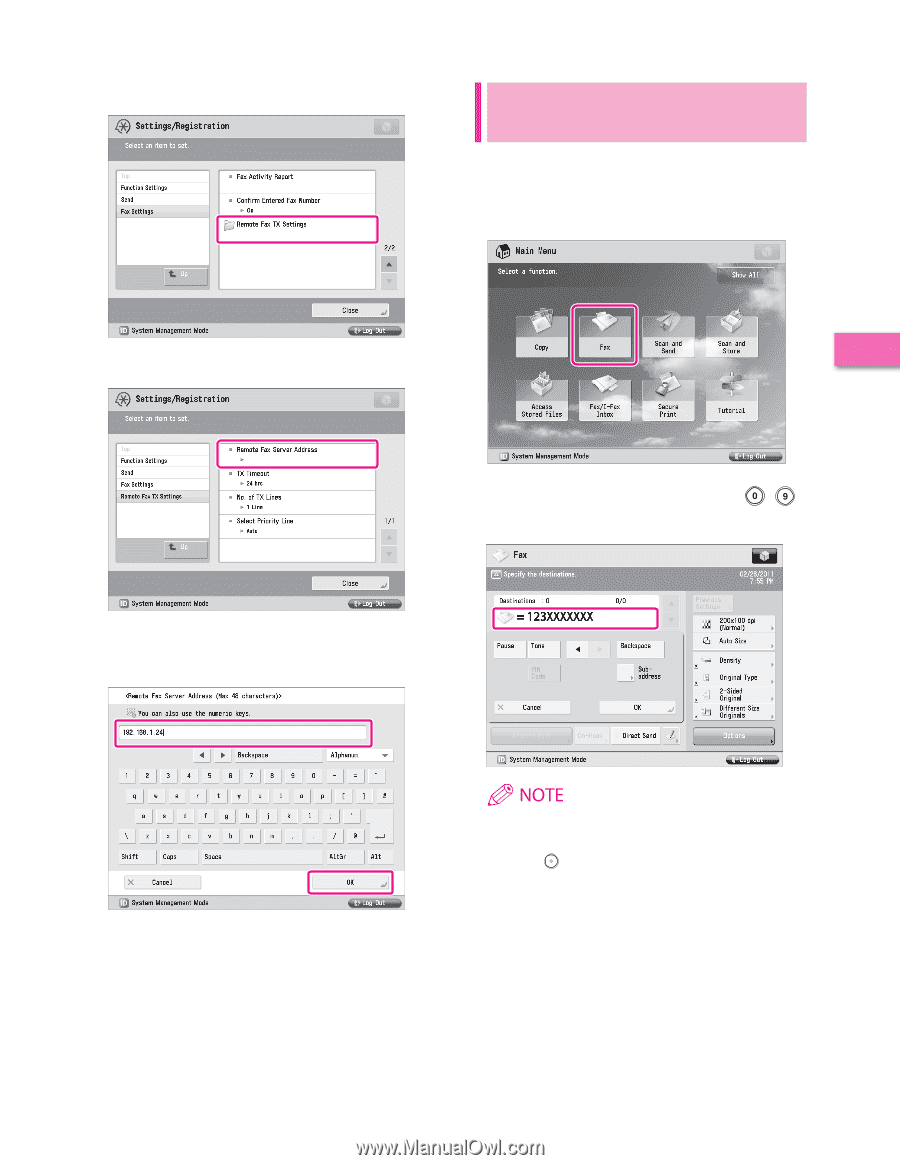
Sending Faxes via the Remote Fax Server, Press [Remote Fax TX Settings].
 |
View all Canon imageRUNNER ADVANCE C9280 PRO manuals
Add to My Manuals
Save this manual to your list of manuals |
Page 47 highlights
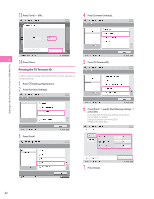
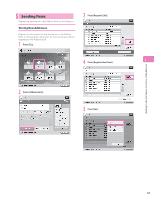
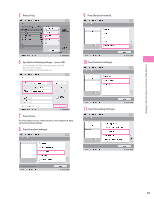
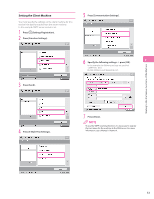
Starting to Use the Various Functions of the Machine 5 Press [Remote Fax TX Settings]. Sending Faxes via the Remote Fax Server Send faxes using the remote fax server. 1 Place your originals. 2 Press [Fax]. 6 Press [Remote Fax Server Address]. 2 3 Enter the destination's fax number using - (numeric keys). In this example, is entered. 7 Enter the IP address ˠ press [OK]. In this example, is entered for the IP address of the server. 8 Press [Close]. The client settings are now specified. You can also specify a destination from the Address Book. For more information, see "Sending Faxes," on p. 43. 4 Press (Start). If the screen is displayed, specify the size of the original ˠ press [OK]. 47
-
 1
1 -
2
-
3
-
4
-
5
-
6
-
7
-
8
-
9
-
10
-
11
-
12
-
13
-
14
-
15
-
16
-
17
-
18
-
19
-
20
-
21
-
22
-
23
-
24
-
25
-
26
-
27
-
28
-
29
-
30
-
31
-
32
-
33
-
34
-
35
-
36
-
37
-
38
-
39
-
40
-
41
-
 42
42 -
 43
43 -
 44
44 -
 45
45 -
 46
46 -
 47
47 -
 48
48 -
 49
49 -
 50
50 -
 51
51 -
 52
52 -
53
-
54
-
55
-
56
-
57
-
58
-
59
-
60
-
61
-
62
-
63
-
64
-
65
-
66
-
67
-
68
-
69
-
70
-
71
-
72
-
73
-
74
-
75
-
76
-
77
-
78
-
79
-
80
-
81
-
82
-
83
-
84
-
85
-
86
-
87
-
88
 |
 |
47
Starting to Use the Various Functions of the Machine
2
5
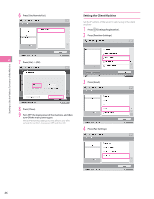
Press [Remote Fax TX Settings].
6
Press [Remote Fax Server Address].
7
Enter the IP address
→
press [OK].
In this example, <192.168.1.24> is entered for the IP address of
the server.
8
Press [Close].
The client settings are now specified.
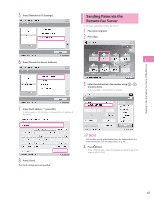
Sending Faxes via the
Remote Fax Server
Send faxes using the remote fax server.
1
Place your originals.
2
Press [Fax].
3
Enter the destination’s fax number using
-
(numeric keys).
In this example, <123XXXXXXX> is entered.
You can also specify a destination from the Address Book. For
more information, see “Sending Faxes,” on p. 43.
4
Press
(Start).
If the <Original Size> screen is displayed, specify the size of the
original
→
press [OK].