Casio EX FH20 Owners Manual - Page 114
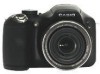
Turn off the camera and then use the USB cable that comes with
 |
UPC - 079767624217
View all Casio EX FH20 manuals
Add to My Manuals
Save this manual to your list of manuals |
Page 114 highlights
4. Turn off the camera and then use the USB cable that comes with the camera to connect it to your computer. USB port USB cable Large connector USB/AV port Small connector Making sure that the 6 mark on the camera is aligned with the 4 mark of the USB cable connector, connect the cable to the camera. • The camera does not draw power over the USB cable. Check the battery level before connecting and make sure it is not too low. • Make sure that you insert the cable connector into the USB/AV port until you feel it click securely into place. Failure to insert the connector fully can result in poor communication or malfunction. • Note that even while the connector is fully inserted, you still will be able to see the metal part of the connector as shown in the illustration. • When connecting the USB cable to a USB port, make sure you align the connector correctly with the port. • Your computer may not be able to recognize the camera if you connect via a USB hub. Always connect directly to the computer's USB port. 5. Turn on the camera. 6. Copy images to your computer. Windows XP 1Select "Open folder to view files" and then click "OK". 2Drag the "DCIM" folder to your Windows desktop to copy it. Windows Vista 1Select "Open folder to view files". 2Drag the "DCIM" folder to your Windows desktop to copy it. Windows 2000 1Double-click "My Computer". 2Double-click "Removable Disk". 3Drag the "DCIM" folder to your Windows desktop to copy it. 114 Using the Camera with a Computer
-
 1
1 -
2
-
3
-
4
-
5
-
6
-
7
-
8
-
9
-
10
-
11
-
12
-
13
-
14
-
15
-
16
-
17
-
18
-
19
-
20
-
21
-
22
-
23
-
24
-
25
-
26
-
27
-
28
-
29
-
30
-
31
-
32
-
33
-
34
-
35
-
36
-
37
-
38
-
39
-
40
-
41
-
42
-
43
-
44
-
45
-
46
-
47
-
48
-
49
-
50
-
51
-
52
-
53
-
54
-
55
-
56
-
57
-
58
-
59
-
60
-
61
-
62
-
63
-
64
-
65
-
66
-
67
-
68
-
69
-
70
-
71
-
72
-
73
-
74
-
75
-
76
-
77
-
78
-
79
-
80
-
81
-
82
-
83
-
84
-
85
-
86
-
87
-
88
-
89
-
90
-
91
-
92
-
93
-
94
-
95
-
96
-
97
-
98
-
99
-
100
-
101
-
102
-
103
-
104
-
105
-
106
-
107
-
108
-
 109
109 -
 110
110 -
 111
111 -
 112
112 -
 113
113 -
 114
114 -
 115
115 -
 116
116 -
 117
117 -
 118
118 -
 119
119 -
120
-
121
-
122
-
123
-
124
-
125
-
126
-
127
-
128
-
129
-
130
-
131
-
132
-
133
-
134
-
135
-
136
-
137
-
138
-
139
-
140
-
141
-
142
-
143
-
144
-
145
-
146
-
147
-
148
-
149
-
150
-
151
-
152
-
153
-
154
-
155
-
156
-
157
-
158
-
159
-
160
-
161
-
162
-
163
-
164
-
165
-
166
-
167
-
168
-
169
-
170
-
171
-
172
-
173
-
174
-
175
-
176
 |
 |
