Casio EX FH20 Owners Manual - Page 38
Specifying ISO Sensitivity (ISO), Adjusting White Balance (White Balance), White Balance.
 |
UPC - 079767624217
View all Casio EX FH20 manuals
Add to My Manuals
Save this manual to your list of manuals |
Page 38 highlights
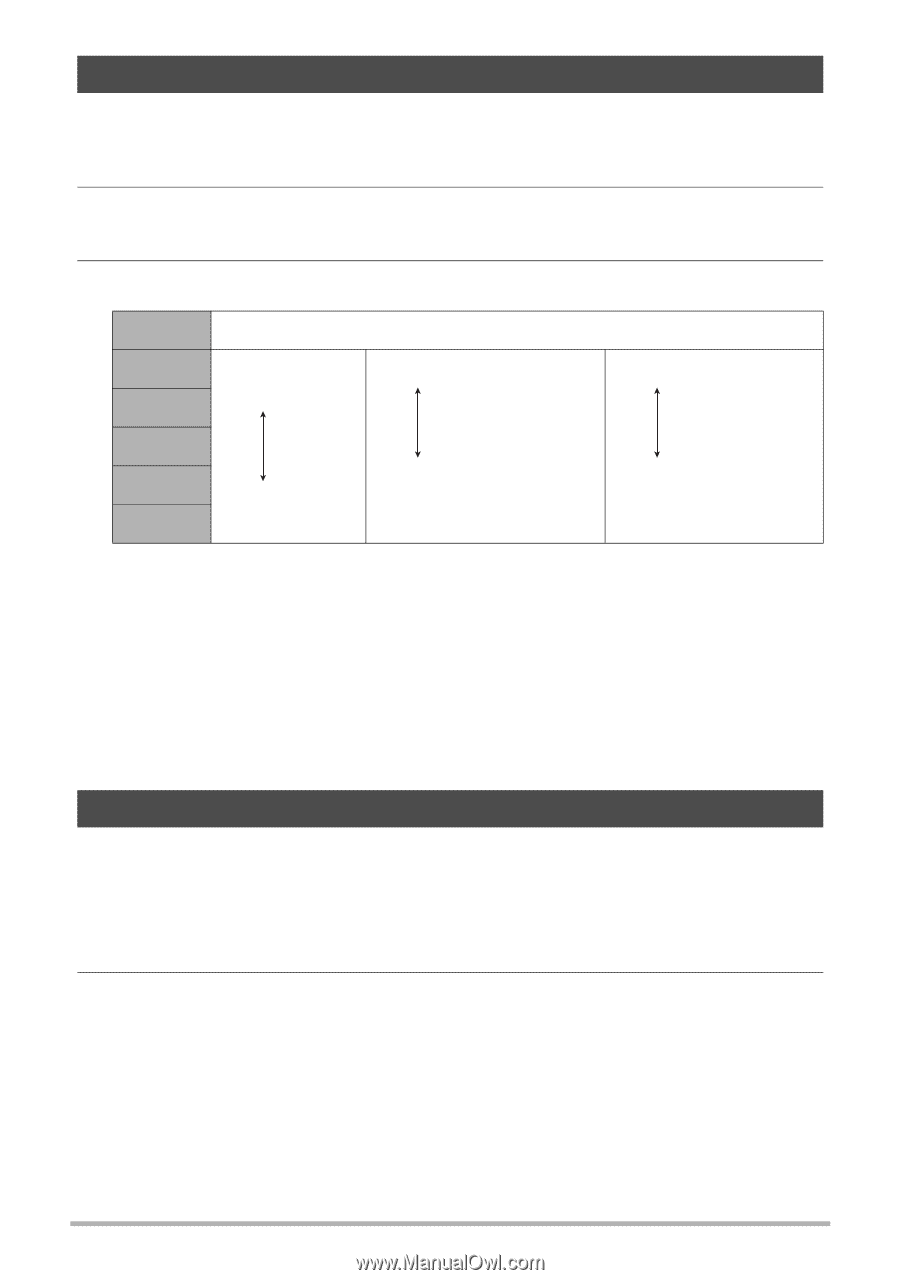
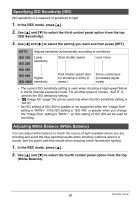
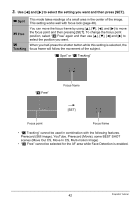
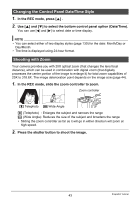
Specifying ISO Sensitivity (ISO) ISO sensitivity is a measure of sensitivity to light. 1. In the REC mode, press [8] . 2. Use [8] and [2] to select the third control panel option from the top (ISO Sensitivity). 3. Use [4] and [6] to select the setting you want and then press [SET]. AUTO ISO 100 ISO 200 Adjusts sensitivity automatically according to conditions Lower sensitivity Slow shutter speed Less noise ISO 400 ISO 800 Higher ISO 1600 sensitivity Fast shutter speed (Set for shooting in dimly lit areas.) Some coarseness (increased digital noise) • The current ISO sensitivity setting is used when shooting a High-speed Movie in the M (manual exposure) mode. For all other types of movies, "AUTO" is used as the ISO sensitivity setting. • "S Image AS" (page 79) can be used only when the ISO sensitivity setting is "AUTO". • An ISO setting of ISO 400 or greater is not supported when the "Image Size" setting is "RAW+". If the ISO setting is "ISO 400" or greater when you change the "Image Size" setting to "RAW+", an ISO setting of ISO 200 will be used for recording. Adjusting White Balance (White Balance) You can adjust white balance to match the source of light available where you are shooting and avoid the blue cast that results when shooting outdoors when it is cloudy, and the green cast that results when shooting under fluorescent lighting. 1. In the REC mode, press [8] . 2. Use [8] and [2] to select the fourth control panel option from the top (White Balance). 38 Snapshot Tutorial
-
 1
1 -
2
-
3
-
4
-
5
-
6
-
7
-
8
-
9
-
10
-
11
-
12
-
13
-
14
-
15
-
16
-
17
-
18
-
19
-
20
-
21
-
22
-
23
-
24
-
25
-
26
-
27
-
28
-
29
-
30
-
31
-
32
-
 33
33 -
 34
34 -
 35
35 -
 36
36 -
 37
37 -
 38
38 -
 39
39 -
 40
40 -
 41
41 -
 42
42 -
 43
43 -
44
-
45
-
46
-
47
-
48
-
49
-
50
-
51
-
52
-
53
-
54
-
55
-
56
-
57
-
58
-
59
-
60
-
61
-
62
-
63
-
64
-
65
-
66
-
67
-
68
-
69
-
70
-
71
-
72
-
73
-
74
-
75
-
76
-
77
-
78
-
79
-
80
-
81
-
82
-
83
-
84
-
85
-
86
-
87
-
88
-
89
-
90
-
91
-
92
-
93
-
94
-
95
-
96
-
97
-
98
-
99
-
100
-
101
-
102
-
103
-
104
-
105
-
106
-
107
-
108
-
109
-
110
-
111
-
112
-
113
-
114
-
115
-
116
-
117
-
118
-
119
-
120
-
121
-
122
-
123
-
124
-
125
-
126
-
127
-
128
-
129
-
130
-
131
-
132
-
133
-
134
-
135
-
136
-
137
-
138
-
139
-
140
-
141
-
142
-
143
-
144
-
145
-
146
-
147
-
148
-
149
-
150
-
151
-
152
-
153
-
154
-
155
-
156
-
157
-
158
-
159
-
160
-
161
-
162
-
163
-
164
-
165
-
166
-
167
-
168
-
169
-
170
-
171
-
172
-
173
-
174
-
175
-
176
 |
 |