Cisco 3725 Hardware Installation Guide - Page 56
Cisco 3745 Router Ground Connection,
 |
UPC - 746320810911
View all Cisco 3725 manuals
Add to My Manuals
Save this manual to your list of manuals |
Page 56 highlights
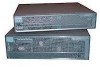
TD RD LP AL CD TD RD LP AL CD 103014 Installing the Chassis Ground Connection Chapter 3 Installing the Router Figure 3-13 Chassis Ground Connection Using Ring Terminal on a Cisco 3725 Chassis 2 NM-HDV AL 1 BANK 4 BANK 3 BANK 2 VWIC 2MFT-E1 BANK 1 BANK 0 CTRLR E2 LP CD CTRLR E1 SEE IBMNEASFNTOAURLAELLATION V0 EN Ring terminal SEE MANUAL BEFORE INSTALLATION DSU 56K SEE MANUAL BEFORE INSTALLATION DSU 56K SEE MANUAL BEFORE INSTALLATION After the router has been installed and properly grounded, you can connect the power wiring; the WAN, LAN, and voice cables; and the cables for administrative access as required for your installation. For cable connection procedures, see the "Power Connections" section on page 3-11, the "Connecting WAN, LAN, and Voice Cables" section on page 3-20, and the "Connecting to a Console Terminal or Modem" section on page 3-22. Cisco 3745 Router Ground Connection To install the ground connection on a Cisco 3745 router, perform the following steps: Step 1 Step 2 Step 3 Step 4 Strip one end of the ground wire to the length required for the ground lug or terminal. • For the NEBS ground lug-approximately 0.75 inch (20 mm) • For user-provided ring terminal-as required Crimp the ground wire to the ground lug or ring terminal, using a crimp tool of the appropriate size. Attach the ground lug or ring terminal to the chassis as shown in Figure 3-14 or Figure 3-15. For a ground lug, use the two screws with captive locking washers provided. For a ring terminal, use one of the screws provided. Use a number 2 Phillips screwdriver, and tighten the screws to a torque of 8 to 10 in-lb (0.9 to 1.1 N-m). Connect the other end of the ground wire to a grounding point at your site. 3-10 Cisco 3700 Series Routers Hardware Installation Guide OL-2180-08
-
 1
1 -
2
-
3
-
4
-
5
-
6
-
7
-
8
-
9
-
10
-
11
-
12
-
13
-
14
-
15
-
16
-
17
-
18
-
19
-
20
-
21
-
22
-
23
-
24
-
25
-
26
-
27
-
28
-
29
-
30
-
31
-
32
-
33
-
34
-
35
-
36
-
37
-
38
-
39
-
40
-
41
-
42
-
43
-
44
-
45
-
46
-
47
-
48
-
49
-
50
-
 51
51 -
 52
52 -
 53
53 -
 54
54 -
 55
55 -
 56
56 -
 57
57 -
 58
58 -
 59
59 -
 60
60 -
 61
61 -
62
-
63
-
64
-
65
-
66
-
67
-
68
-
69
-
70
-
71
-
72
-
73
-
74
-
75
-
76
-
77
-
78
-
79
-
80
-
81
-
82
-
83
-
84
-
85
-
86
-
87
-
88
-
89
-
90
-
91
-
92
-
93
-
94
-
95
-
96
-
97
-
98
-
99
-
100
-
101
-
102
-
103
-
104
-
105
-
106
-
107
-
108
-
109
-
110
-
111
-
112
-
113
-
114
 |
 |
