Cisco 5505 Installation Guide - Page 6
Powering on the Cisco ASA 5505, Setting Up a PC for System Administration - vpn step by step
 |
UPC - 882658082252
View all Cisco 5505 manuals
Add to My Manuals
Save this manual to your list of manuals |
Page 6 highlights
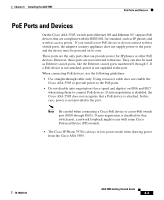
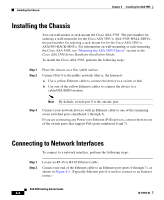
Powering on the Cisco ASA 5505 Chapter 4 Installing the ASA 5505 Powering on the Cisco ASA 5505 To power on the Cisco ASA 5505, perform the following steps: Step 1 Step 2 Step 3 Connect the power supply with the power cable. Connect the small, rectangular connector of the power supply cable to the power connector on the rear panel. Connect the AC power connector of the power supply input cable to an electrical outlet. Note The Cisco ASA 5505 does not have a power switch. Completing Step 3 powers on the device. Step 4 Check the power LED; if it is solid green, then the device is powered on. For more information, see the "Front Panel Components" section on page 4-10. Setting Up a PC for System Administration You can perform setup, configuration and management tasks from a PC using the command-line interface or with the Adaptive Security Device Manager (ASDM) application, which provides an intuitive graphical user interface (GUI). In addition to configuration and management capability, ASDM also provides configuration wizards for initial configuration, VPN configuration, and high-availability configuration. For more information about using ASDM for setup and configuration, see Chapter 1, "Configuring the Adaptive Security Appliance." To set up a PC from which you can configure and manage the Cisco ASA 5505, perform the following steps: Step 1 Make sure that the speed of the PC interface to be connected to one of the Cisco ASA 5505 inside ports is set to autonegotiate. This setting provides the best performance. ASA 5505 Getting Started Guide 4-6 78-18003-02
-
 1
1 -
 2
2 -
 3
3 -
 4
4 -
 5
5 -
 6
6 -
 7
7 -
 8
8 -
 9
9 -
 10
10 -
 11
11 -
 12
12 -
13
-
14
 |
 |