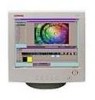
Compaq 210189-001 Compaq P710/P910/P1210 Color Monitor User's Guide - Page 8
Signal Input Connector Signal A:db9-15p
 |
UPC - 720591500153
View all Compaq 210189-001 manuals
Add to My Manuals
Save this manual to your list of manuals |
Page 8 highlights
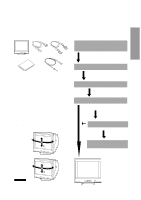
ENGLISH Control Names (22" Model) See figures below for the location of the user controls, indicator and connectors. FRONT FRONT REAR 1/2 3 SIGNAL-A SIGNAL-B 1. POWER SWITCH: A push-on / push-off switch for AC power. 2. POWER-ON INDICATOR: This indicator illuminates green when AC power is on, and illuminates amber when the monitor is in the power management modes. 3. INPUT CONNECTOR SELECT/OSD OFF BUTTON: • Without OSD screen, push to select the signal input connector, SIGNAL A or B. • With OSD screen, push to turn the OSD screen off. If only one input is used, the monitor will select it automatically. 4. DOWN BUTTON: Push to select group icon. 5. ITEM SELECT BUTTON: Push to select the item icon. 6. FUNCTION ADJUST BUTTONS: Push the adjust buttons to adjust the image on the screen. SIGNAL-A 1/2 3 SIGNAL-B 9 7. AC POWER CONNECTOR 8. SIGNAL INPUT CONNECTOR (SIGNAL A):DB9-15P 9. SIGNAL INPUT CONNECTOR (SIGNAL B):DB9-15P 10. USB UPSTREAM PORT: To connect to a USB equipped computer for Monitor Control Function. 11. USB DOWNSTREAM PORT: To connect to USB equipped peripherals, e.g. USB camera, keyboard, printer, etc. - 2 -
-
 1
1 -
2
-
 3
3 -
 4
4 -
 5
5 -
 6
6 -
 7
7 -
 8
8 -
 9
9 -
 10
10 -
 11
11 -
 12
12 -
 13
13 -
14
-
15
-
16
-
17
-
18
-
19
-
20
-
21
-
22
-
23
-
24
-
25
-
26
-
27
-
28
-
29
 |
 |
