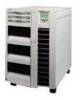
Compaq 6000 Desktop Management Guide - Page 8
Initial Configuration and Deployment, HP Client Automation Agent
 |
UPC - 894582579463
View all Compaq 6000 manuals
Add to My Manuals
Save this manual to your list of manuals |
Page 8 highlights
2 Initial Configuration and Deployment The computer comes with a preinstalled system software image. After a brief software "unbundling" process, the computer is ready to use. You may prefer to replace the preinstalled software image with a customized set of system and application software. There are several methods for deploying a customized software image. They include: ● Installing additional software applications after unbundling the preinstalled software image. ● Using software deployment tools, such as HP Client Automation Standard Edition or HP Client Automation Enterprise Edition (based on Radia technology) to replace the preinstalled software with a customized software image. ● Using a disk cloning process to copy the contents from one hard drive to another. The best deployment method depends on your information technology environment and processes. ROM-based setup and ACPI hardware provide further assistance with recovery of system software, configuration management and troubleshooting, and power management. HP Client Automation Agent The management agent used by both HP Client Automation Standard and Enterprise Editions is preloaded on the computer. When installed, it enables communication with the HP management console. To install the HP Client Automation Agent: 1. Click Start. 2. Click All Programs. 3. Click HP Manageability. 4. Click the HP Management Agent Readme applicable to the language you desire. 5. Review and follow the instructions contained in the Readme file to install the HP Client Automation Agent. HP Client Automation Agent is a key infrastructure component for enabling all of the HP Client Automation solutions. To learn about the other infrastructure components necessary for implementing the HP configuration management solutions, please visit http://h20229.www2.hp.com/solutions/ascm/ index.html. 2 Chapter 2 Initial Configuration and Deployment ENWW
-
 1
1 -
2
-
 3
3 -
 4
4 -
 5
5 -
 6
6 -
 7
7 -
 8
8 -
 9
9 -
 10
10 -
 11
11 -
 12
12 -
 13
13 -
14
-
15
-
16
-
17
-
18
-
19
-
20
-
21
-
22
-
23
-
24
-
25
-
26
-
27
-
28
-
29
-
30
-
31
-
32
-
33
-
34
-
35
-
36
-
37
-
38
-
39
-
40
-
41
 |
 |