Craftsman 16639 Owners Manual - Page 9
Troubleshooting, Guide
 |
View all Craftsman 16639 manuals
Add to My Manuals
Save this manual to your list of manuals |
Page 9 highlights
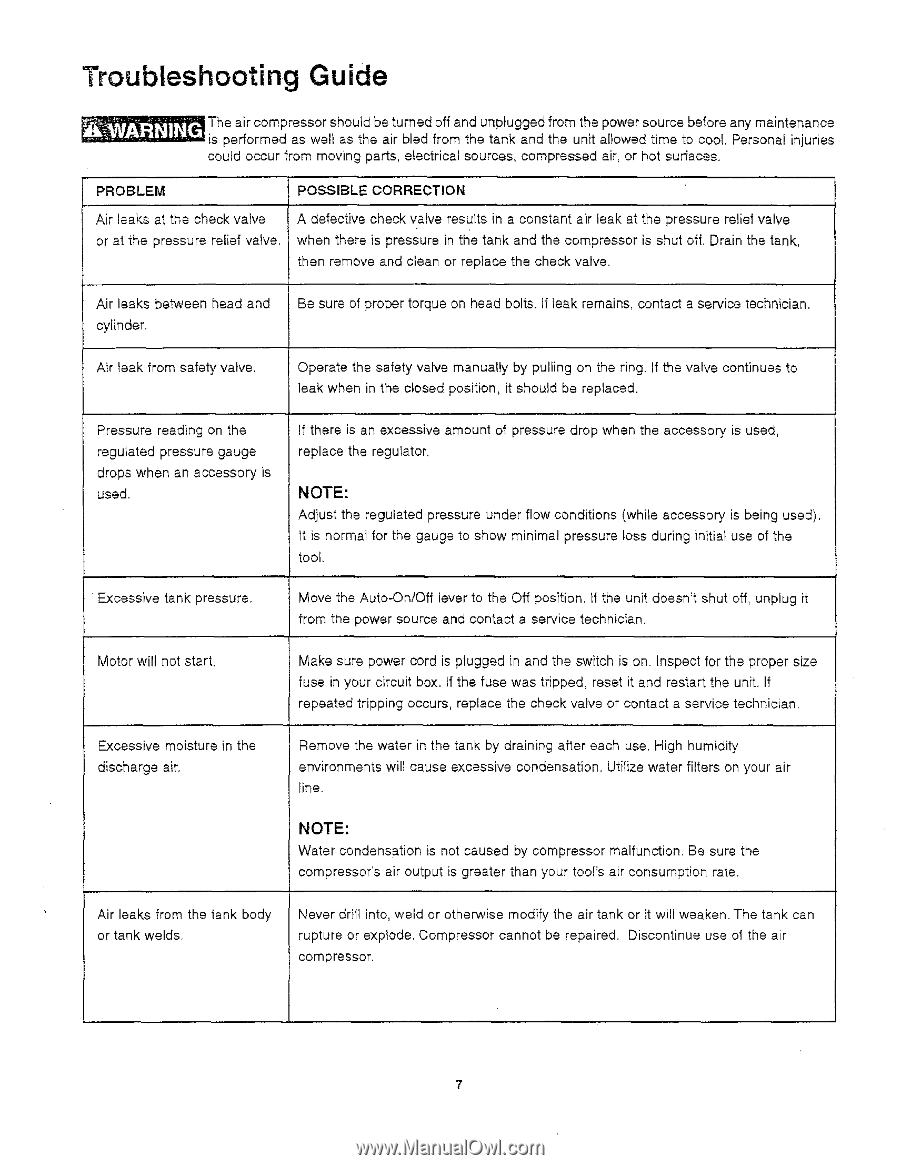
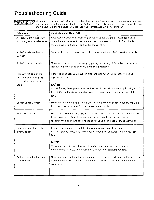
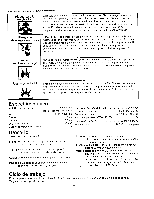
Troubleshooting Guide _The is pearifrocrmomedpreasssworelst haosultdhebeaitrubrnleedd foroffmantdheutnapnlukgagnedd ftrhoemutnhiet aplloowweerdsotiumrceetobecfooorel aPneyrsmoanianlteinnjaunricees could occur from moving parts, electrical sources, compressed air, or hot surfaces. PROBLEM POSSIBLE CORRECTION Air leaks at the check valve or at the pressure relief vaive, A defective check valve results in a constant air leak at the pressure relief valve when there is pressure in the tank and the compressor is shut off. Drain the tank, then remove and clean or replace the check valve. Air leaks between head and cylinder. Be sure of proper torque on head bolts, if leak remains, contact a service technician. Air leak from safety valve. Operate the safety valve manually by pulling on the ring. If the valve continues to leak when in the closed position, it should be replaced. Pressure reading on the regulated pressure gauge drops when an accessory is used. If there is an excessive amount of pressure drop when the accessory is used, replace the regulator. NOTE: Adjust the regulated pressure under flow conditions (while accessory is being used), It is normal for the gauge to show minimal pressure loss during initial use of the tool. Excessive tank pressure. Move the Auto-On/Off lever to the Off position. It the unit doesn't shut off, unplug it from the power source and contact a service technician. Motor will not start. Excessive moisture in the discharge air. Make sure power cord is plugged in and the switch is on. Inspect for the proper size fuse in your circuit box. If the fuse was tripped, reset it and restart the unit. If repeated tripping occurs, replace the check valve or contact a service technician Remove the water in the tank by draining after each use. High humidity environments will cause excessive condensation. Utilize water filters on your air line. NOTE: Water condensation is not caused by compressor malfunction. Be sure the compressor's air output is greater than your tool'e air consumption rate. Air leaks from the tank body or tank welds. Never ddfl into, weld or otherwise modify the air tank or it will weaken. The tank can rupture or explode. Compressor cannot be repaired. Discontinue use of the air compressor.
-
 1
1 -
2
-
3
-
 4
4 -
 5
5 -
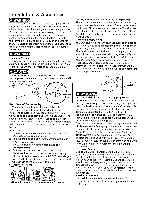 6
6 -
 7
7 -
 8
8 -
 9
9 -
 10
10 -
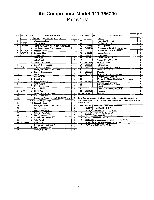 11
11 -
 12
12 -
 13
13 -
 14
14 -
15
-
16
-
17
-
18
-
19
-
20
 |
 |