Craftsman 25cc Operation Manual - Page 17
Brush Cutter Blade Removal / Installation, Guard Change, Rocker Arm Clearance Adjustment - trimmer attachments
 |
View all Craftsman 25cc manuals
Add to My Manuals
Save this manual to your list of manuals |
Page 17 highlights
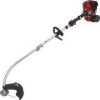
MAINTENANCE ll BRUSH CUTTER BLADE REMOVAL / INSTALLATION GUARD CHANGE 1.Remove the cotter pin (Fig. 38). NOTE: When using the brush cutter blade remove the bottom shield attachment by removing the screw. Replace when using line trimmer head (Fig. 41). Cotter Pin Left-Hand Thread Nut Screw Cutting Attachment Sheild Loosen Fig. 38 Bottom Shield Attachment 2. Insert an allen key into the hole in the shroud to lock the shaft. Remove the left-hand thread nut to dissasemble with tool provided in the tool kit (Fig. 39). Fig. 41 ROCKER ARM CLEARANCE ADJUSTMENT This requires partial disassembly of the engine. If you feel unsure or unqualified to perform this, take the unit to an authorized service center. 1. Remove the four screws on the engine cover with a phillips head screw driver (Fig. 42). Hole 2. Remove the engine cover. 3. Disconnect the spark plug wire. Fig.39 3. Remove in the sequence shown (Fig. 40). Brush Cutter Blade 4. Clean dirt from around the spark plug. Remove the spark plug by using tool provided, turn CCW. NOTE: Inspect the valve to rocker arm clearance with `a feeler gage after the first 25 hours of operation. The engine must be cold when checking or adjusting the valve clearances. This task should be performed in a clean dust free environment. Clamp Plate Star Washer Left-Hand Thread Nut Fig.40 • For reassembly, install all components in the correct sequence ( Fig. 40). • Tighten the left-hand thread nut until snug and install a new cotter pin. Engine cover screws Fig.42 Engine cover screws LEHR | All Rights Reserved 2008-2009 17
-
 1
1 -
2
-
3
-
4
-
5
-
6
-
7
-
8
-
9
-
10
-
11
-
 12
12 -
 13
13 -
 14
14 -
 15
15 -
 16
16 -
 17
17 -
 18
18 -
 19
19 -
 20
20 -
 21
21 -
 22
22
 |
 |
