Craftsman 26302 Operation Manual - Page 17
Trigger
 |
UPC - 009263020008
View all Craftsman 26302 manuals
Add to My Manuals
Save this manual to your list of manuals |
Page 17 highlights
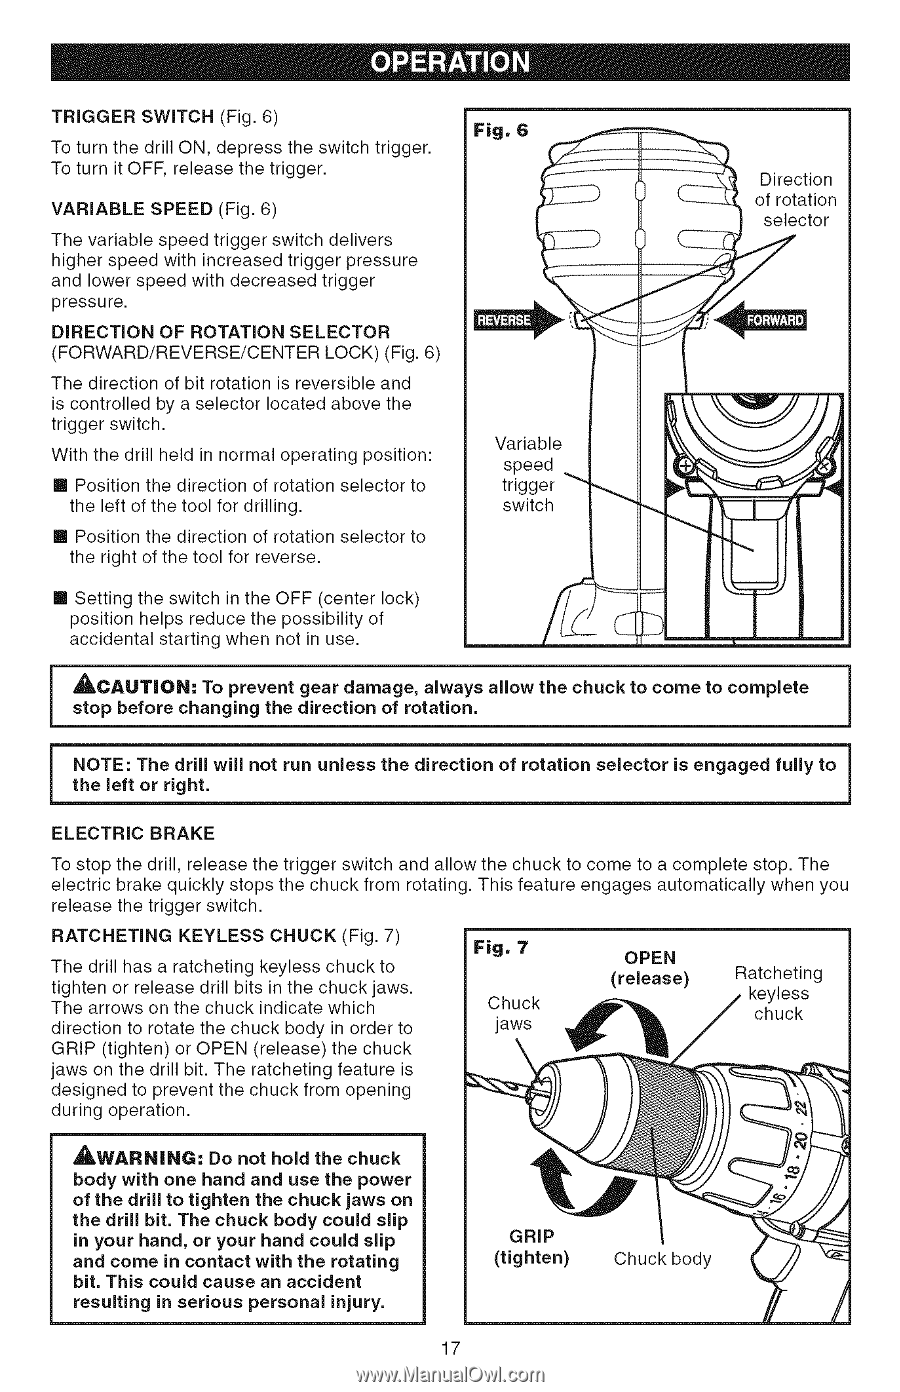
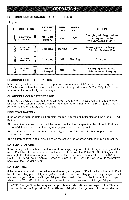
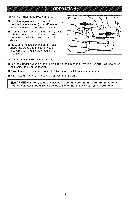
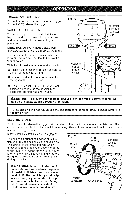
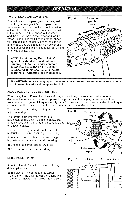
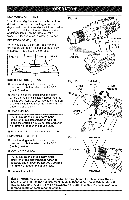
TRIGGESWRITCH (Fig. 6) To turn the drill ON, depress the switch trigger. To turn it OFF, release the trigger. VARIABLE SPEED (Fig. 6) The variable speed trigger switch delivers higher speed with increased trigger pressure and lower speed with decreased trigger pressure. DIRECTION OF ROTATION SELECTOR (FORWARD/REVERSE/CENTER LOCK) (Fig. 6) The direction of bit rotation is reversible and is controlled by a selector located above the trigger switch. With the drill held in normal operating position: m Position the direction of rotation selector to the left of the tool for drilling. m Position the direction of rotation selector to the right of the tool for reverse. ill Setting the switch in the OFF (center lock) position helps reduce the possibility of accidental starting when not in use. Direction of rotation selector _I_CAUTION: To prevent gear damage, always allow the chuck to come to complete | stop before changing the direction of rotation. ! NOTE: The drill will not run unless the left or right. the direction of rotation selector is engaged i fully to | ] ELECTRIC BRAKE To stop the drill, release the trigger switch and allow the chuck to come to a complete stop. The electric brake quickly stops the chuck from rotating. This feature engages automatically when you release the trigger switch. RATCHETING KEYLESS CHUCK (Fig. 7) The drill has a ratcheting keyless chuck to tighten or release drill bits in the chuck jaws. The arrows on the chuck indicate which direction to rotate the chuck body in order to GRIP (tighten) or OPEN (release) the chuck jaws on the drill bit. The ratcheting feature is designed to prevent the chuck from opening during operation. Fig, 7 Chuck jaws OPEN (release) Ratcheting _,WARNING: Do not hold the chuck body with one hand and use the power of the drill to tighten the chuck jaws on the drill bit. The chuck body could slip in your hand, or your hand could slip and come in contact with the rotating bit. This could cause an accident resulting in serious personal injury. 17
-
 1
1 -
2
-
3
-
4
-
5
-
6
-
7
-
8
-
9
-
10
-
11
-
 12
12 -
 13
13 -
 14
14 -
 15
15 -
 16
16 -
 17
17 -
 18
18 -
 19
19 -
 20
20 -
 21
21 -
 22
22 -
23
-
24
-
25
-
26
-
27
-
28
-
29
-
30
-
31
-
32
-
33
-
34
-
35
-
36
 |
 |