Craftsman 88957 Operation Manual - Page 14
Clean-out Tool
 |
View all Craftsman 88957 manuals
Add to My Manuals
Save this manual to your list of manuals |
Page 14 highlights
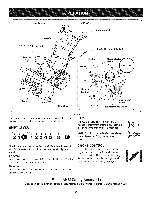
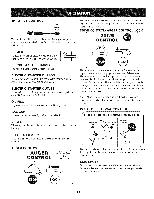
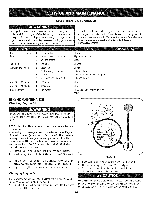
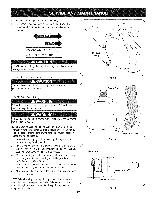
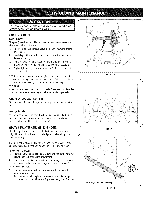
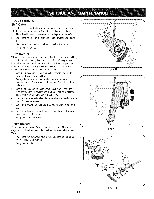
CLEAN-OUT TOOL Neveruse yourhandsto cleara cloggedchute assembly.Shut off engineand remainbehindhandlesuntilall movingpartshave stoppedbeforeusingthe clean-outtoolto clear thechute assembly. Thechute clean-outtool is convenientlyfastenedto the rear of the augerhousingwith a mountingclip. Shouldsnowand ice become lodgedin thechute assemblyduringoperation,proceedas followsto safelycleanthechute assemblyand chute opening: 1. Releaseboththe AugerControland the DriveControl. 2. Stopthe engineby removingthe ignitionkey. 3. Removethe clean-outtoolfrom the clip whichsecuresit to the rear of the augerhousing. 4. Use the shovel-shapedend of theclean-outtool to dislodgeand scoopany snowand icewhich hasformedin and near thechute assembly. 5. Refastenthe clean-outtool to the mountingclip on the rear of theauger housing,reinsertthe ignitionkey and startthe snow thrower'sengine. 6. Whilestandingin the operator'sposition(behindthesnow thrower),engagethe auger controlfora few secondsto clear any remainingsnowand ice from thechute assembly. • Refuelin a well-ventilatedarea with the enginestopped.Do not smokeor allowflamesor sparksin the areawherethe engineis refueledor wheregasolineisstored. • Donot overfillthe fueltank.After refueling,makesurethe tank cap is closed properlyand securely. • Be carefulnotto spillfuel whenrefueling.Spilledfuel or fuel vapor may ignite,ifany fuelis spilled,makesurethe area isdry before startingthe engine. • Avoidrepeatedor prolongedcontact with skinor breathingof )or. Useextremecarewhen handlinggasoline.Gasolineis extremely flammableand thevaporsare explosive.Never fuelthe machine indoorsor whilethe engine ishotor running.Extinguishcigarettes, cigars,pipesand othersourcesof ignition. 1. Cleanaroundfuel fill beforeremovingcap to fuel. 2. A fuel levelindicatorislocatedin the fueltank. See Figure10 inset.Be carefulnotto overfill.Filltank untilfuel reachesthe fuel levelindicatotro allowspacefor fuel expansion. STARTING THE ENGINE Alwayskeep handsand feet clearof movingparts. Donot usea pressurizedstartingfluid.Vaporsare flammable. BEFORE STARTING ENGINE Read,understand,and followall instructionsand warningson the machineand in this manualbeforeoperating. Oil The unit was shippedwith oil in the engine.Checkoil levelbefore eachoperationto ensureadequateoil inthe engine.Forfurther instructions,refertothe stepson page 16. NOTE:Be sureto checkthe engineon a levelsurfacewith the engine stopped. 1. Removethe oil fillercap/dipstickand wipethe dipstickclean. 2. insertthe cap/dipstickintothe oil filler neck,butdo NOTscrewit in. 3. Removethe oil fillercap/dipstick,ifthe levelislow,slowlyadd oil (5%30, with a minimumclassificationof SF/SG)untiloil level registersbetweenhigh (H) and low(L). NOTE:Do notoverfill.Overfillingwith oil mayresult inenginesmoking, hard startingor spark plugfouling. 4. Replaceand tighten cap/dipstickfirmlybeforestartingengine. Gasoline Use automotivegasoline(unleadedor low leadedto minimizecombustionchamberdeposits)with a minimumof 87 octane.Gasolinewith up to 10%ethanolor 15%MTBE(MethylTertiaryButyl Ether)canbe used. Neverusean oil/gasolinemixtureor dirty gasoline.Avoidgetting dirt, dust,or waterin thefuel tank. DO NOTuse E85gasoline. NOTE:Allowthe engineto warm up for a few minutesafter starting. The enginewill notdevelopfull poweruntilit reachesoperating temperatures. 1. Makecertainboththe augercontrol and drivecontrolare in the disengaged(released)position. 2. insertkeyinto slot. Makesureit snaps intoplace. Donot attempt to turn the key. NOTE: Theenginecannot startwithoutthe keyfully insertedintothe ignitionswitch. Electric Starter The optionalelectricstarteris equippedwith a groundedthree-wire powercordand plug,and is designedto operateon 120volt AC householdcurrent.Itmustbe usedwith a properlygroundedthreeprongreceptacleat all timesto avoidthe possibilityof electricshock. Followall instructioncsarefullyprior to operatingthe electricstarter. DONOT useelectricstarterinthe rain. Determinethat yourhome'swiringis a three-wiregroundedsystem. Ask a licensedelectricianif you are notcertain. Ifyou havea groundedthree-prongreceptacle,proceedas follows. Ifyou do not havethe properhousewiring, DONOT usethe electric starterunder anyconditions. 1. Plugthe extensioncord intothe outlet locatedon the engine's surface.Plug the otherend of extensioncord intoa three-prong 120-volt,grounded,AC outlet in a well-ventilatedarea. 14
-
 1
1 -
2
-
3
-
4
-
5
-
6
-
7
-
8
-
 9
9 -
 10
10 -
 11
11 -
 12
12 -
 13
13 -
 14
14 -
 15
15 -
 16
16 -
 17
17 -
 18
18 -
 19
19 -
20
-
21
-
22
-
23
-
24
-
25
-
26
-
27
-
28
-
29
-
30
-
31
-
32
-
33
-
34
-
35
-
36
-
37
-
38
-
39
-
40
-
41
-
42
-
43
-
44
-
45
-
46
-
47
-
48
-
49
-
50
-
51
-
52
-
53
-
54
-
55
-
56
-
57
-
58
-
59
-
60
-
61
-
62
-
63
-
64
-
65
-
66
-
67
-
68
-
69
-
70
-
71
-
72
 |
 |